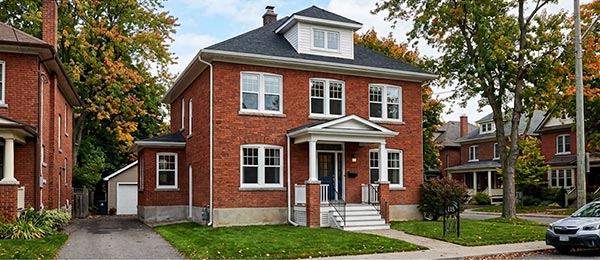
Replacing windows is one of the most impactful upgrades a homeowner can make, yet the entire project hinges on a single foundational step: accurate measurement. An error of even a few millimetres at this stage can mean ill-fitting units, compromised thermal performance, and costly reorders from the manufacturer.
Key Takeaways
- Accurate window measurement is critical — even a small error can lead to poor fit, air leaks, and costly reorders
- Always follow the three-point method (measure width, height, and depth in three places and use the smallest value) to account for frame irregularities
- Measure the distance between the interior jambs, not from the trim or exterior elements, since new windows are installed inside the existing frame
- Depth is a key compatibility factor, especially for double- and triple-pane windows, and directly affects insulation performance
- Confirm factory deductions with your supplier to avoid ordering a unit that is too large or too small
- For older homes or complex window types, professional measurement significantly reduces risk and often costs less than fixing a mistake
What Tools Do You Need for Measuring Windows Accurately?
Accurate window measurement begins with having the right instruments. Professional installers and informed homeowners alike rely on the same core toolkit, though the precision of individual tools can vary significantly between trade-grade and consumer-grade options.
The essential items are a 25-foot steel tape measure (rigid blade), a carpenter's level, a notepad or digital recording device, a pencil, and a bright flashlight for inspecting older frames and sill conditions. A sliding digital calliper is also useful for measuring glass thickness or the dimensions of existing glazing beads in retrofit scenarios.
Why tool quality matters more than most homeowners realize: A flimsy fabric tape measure can bow or stretch across a wide opening, introducing cumulative error. Professional installers typically use a rigid steel blade tape and lock it at each measurement point before recording. For a window rough opening that spans 1,200 mm or more, a 2 mm deviation from tape sag is not uncommon and can cause an ordered unit to bind or leave a gap at the frame.

Windows Near Me
How Are Windows Measured for Replacement Step by Step?
Window replacement measurement follows a clear, structured sequence:
- Width is measured first
- Height is measured second
- Depth is measured last
- Each dimension is measured three times (at different points across the opening)
- The smallest measurement is used for ordering
This method helps account for common issues such as frame warping, settling, or openings that are slightly out of square.
The inside-measurement method is standard for replacement windows. This means measurements are taken from interior jamb to interior jamb, rather than from exterior elements like brick mould or casing. Replacement windows are designed to fit the existing frame, allowing you to preserve the surrounding trim and avoid unnecessary exterior work.
Once all measurements are recorded, the ordering stage requires clarity on sizing adjustments:
- Confirm whether you’re providing exact field measurements or ordering with factory deductions
- Most Canadian manufacturers apply a standard deduction (typically 6 mm per side, or 12 mm total per dimension)
- This deduction allows room for shimming and levelling during installation
- Always verify deduction standards with your supplier before ordering
Taking this extra step helps prevent costly ordering errors and delays.
According to Natural Resources Canada's Keeping the Heat In guide, windows, doors, and skylights can account for up to 35 percent of total residential heat loss in Canadian homes. When a replacement unit is improperly sized and fails to seal correctly against the frame, even a high-specification insulated glass unit operates below its rated thermal performance from the first day of installation. The guide explicitly recommends working with a qualified window supplier to ensure proper fit as part of any energy-efficiency upgrade.
What Is the Correct Way to Take Window Measurements for Width?

Width measurement is taken horizontally across the interior of the window frame, from the inside face of one side jamb to the inside face of the opposite side jamb. You take this measurement at three distinct heights: the top of the opening, the midpoint, and the bottom. Each reading is recorded independently.
| Measurement Position | Where to Measure | What to Watch For |
| Top width | Just below the head jamb | Head jamb bowing or trim interference |
| Middle width | At the midpoint of the opening | Most representative of the true opening width |
| Bottom width | Just above the sill | Sill rot, swelling, or caulk buildup |
| Final value used | Smallest of the three readings | Ensures the unit will clear the narrowest point |
Once you have the three readings, use the smallest value as your ordering dimension. Do not average the three measurements. Using an average risk ordering a unit that cannot clear the narrowest point in the opening, which is a common and expensive mistake.
If a jam liner is present, its thickness must be accounted for in the measurement. Jam liners are typically 13 mm (½ inch) wide on each side, reducing the effective opening width by approximately 25 mm in total. If the liner cannot be removed for direct measurement, the ½-inch-per-side industry standard deduction applies.
How Do You Measure Window Height Properly?

Height is measured vertically from the interior window sill surface to the underside of the head jamb. As with width, three separate measurements are taken: one on the left side of the opening, one at the centre, and one on the right. The smallest value is again used for ordering.
| Measurement Position | Where to Measure | What to Watch For |
| Left height | Left side, sill to head jamb | Frame lean or sill slope |
| Centre height | Midpoint of opening width | Most representative reading |
| Right height | Right side, sill to head jamb | Asymmetric settling in older frames |
| Final value used | Smallest of the three readings | Ensures the unit fits at the tightest point |
Sill slope is particularly relevant in older construction and can cause a meaningful discrepancy between left and right height readings. A difference of more than 6 mm between the highest and lowest reading signals that the frame has settled unevenly, which will require shimming or a custom-sized unit. For second-storey windows or elevated installations, use a proper ladder and a rigid tape measure with both ends locked.
A peer-reviewed case study conducted at the University of New Brunswick (Fredericton, Canada) and published in MDPI Buildings (2025) monitored the thermal performance of various window types under real cold-climate conditions from November to April using infrared thermography. The research found that fixed windows showed measurably better energy performance than sliding and single-hung windows, and that frame distortion, which creates gaps in the perimeter seal, was among the primary drivers of elevated heat loss at the window boundary. The study underscores why precise height measurement and a flush frame fit are directly tied to long-term thermal performance rather than to installation aesthetics alone.
Why Is Measuring Window Depth Important Before Replacement?
Depth refers to the front-to-back dimension of the window frame, measured from the interior stop to the exterior stop. While this measurement is often overlooked, it plays a critical role in ensuring the new unit fits properly and performs as intended.
Minimum Depth Requirements for Different Window Types
- Double-pane windows typically require a minimum frame depth of 3¼ inches (82 mm)
- Triple-pane windows generally need at least 4 inches (100 mm)
- Triple-pane units are commonly used in regions like British Columbia due to stricter energy efficiency expectations under the BC Building Code Part 10
Choosing a unit without confirming available depth can result in improper fit or installation limitations.
How to Estimate Depth When Direct Measurement Isn’t Possible
If the window cannot be opened:
- Measure the interior stop projection
- Measure the exterior stop projection
- Add both values together
- Include the approximate glass thickness (around 25 mm for double-pane units)
This method provides a rough estimate, but it should always be verified before placing an order to avoid sizing issues.
Why Depth Directly Impacts Energy Performance
Depth affects how well the window integrates into the wall system:
- A unit installed too shallow can create a thermal bridge
- This reduces the effectiveness of even high-performance glazing
- Proper depth ensures continuous insulation and airtight sealing
This is especially important in colder regions like Alberta, where building envelope performance is critical due to long heating seasons.
Engineer Sergey Essipov, with over 20 years of experience in window manufacturing, emphasizes the importance of accurate depth measurement:
“We consistently see depth measurement overlooked in DIY replacement projects. When a unit is ordered without confirming depth compatibility, the result is often a window that physically fits but cannot be sealed correctly, leading to air infiltration around the perimeter that negates the insulating glass unit's rated performance.”
What Are the Most Common Mistakes When Measuring Windows?

Measurement errors in window replacement projects follow recognizable patterns. Understanding them in advance significantly reduces the risk of reorders and installation delays.

Measuring from trim or casing rather than from the jamb face is the most frequent error in DIY projects. Trim is decorative and may project inward, making the apparent opening appear smaller than the actual frame opening. All measurements must be taken from the structural jamb surface, not from any applied moulding.
Rounding numbers up rather than down is another common error. If your width reads 887 mm, recording it as 890 mm or 900 mm will result in a unit that is too wide to seat correctly. Always round down to the nearest millimetre, and let the factory deduction account for shimming clearance.
Sergey Essipov, with 20 years of experience in window manufacturing, explains:
“In Canadian conditions, even minor measurement inaccuracies can escalate into significant performance issues over time. What might seem like a negligible 2 — 3 millimetre discrepancy can lead to seasonal air leakage, condensation risks, and reduced energy efficiency — especially in regions with harsh winters. Precision at the measurement stage is not optional; it is a critical determinant of long-term window performance.”
Additional measurement mistakes that cause problems during installation include:
- Recording the largest rather than the smallest of the three readings per dimension, which leads to an oversized unit
- Failing to account for existing jam liners or glazing stops that reduce the effective opening
- Ignoring frame squareness by not checking diagonal measurements results in a unit that fits dimensionally but cannot seal at the corners
- Using a single measurement point per dimension rather than taking all three


Window Types?
Different window operating styles have distinct structural configurations that affect both where measurements are taken and which dimensions are most critical.
| Window Type | Primary Measurement Focus | Key Consideration |
| Single-hung / Double-hung | Width and height of frame opening | Check sash channel width; affects replacement unit compatibility |
| Casement | Width, height, and hinge-side depth | The hinge reinforcement zone may reduce usable frame depth |
| Sliding (horizontal) | Width, height, and track depth | Track must be measured separately from frame depth |
| Awning | Height and hinge-top depth | The top-hinge zone requires clearance measurement |
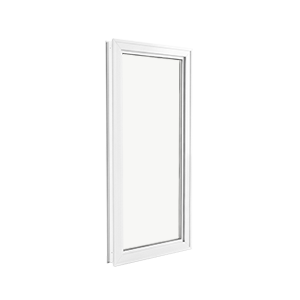
| Fixed / Picture | Frame opening only | No sash channel; simplest measurement scenario |
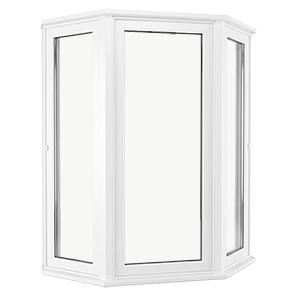
| Bay / Bow | Each unit is measured independently | Angle units require degree-of-projection measurement |
For casement windows, the hinge side requires particular attention. The hinge reinforcement plate on the frame interior can reduce the usable depth at that corner, affecting how the replacement unit's hinge hardware seats.
Bay and bow windows are the most complex measurement scenario. Each individual unit within the bay assembly must be measured independently, as the angled framing means no two openings are necessarily identical even in a symmetric bay. The projection angle of the assembly also determines how the units are ordered, and this dimension requires a degree measurement that goes beyond the standard tape-measure technique.
Can You Measure Windows Yourself or Should You Hire a Professional?

The decision between DIY measurement and professional assessment comes down to the complexity of the opening, the age of the structure, and the cost of an error.
| Factor | DIY Measurement | Professional Measurement |
| Simple rectangular openings in newer homes | Suitable with care | Optional but recommended |
| Older homes (pre-1980) with potential settling | Higher risk | Strongly recommended |
| Bay, bow, or architectural windows | Not recommended | Required |
| Large-scale multi-window replacement | Risk compounds across units | Strongly recommended |
| Cost implications of the reorder | Full unit replacement cost | Measurement fee avoided |
| Access to factory pricing | Standard retail | Often factory-direct pricing |
An IEA Solar Heating and Cooling Programme task paper that specifically examined Canadian window energy-efficiency standards noted that the residential window market in Canada is heavily oriented toward custom-sized, made-to-order units, particularly in the replacement segment. The paper highlighted that field measurement accuracy directly determines whether the ordered unit achieves its rated Energy Rating (ER) value under the Canadian CSA A440.2 standard, since even a correctly specified unit will underperform if installed with perimeter gaps or misaligned stops. For homeowners, this reinforces that a professional pre-measurement visit is not just about physical fit — it is about preserving the energy performance value that motivated the replacement investment in the first place.
A professional measurement visit from a qualified window supplier typically costs little to nothing when bundled with a replacement quotation. For a homeowner searching for a window company, most reputable local suppliers will include a site measurement as part of the quoting process, eliminating measurement risk at no additional cost.
The economic argument for professional involvement is direct: a single-window reorder due to a measurement error will typically cost more than the professional measurement visit would have cost. For a multi-window project, the compounding risk makes the case for professional measurement even stronger.
What Factors Can Affect Window Measurements in Older Homes?

Homes built before approximately 1980 present specific challenges for window measurement that do not apply in the same way to newer construction. Over time, structural movement and layered renovations can significantly alter what appears to be a standard rectangular opening.
Structural Changes Over Time
Several natural and environmental factors can impact the accuracy of window measurements:
- Frame settling can cause slight shifts in the wall structure
- Wood movement due to humidity and temperature changes
- Material buildup from paint, caulk, or past repairs
In Canadian wood-frame homes, seasonal moisture changes can cause frames to shift slightly out of square. One of the most reliable ways to detect this is to measure the diagonals.
- If the difference between diagonal measurements exceeds 6 mm, the opening is no longer perfectly rectangular
- This may require custom-sized windows or shimming adjustments during installation
Impact of Previous Renovations
Renovations completed over the years can further complicate measurements:
- Interior trim replacements may reduce usable opening space
- Drywall updates can alter frame depth
- New casings may create uneven edges or step-downs
In homes with multiple window replacements, these accumulated changes can result in openings that differ significantly from the original construction dimensions.
Final Thoughts on Accurate Window Measurement

Accurate measurement is not a preliminary step to the window replacement process — it is the foundation upon which every subsequent decision depends. The three-point method, consistent frame-to-frame reference points, and an understanding of your window type and home's age will reliably produce measurements that translate into well-fitting, high-performing units.
For straightforward replacements in newer homes, an informed homeowner with the right tools can take reliable measurements following the process outlined above. For older homes, architectural window styles, or projects involving energy-efficient windows in British Columbia or window installation in Alberta, where energy code requirements place additional demands on installation precision, professional involvement at the measurement stage is an investment that consistently pays for itself.

Frequently Asked Questions
Should I measure the existing window unit or the frame opening?
For replacement windows, always measure the frame opening (from jamb to jamb, sill to head jamb), not the existing glass unit or sash. The replacement unit is sized to fit inside the existing frame.
What if my three width measurements are all different?
This is normal in older construction. Use the smallest of the three readings as your ordering dimension. The factory deduction applied by the manufacturer provides the remaining clearance for shimming and levelling.
How do I know if my window opening is square?
Measure diagonally from the top-left corner to the bottom-right corner, then from the top-right to the bottom-left. If both readings are equal, the opening is square. A difference of more than 6 mm requires adjustment at installation.
What is a factory deduction and should I apply it myself?
A factory deduction is a standard reduction (typically 6 mm per side) that manufacturers apply to field measurements to allow clearance for shimming. Confirm with your window supplier whether they apply this automatically. Never apply it yourself; request it from the manufacturer, as the resulting unit will be too small.
Can I use the original construction drawings for my window measurements?
No. Original drawings reflect nominal dimensions and do not account for frame settling, renovation modifications, or material accumulation over time. Always take fresh field measurements before ordering replacement windows.
How does window depth affect insulation performance?
Insufficient frame depth prevents the replacement unit from seating flush to the interior stop, creating a gap at the perimeter that allows air infiltration and thermal bridging. This can significantly reduce the effective R-value of even a high-specification unit.
When is it worth hiring a professional to measure windows?
Any home built before 1980 involves non-rectangular or architectural window types (bay, bow, casement) or spans multiple windows. A measurement error on a single unit in a multi-window project can cost more to correct than a professional site visit would have.
People Also Ask