

Key Takeaways
- Cleaning windows twice a year, in spring and autumn, protects glass from cumulative mineral and organic buildup that shortens the service life of the window unit as a whole.
- The single most effective streak-prevention measure is to avoid direct sunlight during cleaning: any cleaning solution that dries before it can be properly removed is likely to leave residue and visible streaks.
- Hard water stains require targeted acid-based treatment (diluted white vinegar or a purpose-made calcium remover); standard glass cleaner will not dissolve mineral deposits.
- Vinyl window frames must never be cleaned with abrasive pads, solvent-based products, or pressure washers; doing so can damage the surface and void the manufacturer's warranty.
- Windows fitted with Low-E coatings or specialized glass treatments require non-abrasive, non-ammonia-based cleaners; check the manufacturer's specification before selecting any product.
- Working above 3 metres on an extension ladder requires fall protection under Canadian occupational health standards; exterior upper-floor window cleaning should be delegated to professionals equipped accordingly.
Dirty windows do more than diminish curb appeal. Over time, accumulated mineral deposits, environmental grime, and oxidized organic matter etch the glass surface, accelerating seal degradation in insulated glass units. Understanding exactly how to clean windows, what solution to use, in which order to proceed, and where the real risks lie protects both the glass and the frame investment for years to come.
Most homeowners assume glass is chemically inert, but prolonged exposure to mineral deposits changes the surface over time. At our facility, we engineer our lead-free uPVC frames with UV stabilizers precisely because we understand how environmental exposure accumulates. The same principle applies to glass: once hard water residue begins to bond with the surface, cleaning shifts from maintenance to restoration, and no standard cleaner can reverse that damage.
Why Does Proper Window Cleaning Matter for Your Home?
Most homeowners treat window cleaning as a cosmetic task. In practice, it functions as preventive maintenance. Airborne pollutants, road salt residue, pollen, and hard water overspray from irrigation systems deposit a film on glass that, left untreated, becomes increasingly difficult to remove without abrasion. On insulated glass units, contaminant buildup at the frame perimeter can compromise the seal and accelerate moisture ingress between the panes.
Benefits of Clean Windows
Clean windows deliver four measurable advantages beyond appearance:
- Natural light transmission. Even a light film of dirt reduces visible light transmittance. Professionally cleaned glass under laboratory conditions has shown improvements in transmittance of several percentage points, enough to noticeably brighten interior spaces without any change to the window itself.
- Glass service life. Glass is not inert in the presence of contamination. Hard water minerals, in particular, etch the silica surface at a microscopic level. Regular cleaning before deposits form prevents permanent surface damage.
- Frame and seal protection. Dirt tracked along the bottom of a sash accumulates in the track, creating abrasion points and trapping moisture against the weatherstripping. Cleaning the frame and track as part of the window maintenance routine extends the life of these components.
- Thermal performance. On windows with Low-E coatings, heavy dirt accumulation can reduce overall window clarity and limit the practical benefits of natural light transmission.
How Dirt Affects Glass Over Time
The degradation process follows a predictable pattern. Initial soiling is superficial and wipes away easily. As deposits accumulate and are repeatedly wetted and dried by rain cycles, mineral content crystallizes on the surface. At this stage, mechanical action, not just detergent, is needed to restore clarity. If left further, hard water etching becomes permanent, and the glass must be polished with professional-grade compounds or replaced. Cleaning deposits before they crystallize is significantly easier and less expensive than restoring damaged glass later.
Engineer Sergey Essipov, with 20 years of experience in window manufacturing, explains:
Most homeowners assume glass is chemically inert, but prolonged exposure to mineral deposits changes the surface over time. Once hard water residue begins bonding with the glass itself, cleaning shifts from maintenance to restoration.

Windows Near Me
What Are the Best Window Cleaning Tips for Streak-Free Glass?
Streak-free results depend on method, timing, and tool condition, not on the specific brand of cleaner used. The following principles apply consistently regardless of window type or size.
Best Time of Day to Clean Windows
Avoid cleaning windows in direct sunlight. When the glass surface is warm, the cleaning solution evaporates before the squeegee reaches it, leaving soap residue that is exactly the condition people describe as streaks. Early morning on an overcast day provides ideal conditions: the glass is at ambient temperature, evaporation is slow, and residual marks are well visible before glare returns.
Cold temperatures below freezing create the opposite problem. The solution can partially ice on contact with the glass and smear rather than lift dirt. Across most of Canada, defer exterior cleaning to days when outdoor temperatures remain above 5°C.
How to Prevent Streaks
Four variables consistently produce streak-free outcomes:
Squeegee blade condition. A blade with any nick, crack, or hardened edge will leave a line with every pass. Rubber blades should be replaced at least annually, or immediately upon visible damage.
Overlap on each pass. Each squeegee stroke should overlap the previous one by approximately 2 — 3 centimetres. Gaps between passes leave a thin band of solution that dries into a streak.
Dry detailing at the edges. After squeegeeing the main glass surface, run a clean, dry microfiber cloth around the perimeter to absorb any solution that has pooled along the frame edge or sill. This step is the most commonly skipped, and the most reliable source of visible streaks after the glass dries.
Clean tools only. Using a scrubber pad that has picked up grit from a previous dirty window transfers that grit back to the next pane. Rinse tools between windows.
How to Clean Windows Step by Step Without Leaving Residue
A repeatable cleaning sequence prevents missed steps and ensures that the glass, frame, and hardware all receive appropriate attention.
What Tools Do You Need Before You Wash Windows?
Using the right equipment makes window cleaning faster, safer, and less likely to damage glass, frames, or surrounding surfaces. For residential window cleaning, start with a quality squeegee fitted with a brass or stainless-steel channel measuring approximately 30 — 45 cm wide. The rubber blade should be replaced annually or immediately if it develops visible nicks, as worn edges leave streaks.
A scrubber or T-bar with a microfiber or lambswool sleeve helps loosen dirt efficiently before squeegeeing. Avoid synthetic sleeves or pads with abrasive backing, as these can scratch surfaces or wear down protective coatings over time.
Keep several lint-free microfiber cloths available during each cleaning session. Cloths with a minimum weight of 300 GSM work well for absorbing moisture and detailing edges. Switching to a dry cloth for final touch-ups helps eliminate residual streaks.
A rigid-sided bucket with a capacity of around 10 — 12 litres provides stability and reduces spills, particularly when working on a ladder. For windows positioned above roughly two metres, a telescoping extension pole can improve reach and reduce unnecessary climbing. However, work performed from extension ladders at heights of 3 metres or more may require fall-protection measures under Canadian safety guidance.
A small soft-bristle brush is useful for removing dust and debris from frame corners, tracks, and joints before washing begins. Absorbent drop cloths with non-slip backing protect floors and interior sills from drips, while nitrile or rubber gloves help prevent skin irritation from prolonged contact with detergents and cleaning solutions.
What to avoid: razor blades on coated glass, abrasive scouring pads, steel wool, ammonia-based cleaners on tinted or Low-E coated glass, and pressure washers on vinyl frames. Pressure washing can force water beneath sill flashings and around frame seals, potentially introducing moisture into the wall cavity.
How Should You Clean Windows Inside the House?
Interior window cleaning involves fewer variables than exterior work but requires attention to adjacent surfaces, particularly wood trim, painted sills, and window tracks that can be damaged by excess moisture.
Cleaning Window Tracks
Tracks accumulate compressed dirt, dead insects, and mould spores, particularly in Canadian climates with significant humidity and seasonal temperature swings. Left unaddressed, built-up track debris creates abrasion against the sash as it slides, eventually wearing through the weatherstrip.
The correct sequence for cleaning window tracks:
- Vacuum loose debris with a crevice tool, running along the full length of both tracks.
- Apply a small amount of diluted dish detergent solution with a stiff, narrow brush (an old toothbrush works well for corners).
- Wipe clean with a damp cloth, wrung nearly dry to avoid saturating any wood substrate beneath the track.
- Allow to dry completely before operating the window.
Do not spray liquid directly into the track. Pooled solution beneath a sliding sash reaches the subframe components and, in wood-framed installations, accelerates rot.
Window Force sliding and casement units incorporate drainage channels and weep hole systems engineered to direct moisture away from the subframe. Keeping these channels clear during routine cleaning is the single most effective step a homeowner can take to preserve the seal and the integrity of the frame between professional inspections.
Cleaning Fingerprints and Smudges
Interior glass accumulates grease-based soiling such as fingerprints, pet nose prints, and cooking vapour residue. These contaminants require a slightly different cleaning approach from that for exterior mineral deposits. A 50% distilled white vinegar-50% water solution, applied with a microfiber cloth, dissolves grease-based deposits more effectively than diluted dish detergent alone. Apply the solution sparingly, buff in circular motion, then squeegee or wipe dry with a clean cloth.
How Should You Handle Cleaning Outside Windows Safely?
Exterior window cleaning introduces hazards that interior work does not: working at height, unstable ladder placement on landscaped or uneven ground, and proximity to electrical services. Safety must be the primary consideration before technique.
According to the Canadian Centre for Occupational Health and Safety (CCOHS), when working at heights of 3 metres or more from an extension ladder, a fall protection program is required, and fall arrest equipment should be worn where the nature of the work prevents maintaining a handhold on the ladder at all times.
For homeowners cleaning exterior windows from ground level or from a first-floor stepladder, the following practices apply:
Ladder placement
Set the ladder on a firm, level surface. The foot-to-wall horizontal distance should equal one-quarter of the working length, resulting in an approximately 75-degree lean angle. Never rest the ladder top against a window frame, sash, or vinyl trim; these surfaces are not designed to bear lateral load.
Extension poles as the primary tool
A telescoping extension pole with a squeegee attachment allows most ground-floor and many second-floor exterior windows to be cleaned without a ladder, eliminating the risk of falls entirely.
Exterior grime sequence
Rinse with a gentle stream from the garden hose to remove loose debris. Pressure washers are not recommended for residential vinyl windows because high-pressure spray can force water beneath seals and flashings.

Pollen season in Toronto and the GTA
In spring, airborne tree pollen accumulates rapidly on exterior glass and is hydrophobic, meaning it resists plain water. A slightly stronger detergent solution is needed during May and early June. Rinsing immediately after squeegeeing, rather than allowing the solution to dwell, prevents pollen residue from re-adhering as the surface dries.
How Do You Clean Windows That Have Hard Water Stains?
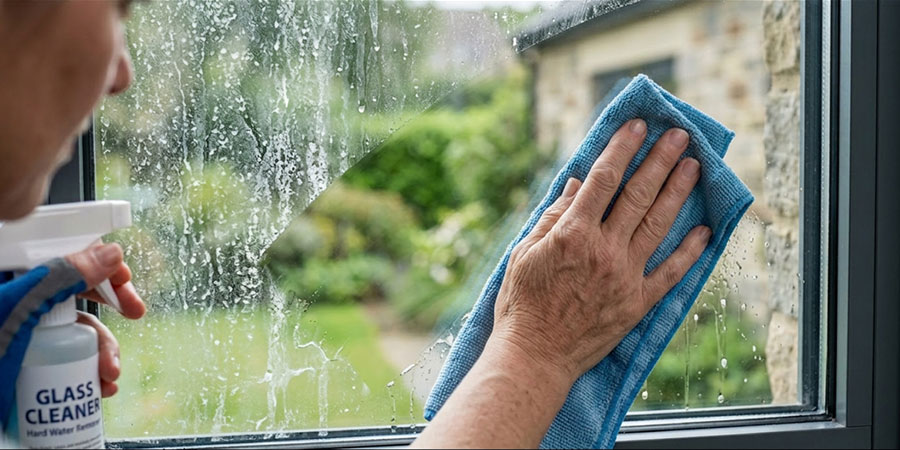
Hard water stains are white or chalky mineral deposits typically caused by calcium and magnesium buildup. They are among the most common and misunderstood problems in window cleaning. Standard glass cleaner does not dissolve calcium deposits; it simply re-suspends and re-deposits them. Acidic solutions are required.
Light vs. Heavy Hard Water Stains
- Light deposits (present for less than one season) respond well to a 1:1 solution of distilled white vinegar and water applied with a microfiber cloth, left to dwell on the deposit for 2 — 3 minutes, then worked in gentle circular motion before rinsing. The acetic acid in vinegar dissolves carbonate deposits without damaging glass or standard vinyl frames.
- Heavy or recurring deposits (present for multiple seasons or from irrigation overspray on a regular schedule) require a purpose-made calcium-lime remover formulated for glass, not a general bathroom tile cleaner, which may contain abrasives. Apply per manufacturer instructions, rinse thoroughly, and follow with a standard cleaning pass to remove any cleaner residue.
- Etched glass is a separate condition from hard water staining. When mineral deposits have been allowed to chemically react with the silica in the glass over extended periods, the surface itself is physically altered. No cleaning solution restores etched glass; restoration requires professional polishing with cerium oxide compounds or glass replacement. Early, regular cleaning is the only reliable prevention.
Water hardness is determined by the concentration of dissolved calcium and magnesium, which are the primary contributors to mineral scaling on glass surfaces. According to the U.S. Geological Survey, these minerals are the main cause of scale formation in domestic water systems, and their crystallization on surfaces accelerates when droplets repeatedly dry without being removed. This is what makes untreated hard water exposure progressively more difficult to reverse on glass.
When Glass May Be Etched
Signs that a surface has progressed from staining to etching include: haze or cloudiness that does not clear after thorough cleaning; a change in texture visible when the hand is dragged across the dry surface; or distortion of reflected images in what was previously flat glass. At this stage, consult a glazing professional before attempting abrasive treatment.
Window Force uses a dual-seal, metal-free warm-edge spacer system across all product lines. By eliminating the aluminum thermal bridge at the glass edge, this design reduces the temperature differential that accelerates seal degradation, which is a primary cause of between-pane fogging. When fogging occurs despite proper cleaning and maintenance, it is almost always due to a seal failure rather than a surface issue, and the window unit requires professional assessment.
What Mistakes Should You Avoid When You Clean Windows?
Several common mistakes can turn a simple window-cleaning task into a frustrating process that leaves streaks, yields poor results, or even causes long-term damage to glass and frame materials. Avoiding these issues improves cleaning efficiency and helps preserve both appearance and performance.
One of the most common errors is using paper towels for drying. Paper fibres often leave lint behind, break apart when wet, and create smears rather than a clean finish. Lint-free microfiber cloths provide better absorption and leave fewer residues on the glass.
Cleaning windows in direct sunlight can also create problems. Heat causes the cleaning solution to evaporate too quickly, often drying before the squeegee or cloth reaches the surface. This usually results in streaking and uneven cleaning. Shaded conditions or overcast days generally provide better results.
Another frequent issue is the continued use of dirty wash water throughout the session. As dirt and debris accumulate in the bucket, particles can be redeposited onto the glass surface and repeatedly dragged across it. Replacing the cleaning solution after cleaning a few windows helps maintain clarity and reduce the risk of scratches.
Ammonia-based products should be avoided on tinted glass or windows with Low-E coatings. Ammonia can degrade tint films and may affect certain treated glass surfaces over time. Ammonia-free cleaning products are a safer option for coated or specialty windows.
Engineer Sergey Essipov, with 20 years of experience in window manufacturing, explains:
We regularly see homeowners use aggressive cleaners or abrasive tools on coated glass because the damage is not immediate. The issue is cumulative: once protective coatings begin deteriorating, clarity and performance can gradually decline.
Many homeowners focus only on the glass and overlook frames and tracks. Dust and grime collected in these areas can wash back onto freshly cleaned windows during the next rainfall. Cleaning frames, tracks, and surrounding surfaces during every session helps maintain longer-lasting results.
Finally, abrasive tools should never be used on vinyl frames. Steel wool, scouring pads, or rough cleaning materials can scratch the surface and damage protective finishes. Soft cloths and non-abrasive brushes are safer choices for maintaining frame integrity.
Chemical safety deserves particular attention during window cleaning. Cleaning products should never be mixed unless the manufacturer specifically indicates compatibility. According to the U.S. Environmental Protection Agency’s Safer Choice programme, combining bleach and ammonia-based products can generate toxic chloramine gas. This risk is especially important because ammonia is a common ingredient in many household cleaners, including some glass products. The hazard applies not only in tightly enclosed rooms but also in partially ventilated spaces, such as when cleaning interior windows with limited airflow or with a nearby partially open window. Using one cleaning product at a time is the safest approach.
How Often Should Homeowners Clean Windows?
Window cleaning frequency depends less on a fixed schedule and more on environmental conditions around the home. Factors such as traffic exposure, nearby construction, irrigation systems, pets, and seasonal pollen can significantly affect how quickly glass accumulates dirt and residue.
For a typical residential property with no unusual exposure, cleaning windows twice per year, once in spring and once in autumn, is generally sufficient. A spring cleaning removes winter road salt residue, grime, and accumulated dirt, while an autumn cleaning clears summer organic build-up before colder temperatures arrive. This two-cleaning-per-year rhythm holds across Canadian climates — whether your windows were supplied by a window supplier in Ontario or installed through a dealer in another province, the seasonal maintenance logic remains the same.
Homes located near busy roads often require more frequent maintenance. Vehicle exhaust, airborne dust, and traffic-related debris settle on glass more rapidly, making a schedule of three to four cleanings annually more practical.
If exterior windows are regularly exposed to overspray from irrigation, cleaning after each irrigation season helps prevent hard-water mineral deposits from drying and crystallizing on the glass. Once these deposits harden, they become more difficult to remove and may permanently affect clarity.
Properties near active construction or renovation sites may require additional cleaning during the project, and a thorough wash after work is completed. Concrete dust and fine silica particles can remain on the surface and potentially etch glass if left untreated.
Interior window surfaces in homes with children or pets typically need more frequent attention. In heavily used living areas, monthly cleaning may be beneficial because fingerprints, grease, and pet residue accumulate quickly on lower sections of glass.
Homes situated on heavily wooded lots may also benefit from an additional cleaning in late spring. During peak pollen season, airborne particles can create a visible film on windows and reduce clarity within a short period.
For most homeowners, a practical routine is to clean windows twice a year: once in spring, after winter ends, and again in early autumn, before colder weather arrives. Completing exterior cleaning before freezing temperatures set in also helps keep frame seals and drainage areas free of debris that could trap moisture during the winter months.
What Is the Difference Between DIY Window Cleaning and Professional Window Cleaning?
Understanding where DIY cleaning ends and professional service begins prevents both overspending on unnecessary services and underinvesting when professional access or expertise is genuinely required.
| Consideration | DIY Cleaning | Professional Window Cleaning |
| Ground-floor and accessible windows | Fully practical with basic equipment | No advantage over DIY for accessible panes |
| Upper-floor exterior windows | Extension poles work for most; ladders above the first floor carry fall risk | Professionals have harnesses, water-fed poles, and elevated access equipment |
| Hard water stain restoration | Manageable for light deposits; limited by available products | Professional-grade polishing compounds for etched or severe cases |
| Screen cleaning | Easily handled at home with mild soap and a soft brush | No advantage |
| Time investment | 2 — 4 hours for an average home, twice per year | 1 — 2 hours for the same home; faster with commercial equipment |
| Cost | Minimal (solution ingredients, tool purchase amortized over years) | Typically $150—$400 per session, depending on home size and storey count across Canadian markets |
| Coated or specialty glass | DIY safe with correct (non-abrasive, ammonia-free) products | Recommended for windows with complex coatings or warranty conditions |
The strongest case for professional cleaning is for homes with exterior access of two or more storeys. This applies equally whether you are dealing with a two-storey home in the Prairies or managing window replacement in British Columbia, where coastal humidity adds an additional layer of exterior soiling that accelerates the case for professional access equipment. The vinyl replacement windows manufactured for these applications are not height-related damage, but the primary concern is the increased fall risk for the person performing the work, which extension poles alone cannot always eliminate.
Window Force manufactures every window to order at our Ontario facility and backs each unit with a 25-year transferable warranty. Our products are CSA certified and engineered to meet or exceed ENERGY STAR® requirements across all Canadian climate zones. When warranty conditions specify non-abrasive, ammonia-free cleaning products, as ours do for Low E coated glass, following those specifications is what keeps the warranty valid and the glass performing as designed throughout the unit's full service life.
How Can You Clean Window Screens, Frames, and Tracks Properly?
Screens, frames, and tracks are systematically underserviced in most cleaning routines. Neglecting them makes the results look worse over time, even when the glass itself is clean, because dirt from these components transfers back to the glass surface on the first wet day.
How to Clean Window Screens
Remove the screen before cleaning. Leaving the screen in place while cleaning the glass forces wash solution through the mesh onto the exterior, creating streaking that is difficult to reach.
The correct process for screen care:
- Remove the screen and lay it flat on a clean surface (grass works well).
- Brush off loose dust and debris with a soft brush.
- Wash both sides with mild soapy water and a soft bristle brush, using light pressure to avoid distorting the mesh.
- Rinse thoroughly with a garden hose at low pressure.
- Allow to dry completely before reinstalling. Reinstalling a damp screen traps moisture between the frame and the mesh, promoting mould growth along the frame edge.
After autumn cleaning, inspect each screen for torn or stretched mesh before storing for winter. Damaged screens allow insects and fine debris inside when reinstalled in the spring.
How to Clean Dirty Tracks
Tracks on sliding windows accumulate compressed debris that, over time, functions as an abrasive on the sash. The complete track-cleaning process is described in the interior cleaning section above; the additional point specific to exterior-facing tracks is to check the weep holes and small drainage channels at the bottom of the outer track for blockages. Blocked weep holes cause water to pond inside the frame cavity during rain, accelerating seal and frame degradation. Clear them with a soft brush or a toothpick, working gently to avoid scratching the vinyl channel.
For a detailed overview of ongoing frame and seal care, published window maintenance tips cover inspection points that go far beyond routine cleaning.
Window Cleaning Is Ultimately About Long-Term Glass Preservation
Cleaning windows properly is less complicated than it appears, but it requires the right sequence and the right products matched to the glass's condition. The most common mistakes, such as using inappropriate cleaners on coated surfaces, cleaning in direct sunlight, and skipping frame and track preparation, are entirely avoidable with a consistent routine. For the vast majority of residential windows across Canada, a spring and autumn cleaning schedule using a squeegee, microfiber cloths, and a diluted dish detergent solution delivers results that are indistinguishable from professional service.
Where professional help is genuinely warranted, such as for upper-floor exterior access, etched glass restoration, or windows with complex specialty coatings, the cost of hiring an equipped professional is substantially lower than replacing damaged glass. Understanding that boundary, and respecting it, is the most practical advice any manufacturer can offer.
Have questions about your specific windows, glass coatings, or frame specifications? Contact Window Force through our website, and our team will confirm the appropriate cleaning products for your unit, review any warranty conditions that apply, and advise on inspection points indicating when maintenance crosses into replacement territory.

Frequently Asked Questions
How do I know if my window has a Low-E coating that restricts what cleaners I can use?
Most manufacturers, including Window Force, document the glass specification at the time of purchase or installation. If you are unsure, the safest approach is to use an ammonia-free, non-abrasive cleaner on all windows. Low-E coatings are typically applied to the interior-facing surface of the outer pane; using ammonia-based products risks degrading the coating's reflective properties over time.
Can I use a pressure washer on my vinyl windows to save time?
No. Pressure washing forces water at high velocity under sill flashings, around frame seals, and into the cavity between the frame and the rough opening. This introduces moisture into wall assemblies, accelerates seal failure in insulated glass units, and can strip weatherstripping from its channel. A garden hose at moderate pressure is safe for rinsing exterior glass and frames.
What causes white streaks that appear only after the window dries?
These are almost always either soap residue (from too much detergent in the solution, or from a solution that dried before squeegeeing) or mineral deposits from the water itself. If your tap water is hard, using distilled water for the final rinse or mixing the cleaning solution with distilled water eliminates the mineral-streak issue entirely.
How do I safely clean the second-floor windows without hiring a professional?
A telescoping extension pole (typically available in 3 — 6 metre lengths) fitted with a compatible squeegee head allows most second-floor windows to be reached from the ground. This eliminates ladder risk for windows that are accessible from a stable ground position. For windows that genuinely cannot be reached safely from ground level or a first-floor stepladder, engaging a professional cleaner equipped with appropriate fall-arrest equipment is the correct choice.
Is it safe to clean windows in winter in Canada?
Interior windows can be cleaned year-round without issue. For exterior cleaning, wait until temperatures are consistently above 5°C. Below that threshold, the cleaning solution can partially freeze on contact with cold glass, reducing effectiveness and increasing the risk of slipping on icy surfaces underfoot. Autumn cleaning, completed before the first freeze, is the practical way to get exterior glass clean before the heating season.
My window glass is still hazy after cleaning. What's wrong?
Persistent haze after thorough cleaning typically indicates one of three conditions: etching from long-term hard water exposure (physical surface damage that cleaning cannot reverse), failed seal in an insulated glass unit (condensation or haze between the panes, visible as a fixed cloud that does not change), or residue from an incompatible cleaner applied previously. Haze between the panes always indicates a failed seal and requires professional assessment.
People Also Ask