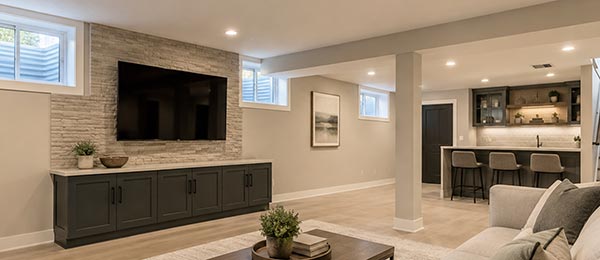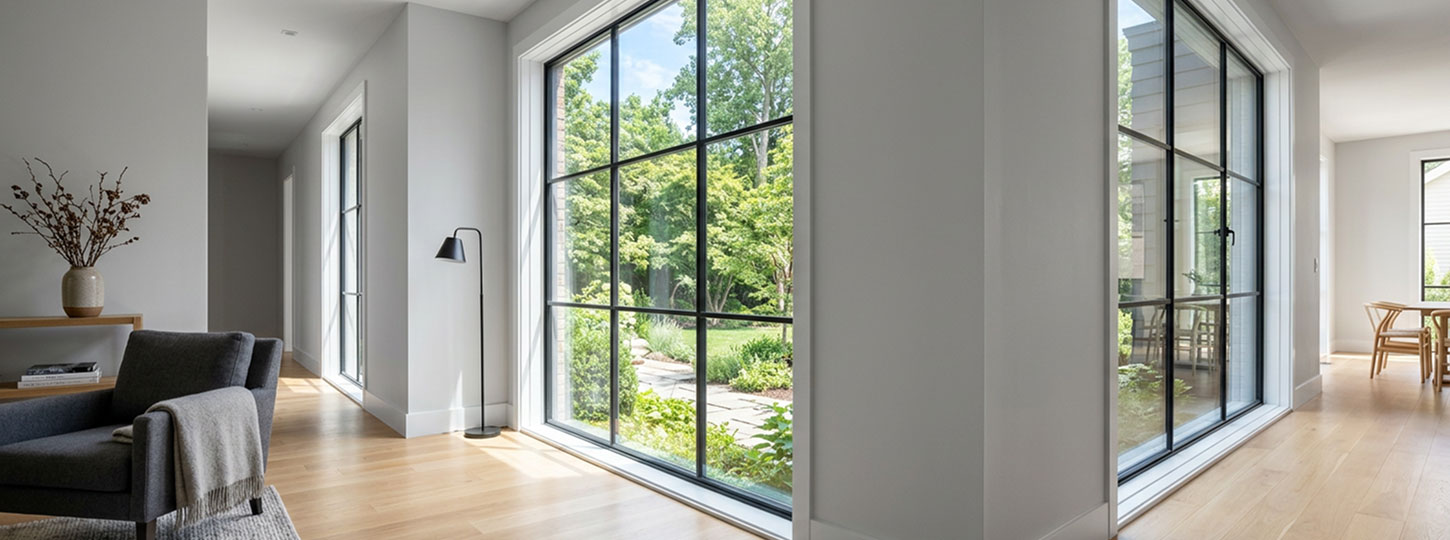


Window trim, also called casing, is one of the most impactful finishing details in any room. The right style can make your windows feel like architectural features while also sealing gaps and tying the room's overall look together. Whether you're replacing worn casing during a window renovation or simply refreshing your interior style, choosing the right trim pays off in both appearance and function.
This guide draws on Window Force's experience as a Canadian vinyl window manufacturer. Since 2007, we have produced custom windows at our 80,000 sq ft Ontario facility for builders, dealers, contractors, and homeowners across Canada. The trim and casing guidance described here reflects what our production and installation teams observe firsthand, including how frame construction and finishing details affect long-term window performance in Canadian climate conditions.
Key Takeaways
- Window trim is both decorative and functional: it seals gaps around the frame, helps reduce drafts and moisture intrusion, and visually completes the room.
- Trim style should match the home's architectural character, as Craftsman, Colonial, Farmhouse, and modern homes each benefit from different casing profiles.
- Material selection matters as much as style. Wood offers the most authentic appearance, MDF lowers cost for paint-grade projects, and PVC or vinyl perform best in moisture-prone areas.
- Proper proportions are critical: casing width, reveal spacing, stool depth, and trim thickness all affect the finished appearance.
- DIY installation works well for simple flat-stock profiles, but elaborate Colonial and multi-piece trim assemblies often justify professional installation.
- Current design trends favour minimalist profiles, natural wood finishes, mixed materials, integrated lighting, and wider functional window sills.
- Before installing new trim, inspect for failed caulk, moisture damage, or hidden rot to avoid covering larger structural problems.
- Professionally installed, well-maintained trim can improve appearance, energy efficiency, and contribute to meaningful long-term home value.
Understanding Window Trim: More Than Just Decoration
Window trim serves two roles simultaneously. On the practical side, casing covers the gap between the window frame and the surrounding drywall, helping block drafts and seal out moisture. On the design side, it visually anchors a window, signals the home's style, and creates a sense of architectural completeness.
Trim styles range from ultra-minimal flat stock, barely visible against the wall, to elaborate multi-piece Colonial assemblies that can span up to 6 inches wide. The profile, width, and finish all contribute to how a space feels: wider, more ornate trim reads as formal and classic, while narrower, flatter trim feels relaxed and contemporary.
Modern design has also introduced options beyond traditional wood. MDF provides a smooth, paint-ready surface at a lower cost. PVC and vinyl perform well in moisture-prone areas like bathrooms. Polyurethane foam replicates detailed ornate profiles at a fraction of the weight. Each material has trade-offs in cost, durability, and appearance that should be considered before purchasing.
For exterior applications, exterior casings warrant separate consideration because they face direct weather exposure and require materials and profiles engineered specifically for moisture resistance and seasonal dimensional stability.
Window Trim Styles at a Glance
| Style | Width | Profile | Best For |
| Ranch | 2.5 — 3 in | Flat, smooth, no ornate detail | Modern, transitional homes |
| Craftsman | 3 — 4 in | Thick, clean lines, multi-piece possible | Traditional & contemporary |
| Provincial | 2.5 — 3.5 in | Subtle bevel or inner curve | Country, brick, stone homes |
| Colonial | 3 — 6 in | Multi-layer, fluted sides, rosette corners | Historic, formal, statement rooms |
| Farmhouse | 3 — 4 in | Wide boards, shiplap-inspired | Rustic, country interiors |
| Minimalist/No-Trim | 0 — 1 in | Ultra-clean drywall wrap | Modern minimalist architecture |
Windows Near Me
Painted vs. Stained Window Trim: Which Is Right for You?
The choice between painted and stained trim remains one of the most important design decisions in interior finishing. Both options can look excellent, but they create very different visual effects and suit different home styles, budgets, and maintenance expectations.
Painted trim has been the dominant choice for years, particularly in white, off-white, and soft neutral shades. It creates a clean, consistent appearance and provides contrast against nearly any wall colour. Because lighter trim reflects more light, it can also make rooms feel brighter and more spacious.
Paint offers practical benefits as well. Since it fully covers the surface, it hides minor imperfections, knots, and inconsistencies in the wood beneath. This makes painted trim a more budget-friendly option because homeowners can use less expensive wood species without sacrificing the finished appearance.
Painted trim typically works best in:
- Modern interiors
- Farmhouse-style homes
- Coastal designs
- Minimalist spaces
- Contemporary renovations
Maintenance is relatively straightforward. Small scratches or worn areas can usually be repaired with touch-up paint, although painted surfaces may eventually chip or show wear in high-traffic areas.
Natural stained wood finishes have become increasingly popular in interior design. After years of painted surfaces dominating interiors, many homeowners are reintroducing natural wood finishes to add warmth and character. Stained trim highlights the grain and texture of the wood, creating a richer, more handcrafted appearance.
This approach works especially well when paired with white walls, stone surfaces, or minimalist interiors, where the wood becomes a visual focal point. Because stain enhances rather than conceals the material underneath, higher-quality wood species are generally preferred. Oak and walnut remain among the most popular choices due to their attractive grain patterns.
Stained trim is often associated with:
- Craftsman homes
- Traditional interiors
- Rustic spaces
- Transitional designs
- Natural or organic aesthetics
From a durability standpoint, stain penetrates the wood rather than forming a surface coating, which can make wear less noticeable over time. However, stained finishes may require periodic refinishing or re-staining to maintain their appearance.
In simple terms, painted trim delivers a clean and timeless look at a lower cost, while stained trim prioritizes natural texture, warmth, and craftsmanship. The right choice depends on whether you want a trim that quietly blends into the room or becomes a visible design feature.

Choosing the Right Trim Material
Material selection affects both the look and longevity of your window trim. The most common options for interior casing differ in price per linear foot, workability, moisture resistance, and finish compatibility. No single material is best in all situations because the right choice depends on your room conditions, budget, and intended finish.
Wood remains the traditional choice and the benchmark against which other materials are measured. Pine is widely available, affordable, and commonly used for paint-grade projects, although it can also be stained with proper preparation. Oak costs more but delivers exceptional durability and a grain pattern that stained finishes show off beautifully. For moisture-prone rooms, PVC and vinyl offer long-term performance without the risk of warping or rot.
Window Trim Materials Comparison
| Material | Cost/Linear Ft | Best Use | Pros | Cons |
| Pine | $1—$5 | Interior, paint-grade | Affordable, easy to cut | Softer, dents more easily |
| Oak | $5—$15 | Stain-grade interiors | Durable, beautiful grain | Expensive, heavier |
| MDF | $1—$3.50 | Paint-grade interior | Smooth finish, affordable | Not moisture-resistant |
| PVC/Vinyl | $0.50—$5 | Bathrooms, exteriors | Moisture-resistant, low-maintenance | Less natural look |
| Polyurethane | $2—$6 | Ornate profiles | Lightweight, detailed design | Less rigid than wood |
| Composite | $3—$8 | Moisture-prone areas | Rot-resistant, versatile | Can look less natural |
Window Trim Specifications: What to Know Before You Buy
Before purchasing trim, understanding a few key measurements can prevent costly mistakes and help create a cleaner, more balanced finished result. Proper sizing affects not only appearance but also installation quality and overall proportion within the room.
One of the most important details is the reveal, which is the small setback between the inner edge of the window frame and the inside edge of the casing. Professional installers typically maintain a consistent reveal of 3/16 to 1/4 inch on all sides. Even minor inconsistencies can become visually noticeable, making this one of the defining characteristics of high-quality trim work.
Key Trim Measurements to Consider
- Casing Width
Most window casing falls within a range of 2.5 to 6 inches wide. Narrower trim creates a cleaner, more modern appearance, while wider casing tends to feel more formal and traditional. Larger rooms and taller ceilings often benefit from wider trim proportions. - Trim Thickness
Window trim is commonly available in thicknesses ranging from 1/2 inch to 1 inch. Thicker profiles create more shadow lines and visual depth, helping windows appear more substantial and architectural. - Reveal Distance
Maintaining a 3/16 — 1/4 inch reveal around the frame creates visual consistency and helps the trim appear intentionally aligned rather than crowded against the window. - Header Width
The top horizontal piece, often called the header, usually matches the side casing width or extends slightly beyond it. Wider headers are especially common in Craftsman and Colonial-inspired trim designs. - Stool (Interior Sill) Depth
Interior stools typically extend 1 — 3 inches beyond the window frame and project slightly past the casing on both sides. Larger projections create a more traditional appearance. - Apron Length
The apron beneath the stool generally aligns with the outer edges of the side casings. Maintaining this proportion helps preserve symmetry and creates a visual balance.
DIY vs. Professional Installation
Once dimensions are selected, homeowners also need to decide whether installation is a manageable DIY project or better handled by a professional.
A DIY installation can be relatively affordable, with material costs typically ranging from $30 to $150 per window, depending on the trim style and material selection. DIY installation typically takes 2 — 6 hours per window, whereas experienced professionals often complete the same work in 1 — 3 hours due to specialized tools and more efficient workflows. Simpler trim profiles, such as ranch-style or flat stock casing, are generally the most beginner-friendly options.
Professional installation usually ranges from $350 to $1,600 per window, depending on labour rates, trim complexity, and regional costs. Experienced installers can often complete a window in 1 — 3 hours while minimizing issues such as uneven joints, inconsistent reveals, visible gaps, or poor corner alignment.
DIY installation works best for straightforward layouts and simple trim profiles. More elaborate styles, particularly Craftsman, Colonial, or layered decorative assemblies, often benefit from professional installation because achieving clean cuts and consistent proportions becomes significantly more demanding.
This is particularly relevant when trim work is part of a larger project involving replacement windows, where the new frame dimensions may differ from the original rough opening, requiring adjusted reveal calculations and new jamb extensions.
Ultimately, careful measurements matter as much as style selection. Even premium materials can appear unfinished if trim dimensions and spacing are inconsistent.
Window Force coordinates window supply and installation through our authorized dealer network, which means the same organization responsible for manufacturing the unit can advise on trim compatibility, frame dimensions, and finishing specifications before installation begins. Every window is custom-manufactured to order at our Ontario facility and backed by a 25-year transferable warranty, giving both DIY homeowners and professional installers a precise, documented starting point for any trim project.
Window Trim Ideas by Room
Not every room benefits from the same trim style. The best window casing choices should reflect how the space is used, the home's architectural style, moisture conditions, and the overall design direction. Kitchens and bathrooms often require more practical, moisture-resistant materials, while formal rooms can accommodate larger, more decorative trim profiles. Bedrooms and workspaces typically benefit from simpler styles that feel calm and unobtrusive.
Flat stock trim remains one of the most versatile options because of its clean lines, affordability, and adaptability across multiple interior styles. Homeowners can also customize the appearance with jamb extensions for added depth, or with reveal details that create subtle shadow lines and visual separation between the wall and the window frame.
Living Room
Living rooms often serve as focal spaces where architectural details receive more attention. Larger profiles, such as Colonial or Craftsman trim work, particularly well because they create a more finished and substantial appearance.
Recommended characteristics:
- Width: 3 — 6 inches
- Finish: painted white or stained wood
- Best for: traditional, transitional, and Craftsman-inspired interiors
A wider trim in living spaces can make windows feel more prominent and create stronger visual framing.
This holds true whether you're refreshing a heritage home in the Maritimes or planning window replacement in Vancouver, where contemporary open-plan interiors often benefit from wider, more architectural casing that complements the view.
Kitchen
Kitchen trim should balance style with durability and ease of maintenance. Simpler profiles, such as Ranch or Farmhouse-style casing, work well because they avoid excessive detailing that can collect dust or grease.
Recommended characteristics:
- Width: 2.5 — 3.5 inches
- Finish: painted white or natural wood
- Best for: farmhouse, modern, and casual interiors
Because kitchens already contain numerous visual elements, simpler trim often creates a cleaner appearance.
Bathroom
Bathrooms experience constant humidity fluctuations, making moisture resistance a major consideration. PVC or vinyl Ranch-style trim provides durability and reduces maintenance concerns.
Recommended characteristics:
- Width: 2 — 3 inches
- Finish: moisture-resistant painted surfaces
- Best for: high-humidity environments
Materials that resist swelling, warping, and water exposure generally outperform traditional wood in bathroom settings.
Window Force vinyl frames are engineered with the same moisture-resistance priorities in mind. Our lead-free uPVC profiles resist the humidity fluctuations typical of Canadian bathroom environments, and their low-maintenance surface pairs naturally with PVC or vinyl trim, creating a consistent material system that requires minimal upkeep over the life of the installation.
Bedroom
Bedrooms typically benefit from softer visual details that support a more relaxed atmosphere. Moderate-width Provincial or Craftsman-style trim provides character without becoming overly decorative.
Recommended characteristics:
- Width: 2.5 — 4 inches
- Finish: painted or lightly stained
- Best for: comfortable, understated interiors
Lighter stains and neutral paint colours often help maintain a calm visual environment.
Home Office
A home office usually benefits from minimal visual distractions. Clean, flat stock trim creates structure while maintaining a modern, functional appearance.
Recommended characteristics:
- Width: 2 — 3 inches
- Finish: white or bold contrast colours
- Best for: contemporary and minimalist spaces
Simple trim profiles help maintain focus and prevent the room from feeling visually crowded.
Dining Room
Dining rooms often support more formal architectural details than other spaces. Colonial-style trim with wider profiles creates a more refined appearance and complements traditional design elements.
Recommended characteristics:
- Width: 4 — 6 inches
- Finish: painted white or darker stains
- Best for: formal and traditional interiors
Larger casing dimensions can help elevate the room and create a stronger sense of architectural detail.
Selecting trim by room allows the design to feel intentional throughout the home. Rather than applying one style everywhere, adjusting profile size, material, and finish to suit the function often yields a more balanced result.
Coordinating Window Trim with Other Woodwork
Window trim works best when considered alongside other architectural details. To create a cohesive interior, window casing should work together with other architectural details throughout the home, including baseboards, door casings, crown moulding, chair rails, and window grilles. When these elements feel coordinated, the space appears intentionally designed rather than assembled from unrelated pieces over time.
The key principle is consistency of profile and style. Matching exact dimensions is less important than maintaining similar shapes, proportions, and design language. A room with clean modern casing, highly decorative crown moulding, and ornate door trim can quickly feel visually disconnected. Consistent detailing creates smoother transitions between architectural elements.
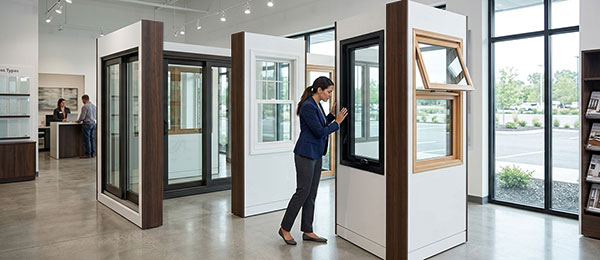
Coordinate Baseboards with Window Casing
Baseboards and window trim establish the visual framework of a room, making their relationship especially important. The profile style should generally align, even if the dimensions differ.
Examples include:
- Craftsman window casing paired with Craftsman-style baseboards
- Flat stock trim paired with simple square baseboards
- Colonial casing combined with more decorative baseboard profiles
Baseboards can vary in height while still maintaining visual harmony if the profile language remains consistent.
Keep Door Casings Consistent
Door trim and window trim often appear within the same sightline, making mismatches easy to notice. Using the same profile and ideally similar widths creates continuity throughout the home.
A common approach is to select a single casing style and apply it to all doors and windows rather than mixing multiple profile types.
The one exception worth noting is bay and bow windows, where the angled geometry requires mitered casing returns at each facet, but even here, the profile and finish should remain consistent with the rest of the home's trim to preserve visual continuity.
Coordinate Crown Moulding with Room Style
Crown moulding does not need to appear in every room, but where it is used, its level of detail should align with the trim style below.
Examples include:
- Colonial window trim paired with decorative crown moulding in dining rooms
- Craftsman trim with simpler, stronger crown profiles
- Minimalist interiors that intentionally omit crown moulding entirely
Formal spaces can typically support more ornamentation, while modern rooms often benefit from restraint.
Match Chair Rail Profiles
Chair rails create another horizontal design line within a room and should feel visually related to nearby casing details. Matching profile shapes helps maintain consistency.
Examples include:
- Provincial chair rails paired with Provincial window trim
- Craftsman rails echoing Craftsman casing lines
Repeating profile details subtly reinforces the architectural style.
Coordinate Window Grilles and Finish Colours
While grille patterns and casing profiles do not need to match exactly, the finish should remain consistent. Painted trim generally works best with painted grilles, while stained wood trim pairs more naturally with wood-toned finishes.
Examples include:
- White window casing with white grilles
- Dark-stained trim paired with wood-finish grille details
Consistent finishes help prevent windows from feeling visually fragmented.
Coordinating trim elements throughout a home creates a stronger sense of structure and design continuity. Small decisions that are repeated consistently often have a greater impact than adding more decorative detail.
How to Choose the Right Window Trim Style for Your Home
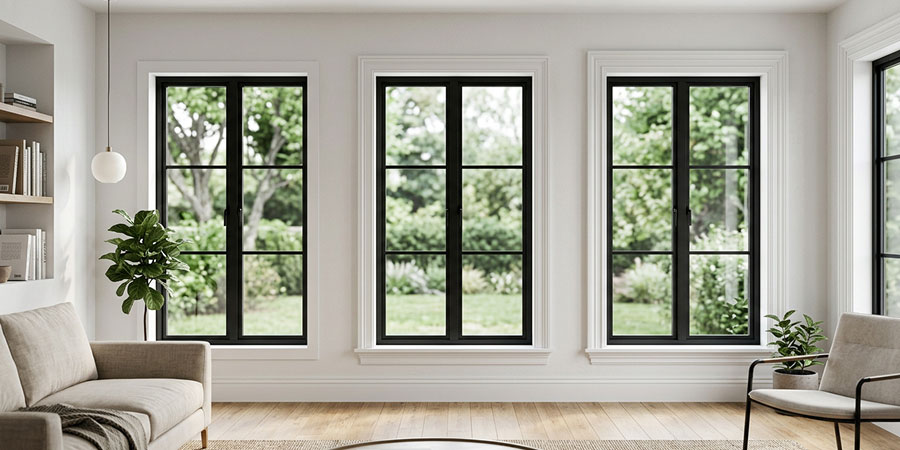
Selecting window trim is a decision that touches on style, budget, material performance, and the architectural character of your home. The best trim choices appear visually integrated with the home's architecture.
Start with your home's existing architectural vocabulary. A Craftsman bungalow calls for thick, clean Craftsman casing. A colonial revival expects layered, ornate profiles. A mid-century modern home is best served by flat stock or no trim at all. Fighting the architecture of your home is the most common mistake homeowners make when updating trim.
Engineer Sergey Essipov, with 20 years of experience in window manufacturing, explains:
The trim projects that age best are usually the ones that respect the home's original proportions. At our facility, we engineer our frames with fusion-welded corners and multi-chamber profiles specifically because the interface between the window unit and the surrounding trim is where air leakage and moisture problems most often begin. Oversized decorative casing in a minimalist home or ultra-thin trim in a traditional space not only feels visually out of place, but it can also create installation conditions where the seal between frame and casing is harder to maintain over time.
Next, consider finishing. White paint is a safe, universally flattering choice that makes rooms feel larger and brighter. Stained wood adds visual depth and emphasizes natural material qualities, and is especially effective when it echoes other natural wood tones in the room, such as hardwood floors, exposed beams, or cabinetry.
How to Install Interior Window Trim: Step-by-Step
Installing window trim is a manageable DIY project for most homeowners. It requires basic carpentry tools and careful measuring, but the steps are straightforward. New interior window trim gives any room a finished look because trimming a window's interior creates a picture frame effect that draws attention and adds a decorative element to your home.
- Remove old trim using a utility knife along the seam, then a hammer and pry bar to loosen and pull the existing casing away from the wall without damaging the drywall behind it.
- Mark reveals with a pencil and combination square, maintaining a consistent 3/16-inch setback from the inner edge of the window frame on all four sides.
- Cut and install the top (header) piece first. Measure the width, cut 45-degree mitres at each corner, and nail into place with finish nails driven into the framing.
- Measure and cut the vertical side pieces (legs), mitering the top ends to meet the header corners. Check for plumbing before nailing through the casing into the wall framing.
- Install the stool (bottom sill), cutting it to extend past the outer edges of the side casings by an equal amount on each side. Nail down into the rough sill below.
- Add the apron beneath the stool, cut to match the outer width of the side casings, and nail it into the framing below the rough sill.
- Fill nail holes with wood filler, sand smooth once dry, and apply paintable caulk along all seams where trim meets wall and window frame.
- Prime and finish by applying primer, then paint or stain and topcoat once the filler and caulk are fully dry and sanded to a smooth surface.
Tools Needed for Window Trim Installation
| Tool | Purpose | Approx. Cost |
| Miter saw | Accurate 45-degree corner cuts | $150—$600 |
| Finish nail gun | Fast, clean fastening | $80—$250 |
| Combination square | Mark consistent reveal lines | $15—$40 |
| Pry bar | Remove old trim without damage | $10—$30 |
| Caulk gun + caulk | Seal trim-to-wall seams | $5—$20 |
| Wood filler | Fill nail holes before painting | $5—$15 |
Cost Data from Authoritative Sources
Understanding the real cost of window trim installation helps you budget accurately and avoid surprises. Costs vary significantly based on material, trim profile complexity, window size, and regional labour markets.
The cost to install window trim ranges from $350 to $1,600 per window, with an average project cost of $900. Homeowners can expect to pay $4 to $12 per linear foot, depending on the trim material and window size.
The average cost of trim installation ranges from $634 to $2,249, with most homeowners spending $1,381. Small jobs can cost as little as $200, while complex jobs with high-end materials can cost $7,100 or more. Expect to pay $75 to $125 per hour for labour.
Regional price variation runs ±15 — 25% depending on local demand and material availability. In the urban Northeast, expect installed prices to be often 15 — 25% above the national average. In the rural South, lower labour costs can reduce totals by 10 — 20% for similar work.
Engineer Sergey Essipov, with 20 years of experience in window manufacturing, explains: Before selecting new trim, inspect the area around your windows carefully. Look for visible gaps between the frame and wall, feel for drafts on cold days, and check the existing caulking for cracks or separation. Damaged caulking is a leading cause of moisture intrusion and can lead to rot in the framing behind the trim, a problem far more expensive to fix once new casing is installed. If you find soft wood, discoloration, or any sign of mould, address the underlying issue before any trim work begins.
Selecting a Window Trim Contractor: What to Compare
Hiring a professional installer can save time and reduce costly mistakes, especially for complex trim profiles or larger projects. However, comparing contractors involves more than choosing the lowest estimate. Experience with your preferred trim style, quality of finish work, communication, and warranty coverage can have just as much impact on the final result as price alone.
A detailed comparison process helps ensure that quotes reflect the same scope of work and prevent unexpected costs later.
Verify Licensing and Insurance
Always begin by confirming that the contractor is properly licensed and insured in accordance with local or state requirements.
Ask questions such as:
- Are you currently licensed for this type of work?
- Do you carry liability insurance?
- Can you provide documentation if requested?
Be cautious if a contractor hesitates, avoids specifics, or provides vague answers. Proper licensing and insurance protect both the homeowner and the project.
Evaluate Relevant Experience
Trim installation requires precision, particularly with decorative or multi-piece profiles. General carpentry experience does not always translate into specialized finish work.
Useful questions include:
- Have you installed this specific trim style before?
- Do you have photos of similar completed projects?
- How frequently do you finish carpentry work?
Experience with Colonial, Craftsman, or custom trim assemblies can make a significant difference in the quality of joints, reveals, and final appearance.
Request an Itemized Quote
Detailed quotes make it easier to compare bids accurately. Instead of a single total price, ask contractors to separate labour, materials, and finishing work.
Look for itemization covering:
- Trim materials
- Labor costs
- Removal of existing trim
- Caulking and filling
- Priming and finishing work
- Cleanup and disposal
Lump-sum pricing without details can make comparisons difficult and may hide additional charges.
Discuss Project Timeline
Project schedules vary depending on window count and trim complexity. While efficiency matters, unusually aggressive timelines can be a warning sign.
Questions worth asking:
- How many windows can typically be completed per day?
- How long will the full project take?
- Does the estimate include drying or finishing time?
Unrealistically fast promises sometimes indicate rushed work or incomplete finishing steps.
Clarify Finish Work Responsibilities
Installation alone does not always include the final finishing stages. Some contractors stop after securing the trim, leaving filling, sanding, caulking, priming, and painting as separate services.
Confirm whether the quote includes:
- Filling nail holes
- Caulking joints
- Sanding surfaces
- Priming trim
- Painting or staining
These finishing details have a major impact on the final appearance.
Review Warranty Coverage
A workmanship warranty demonstrates confidence in the quality of installation. Contractors who stand behind their work generally provide clear warranty terms.
Ask:
- Do you warranty your installation?
- What does the warranty include?
- How long does coverage last?
No warranty or vague answers about warranty coverage can be a warning sign.
Window Force backs every window unit with a 25-year transferable warranty, and our products are CSA certified and engineered to meet or exceed ENERGY STAR® requirements across all Canadian climate zones. When evaluating trim contractors, applying the same standard of clear, documented warranty terms with a defined scope is the most reliable way to distinguish installers who stand behind their work from those who do not.
Step-by-Step Process for Hiring a Window Trim Contractor
Following a structured process helps simplify comparisons and reduce surprises:
- Gather at least three written quotes that clearly specify material type, trim profile, and finishing scope.
- Verify licensing and liability insurance through local or state licensing resources.
- Request photos of completed projects featuring trim styles similar to your planned design.
- Confirm whether the contractor supplies materials or if purchasing is your responsibility.
- Clarify whether painting or staining is included or billed separately.
- Review warranty details and ensure all agreements are documented in writing before work begins.
A contractor's attention to detail during the quoting process often reflects the quality of their installation work. Thorough communication upfront can help prevent misunderstandings and create a smoother project experience.
Window Trim Maintenance and Longevity
The lifespan of your window trim depends largely on the material chosen, the quality of installation, and ongoing maintenance. Properly maintained wood trim can last decades; neglected trim can fail within a few years, especially in high-humidity rooms or in climates with significant temperature swings.
For homeowners dealing with windows in Calgary or similar climates with sharp seasonal shifts, maintaining caulk joints is especially critical — freeze-thaw cycles accelerate joint separation faster than in milder regions.
The single most important maintenance step for any trim material is keeping caulk joints intact. A failed caulk joint between the trim and the wall, or between the trim and the window frame, is the entry point for moisture that causes swelling, rot, and mould behind the casing.
Window Force frames are extruded from lead-free uPVC with UV stabilizers and feature fusion-welded corners that form a continuous, moisture-resistant joint at every angle of the frame. This construction eliminates the corner gaps common in mechanically fastened frames, which are the same gaps where moisture typically enters once caulk begins to fail. A well-sealed Window Force frame reduces the maintenance burden on the surrounding trim by limiting conditions that accelerate casing deterioration.
Trim Longevity by Material
| Material | Expected Lifespan | Maintenance Required | Common Failure Cause |
| Pine (painted) | 15 — 25 years | Repaint every 5 — 8 years | Moisture, paint failure |
| Oak (stained) | 25 — 40 years | Re-stain every 7 — 10 years | UV fading, wear |
| MDF (painted) | 10 — 20 years | Repaint when needed; avoid moisture | Swelling from water exposure |
| PVC/Vinyl | 30 — 50 years | Wipe clean; inspect seals | UV yellowing (low quality) |
| Polyurethane | 20 — 30 years | Paint or seal periodically | Impact damage |
| Composite | 25 — 35 years | Minimal; inspect caulk annually | Joint failure |
Window trim is a functional architectural element that covers the gap between the window and the wall and provides a finished result to the interior and exterior of the home. It seals out air leaks and moisture and helps conceal and protect the transition between the window frame and the surrounding wall.
High-quality trim can yield a 60 — 70% return on investment, enhancing both curb appeal and energy efficiency.
Conclusion
Window trim may seem like a small detail, but it plays an outsized role in both the performance and appearance of a home. The right casing style frames your windows like architectural features, creates visual consistency with surrounding woodwork, and helps protect the structure by sealing vulnerable gaps around the frame. Whether you prefer clean minimalist lines, classic Colonial detailing, or the warmth of natural stained wood, the best choice is one that complements your home's architecture and daily needs.
By balancing style, material durability, installation quality, and long-term maintenance, homeowners can create trim that looks intentional rather than purely ornamental. When selected carefully and installed properly, window trim becomes more than a finishing touch; it becomes a lasting investment in comfort, design, and value.
Planning a window renovation that includes new trim? Contact Window Force through our website to request a quote. Our team will provide frame specifications, confirm glazing and profile options for your project, and connect you with an authorized installer in your area — so your trim work starts from accurate measurements and a clearly documented window unit.
Frequently Asked Questions
What is the purpose of window trim?
Window trim (or casing) covers the gap between the window frame and the wall, creating a finished appearance. It also helps seal air leaks, reduce drafts, and protect against moisture intrusion while adding architectural style to the room.
What is the best material for interior window trim?
There is no single “best” material because the right choice depends on the room and budget. Wood, such as pine or oak, is the most traditional; MDF is cost-effective for painted finishes, and PVC or vinyl works best in humid areas like bathrooms due to its moisture resistance.
Should window trim be painted or stained?
Painted trim creates a clean, modern, and low-maintenance look, while stained trim highlights natural wood grain and adds warmth. Painted finishes are more versatile, but stained wood is often preferred in Craftsman and rustic-style interiors.
How wide should window trim be?
Most window trim ranges from 2.5 to 6 inches in width. Narrow trim (2 — 3 inches) suits modern interiors, while wider trim (4 — 6 inches) is used in traditional, Colonial, or more decorative designs.
Can I install window trim myself?
Yes, simple flat-stock trim can be installed as a DIY project with basic tools and careful measuring. However, complex multi-piece or decorative styles often require professional installation to achieve precise joints and consistent reveals.
How much does it cost to install window trim?
Installation typically costs between $350 and $1,600 per window, depending on material, complexity, and labour rates. DIY installation is significantly cheaper, usually ranging from $30 to $150 per window in materials.
How long does window trim last?
Lifespan varies by material and maintenance. Painted wood trim can last 15 — 25 years, stained hardwood up to 40 years, while PVC or composite materials can last 30 — 50 years with minimal maintenance.
What is a “reveal” in window trim?
A reveal is the small, intentional gap (usually 3/16 to 1/4 inch) between the window frame and the inside edge of the trim. It ensures consistent alignment and gives the trim a clean, professional appearance.
How do I maintain window trim?
Regular maintenance includes inspecting and repairing caulk joints, cleaning surfaces, and repainting or refinishing when needed. Preventing moisture intrusion is the most important factor in extending the lifespan of trim.
People Also Ask