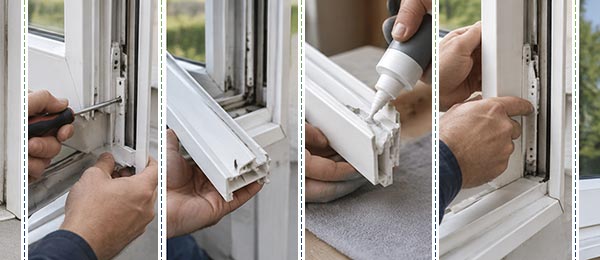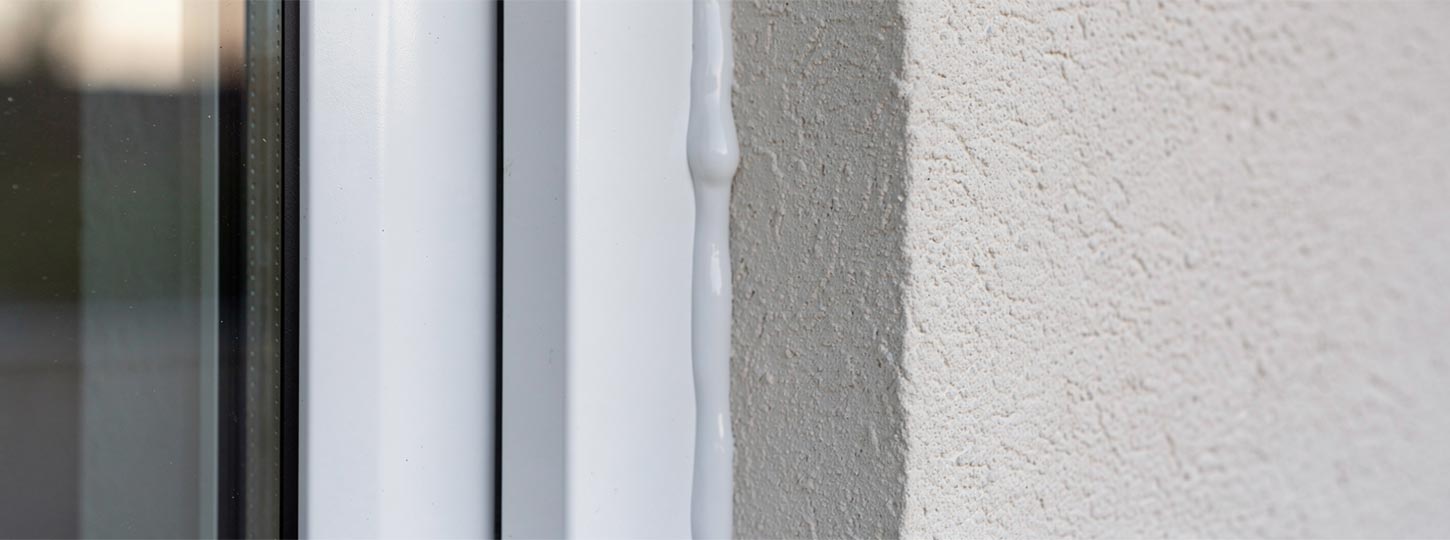


A bead of caulk around a window frame looks like a finishing touch, but it performs an essential weather-sealing function by limiting air leakage and water intrusion. Get the product, prep, and technique wrong, and a home starts losing heat and taking on moisture in ways that are hard to trace back to their source. This guide walks through what window caulking actually does, how to choose and apply it correctly, and when the problem has moved past what caulk alone can fix.
We see the caulk-to-frame interface from the manufacturing side before it ever becomes a job-site question. Since 2007, Window Force has designed each window unit's drainage paths, weep hole geometry, and frame profile dimensions at our 80,000 sq ft Ontario production facility, then coordinates installation through an authorized dealer network that works with those specifications on site. The guidance in this article reflects that full-cycle view — what we build into the frame before it ships, and what our dealers observe at the joint once the unit is installed and sealed.
Key Takeaways
- A cracked or missing caulk bead around a window frame is rarely just cosmetic; it is usually the first visible sign of an air leak, a moisture path, or both.
- Exterior caulk and interior caulk do different jobs and require different products, so using the same tube on both sides of the wall is one of the most common reasons a repair fails early.
- Surface preparation, not the price of the caulk, determines how long a seal lasts; old caulk that isn't fully removed will pull the new bead loose within months.
- The bottom of an exterior sill and any weep holes must stay open, because sealing them traps water inside the frame instead of letting it drain outward.
- Most exterior window caulking needs renewing every five to ten years, while interior caulking, sheltered from sun and weather, can last considerably longer.
What Is Window Caulking, and Why Does It Matter for Homeowners?
Window caulking is the flexible sealant applied along the joints where a window frame meets the surrounding wall, trim, or sill. Its job is narrow but important: fill the small gaps left between the window unit and the building materials around it, gaps that would otherwise let conditioned air escape, outdoor moisture in, and drafts settle into the room.
According to Natural Resources Canada's guidance on upgrading windows and doors, window air leakage is reduced by applying a continuous bead of caulk around the window trim where it meets the wall, at mitred trim joints, and between the trim and frame, with the product matched to interior or exterior use rather than treated as interchangeable.
What Caulk Does Around Window Frames
Caulk is not structural. It doesn't hold the window in place, and it isn't designed to bridge large gaps. Its role is to seal the perimeter joint against unwanted air leakage and water intrusion while allowing the window assembly to perform as designed.
Why Old Seals Fail Over Time
Every joint around a window moves slightly as temperatures shift through the day and across seasons. Vinyl, wood, and the wall assembly all expand and contract at different rates, and the caulk bead is what absorbs that movement. Lower-quality sealants lose flexibility as they age, and once a bead can no longer stretch with the joint, it cracks, pulls away from one side, or shrinks into a hairline gap that appears intact but no longer seals.
Joint movement caused by differential thermal expansion is harder to control at the frame corners, where two profile sections meet, and each responds to temperature change independently. When those corners are mechanically fastened rather than fused, the micro-gaps that open between the joined sections work against the caulk bead at exactly the point where the seal is most critical. Window Force joins its frame corners by fusion welding, which produces a continuous, monolithic joint that expands and contracts as a single unit rather than two separate pieces shifting against each other underneath the sealant.
Windows Near Me
What Are the Main Signs That Your Windows Need New Caulking?
A failing caulk joint rarely announces itself with an obvious event. It shows up gradually, as a slightly higher heating bill, a draft that wasn't there last winter, or a faint line of discoloration on the interior sill. Reading these signals early is what keeps a caulking issue from becoming a moisture issue.
Indoor Warning Signs
Inside the home, look for drafts around the window perimeter even with the sash closed and locked, condensation around the interior frame or trim during cold weather, and any staining or peeling paint on the trim or wall directly below the window. While condensation alone does not necessarily indicate failed caulking, it can be a warning sign when it occurs alongside noticeable drafts or other signs of air leakage. A rising energy bill without a clear cause, particularly in a home where nothing else has changed, is also worth investigating at the window joints before it's attributed to the furnace or the thermostat.
Outdoor Warning Signs
Outside, the caulk bead itself tells most of the story: visible cracking, sections that have pulled away from the frame or the siding, or a chalky, hardened texture where the sealant has lost its flexibility. Gaps that have opened up between the trim and the wall, especially on south- and west-facing exposures that see the most sun and UV exposure, are usually the first joints to fail.
A seasonal walk-around, once in spring after the freeze-thaw cycle and once in fall before winter sets in, catches most of these signs before they turn into a bigger repair.
Which Type of Exterior Caulking Works Best Around Different Window Materials?
Exterior caulk carries the bulk of the weatherproofing load, and the right product depends partly on what it needs to bond to. Vinyl, wood, aluminum, and composite frames each interact differently with a given sealant chemistry, and matching the caulk to the substrate is as important as matching it to the climate.
100% silicone bonds reliably to vinyl, glass, and metal, stays flexible through temperature extremes, and resists UV degradation better than most alternatives, though it is not paintable in its pure form. Polyurethane adheres more aggressively to porous surfaces such as wood, brick, and stucco, which makes it a stronger choice where a window frame meets masonry. Acrylic latex is easy to apply and takes paint well but loses flexibility in cold weather, which limits it to interior use in most Canadian climates. Silicone-modified acrylic latex (hybrid) sits between the two, offering better flexibility than plain acrylic latex while remaining paintable.
| Frame Material | Recommended Exterior Caulk | Why |
| Vinyl | 100% silicone | Strong bond to vinyl, flexible through temperature swings, UV-resistant |
| Wood | Polyurethane or silicone | Polyurethane bonds aggressively to porous wood fibre; silicone works on painted or sealed trim |
| Aluminum | 100% silicone | Bonds well to metal without corroding fasteners or finishes |
| Composite/fibreglass | Polyurethane | Handles the material's slightly different expansion rate under temperature change |
Acrylic latex alone is not recommended for any exterior frame material in a Canadian climate. It dries out and cracks within a few winters regardless of what it's bonded to.
How Do You Choose the Best Caulking for Windows in Canada's Climate?
Selecting a caulk isn't only about the substrate; it's about how the product performs against the specific stresses a Canadian building envelope experiences year-round. A peer-reviewed study published in Polymers found that crack growth in exterior sealants accelerated during colder periods, driven by freeze-thaw cycling and the extension stress placed on the material as substrates contracted in low temperatures.
Features to Prioritize
A handful of sealant characteristics matter more than brand name when comparing options for a Canadian exterior:
- UV resistance: exterior joints see direct sun for years; a sealant that degrades under UV exposure fails faster on south- and west-facing walls.
- Low-temperature flexibility: the product needs to stretch, not crack, when the joint contracts in a January cold snap.
- Adhesion to the specific substrate: a caulk that bonds poorly to the frame or wall material will separate long before it reaches its rated lifespan.
- Paintability, where relevant: interior trim caulk usually needs to accept paint cleanly; exterior silicone typically does not.
What to Avoid in Harsh Climates
Avoid low-grade acrylic latex on any exterior joint, avoid butyl-based products where a paintable finish is required, and avoid any caulk sold without a stated temperature-flexibility range on the label; that omission is usually a sign the material was not formulated for cold-climate performance. Homeowners in Ottawa and other regions Window Force serves across Canada, where winter temperature swings between a mild afternoon and an overnight deep freeze are routine, tend to see this kind of premature cracking fastest on lower-grade products.
How Should Homeowners Prepare Surfaces Before Caulking Windows?
Preparation determines how long a caulk job lasts more than the product choice does. A premium silicone applied over old, dirty caulk will fail almost as fast as a budget product applied the same way, because the new bead never actually bonds to the substrate underneath.
Joint design matters just as much as surface preparation. ASTM International recommends that sealant joints be proportioned to accommodate expected movement without excessive stress, which is why installers use foam backer rods in wider gaps instead of filling the entire cavity with sealant.
The sequence that matters: remove every trace of the old caulk with a razor blade or putty knife, since the new caulk does not bond to the old caulk and will lift within months if applied over it. Clean the joint with rubbing alcohol or denatured alcohol to strip oils, dust, and residue, then let it dry fully before applying anything. Check the width of the gap; up to approximately 6 mm can be sealed directly, while wider gaps need a foam backer rod first so the caulk has something to press against instead of sagging into open space. Mask both sides of the joint with painter's tape if a clean edge matters, which it usually does on visible interior trim.
Tools Checklist
A basic caulking job needs only a short list of tools, most of which are inexpensive or already on hand:
- Caulk gun with a dripless thumb-release mechanism
- Razor blade or putty knife for old caulk removal
- Rubbing or denatured alcohol and clean rags
- Painter's tape
- Foam backer rod for gaps wider than roughly 6 mm
- Caulk smoothing tool, or a bowl of soapy water if smoothing by hand
Common Prep Mistakes
The most frequent error is skipping full removal of the old bead and simply caulking over the top of it. A close second is applying caulk to a surface that appears dry but still has residual moisture in the joint, which prevents proper adhesion and shows up later as a bead that never fully cured.
Because Window Force manufactures each unit to order and ships it directly to the installing dealer, the frame surfaces that receive caulk on site have not sat in a warehouse accumulating dust, moisture, or surface oxidation between production and installation. That shorter chain between the production line and the building envelope means the substrate condition is as close to factory-fresh as the logistics allow, which gives the initial caulk bead a cleaner bond than it would get on a frame that has been in transit or storage for months.
What Is the Correct Process for Caulking Windows for a Clean, Durable Seal?
Once the joint is prepped, the application itself is a short, repeatable sequence. Cut the nozzle at a 45-degree angle, sized slightly smaller than the target bead; it's easier to enlarge the cut than to fix an oversized, sloppy bead after the fact. Load the tube, hold the gun at roughly 45 degrees to the joint, and pull the trigger with steady, even pressure while moving the gun continuously along the seam. Working in shorter sections rather than one continuous pass around the entire window perimeter produces a more even result, since stopping partway through a long bead tends to create drips or thin spots.
Smooth the bead within a few minutes, before it starts to skin over, using a smoothing tool or a finger dipped frequently in soapy water. The goal is a slightly concave line pressed firmly into both sides of the joint, not a raised ridge sitting on top of it. Pull any painter's tape away at a 45-degree angle while the caulk is still wet, and leave the bead undisturbed until it skins, typically around 30 minutes for most products, with full cure taking several days depending on the formulation.
How Much Caulk to Apply
The finished bead should be just wide enough to fully bridge the joint while maintaining good contact with both sides. Oversized beads waste material, look unfinished, and are more prone to sagging before they cure.
How to Smooth Caulk Properly
Move the smoothing tool or finger in one continuous pass rather than working back and forth over the same section, which tends to pull the bead away from the substrate rather than press it in.
As Sergey Essipov, a seasoned engineer with more than 20 years of experience in window manufacturing, explains:
A caulk joint can only perform as well as the surface it bonds to. At our facility, we extrude our frames from lead-free uPVC with UV stabilizers compounded into the material, so the substrate a caulk bead contacts resists chalking and surface degradation for the full service life of the frame rather than breaking down underneath the sealant. If a frame surface is already degrading when new caulk goes on, the bond fails at the substrate, not at the sealant.
How Long Does Caulking Take to Dry Before It Can Handle Rain, Paint, or Cleaning?
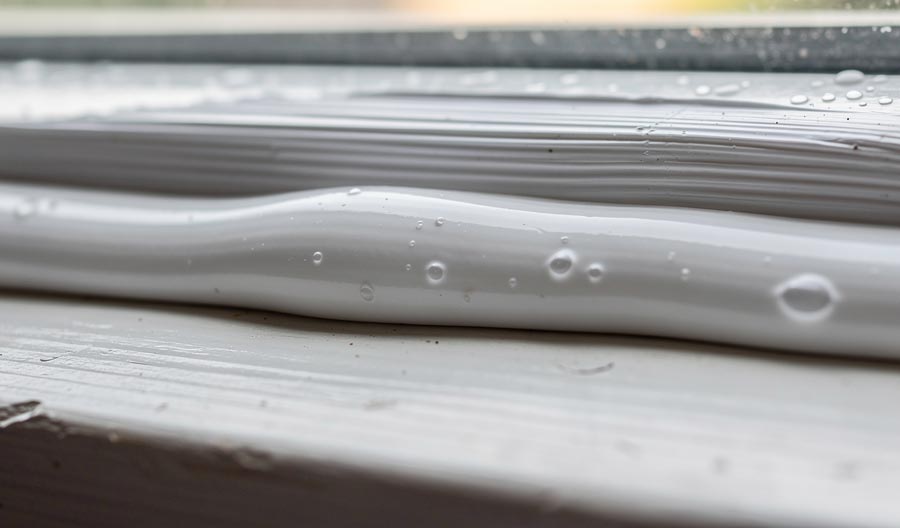
Caulk moves through three distinct stages, and confusing them is a common cause of early failure. "Dry to touch" or "skinned over" happens first, usually within 30 minutes to a few hours, and simply means the surface has firmed up enough not to smear. "Paint-ready" comes next; most paintable caulks need at least one to four hours before accepting a coat of paint without peeling, though the product label is the final word. Full cure is the stage at which the sealant reaches its designed flexibility and long-term performance.
Humidity and temperature both affect these ranges. Cold, dry air slows curing noticeably, which is why exterior caulking scheduled during a cold snap should be given extra time before it's exposed to rain, and why most manufacturers recommend caulking exterior joints when the temperature sits between roughly 5°C and 30°C.
How Can You Remove Old Caulking Without Damaging the Window Frame?
Removing a failed caulk is the step most homeowners rush, and it's also the step that determines whether the new bead actually holds. A sharp razor blade or a dedicated caulk-removal tool, worked at a shallow angle along the joint, lifts most cured caulk cleanly without gouging the surrounding material. For stubborn residue, particularly old silicone that has hardened and bonded tightly, a silicone-specific remover gel softens the material enough to scrape away without forcing the blade.
Material matters here. Vinyl frames scratch easily under an aggressive blade angle, so keeping the tool nearly flat against the surface avoids marking the finish. Wood frames need more care around grain lines, where a blade can catch and tear fibres if pushed too hard. Metal frames tolerate more pressure but should still be checked for any protective coating that a blade edge could scrape through.
| Frame Material | Recommended Removal Method | Precaution |
| Vinyl | Plastic scraper or shallow-angle blade | Avoid gouging the surface finish |
| Wood | Razor blade, worked with the grain | Watch for splintering along grain lines |
| Metal | Blade or scraper, moderate pressure | Check for coatings that scrape off easily |
What Common Mistakes Make New Caulking Fail Too Soon?
Most premature caulk failures trace back to a handful of repeat errors, and they compound each other when more than one is present on the same joint.
“The failure mode that surprises most homeowners is silicone-over-silicone. If a joint was previously sealed with silicone and you want to reseal it with silicone, isopropyl alcohol prep is not sufficient to restore adhesion to a surface that has been silicone-contaminated. Silicone does not bond to cured silicone underneath it. You need a dedicated silicone remover solvent, full mechanical removal of all residue, and a clean, solvent-wiped surface before the new bead will actually hold. We see this failure pattern regularly in service calls: a homeowner removes what they can see, cleans the joint with rubbing alcohol, applies a fresh bead, and six months later the new bead is already peeling at the edges. The substrate looks clean but the surface chemistry from the old silicone is still there. Complete removal is not optional — it is the whole job,” says Sergey Essipov, Production Engineer with 20 years of experience in window manufacturing.
Poor surface preparation, particularly contaminated or damp joints, is one of the most common causes of premature sealant failure. Using the wrong product for the location, interior acrylic latex outdoors, or non-paintable silicone where paint was needed, is close behind. Overfilling wide gaps without a backer rod causes the bead to sag and pull away from its own weight before it cures. Caulking during unsuitable weather, particularly right before rain or in temperatures outside the product's rated range, prevents proper curing from the start. And ignoring joints that see real structural movement, applying a rigid, low-flexibility caulk where the frame and wall genuinely shift with temperature, guarantees the bead will crack again within a season or two.
Should You Caulk Windows Yourself or Hire a Professional?
Interior caulking is a reasonable DIY project for most homeowners. The surfaces are easy to reach, the products are forgiving, and a small mistake doesn't risk water intrusion into the wall. Exterior caulking is a different calculation: ladder work on upper floors, a narrower margin for error around drainage details, and product choices that matter more because a failed exterior seal can lead to real moisture damage rather than just a draft.
| Factor | DIY | Professional |
| Cost | Lower, materials only | Higher, includes labour |
| Time | Homeowner's schedule, often slower | Typically completed in a single visit |
| Finish quality | Variable, depends on experience | Consistent, trained technique |
| Access (upper floors, steep rooflines) | Limited by equipment and comfort | Equipped for safe access |
| Warranty on work | None, unless product-only | Workmanship warranty typically included |
Professional inspection can identify problems that fresh caulk cannot solve, including failed flashing, missing drainage paths, or moisture intrusion behind the cladding. According to the Canada Mortgage and Housing Corporation (CMHC), controlling water penetration requires the entire wall assembly to manage drainage and drying rather than relying on sealants alone.
A professional installer brings more than convenience: proper insurance coverage, familiarity with drainage details that are easy to get wrong on a DIY exterior job, and a documented scope of work if something needs to be revisited. For homeowners in Toronto and the surrounding GTA, where multi-storey exteriors and mixed cladding are common, that access advantage alone is often reason enough to bring in a professional for the exterior half of the job even when the interior trim is handled as a weekend project.
The same applies in London, Brampton, and other Ontario cities where older housing stock often combines brick, wood trim, and vinyl replacement windows on the same elevation — a combination that requires matching each caulk type to the correct substrate rather than running a single bead around the full perimeter. Homeowners searching for a window company in Calgary or Edmonton can coordinate a caulk assessment with a window evaluation through the same dealer network.
How Often Should Exterior Caulking Around Windows Be Inspected or Replaced?
Exterior caulking typically lasts 5 to 10 years, with the range depending heavily on the product used and how much sun and weather exposure a given joint sees. Interior caulking, sheltered from UV and precipitation, generally lasts 10 to 15 years or longer before it needs attention. South- and west-facing windows, which absorb the most direct sunlight over a typical day, tend to need recaulking sooner than north-facing exposures on the same building.
Maintenance Schedule
An annual visual check, ideally in spring after the winter freeze-thaw cycle has had its effect, catches cracking or separation early enough to schedule a repair before a full season of water exposure. Any joint showing visible gaps, chalking, or discolouration during that check should move up the priority list rather than wait for the next scheduled review.
One detail that routine caulk inspections often miss is the condition of the weep holes and drainage channels built into the window sill. Caulking over these openings, whether by accident or by an installer who doesn't recognize them, traps water inside the frame cavity and accelerates deterioration from the inside out. Window Force's multi-chamber frame profiles incorporate engineered drainage paths that route water to specific exit points along the sill, and those exit points need to remain clear for the drainage system to function as designed.
How Climate Affects Lifespan
Freeze-thaw cycling is one of the more aggressive stresses a caulk joint experiences in a Canadian climate, and it disproportionately affects lower-grade products that lose flexibility at low temperatures. A joint on a wall with heavy sun exposure and significant winter temperature swings, common in much of Ontario, will generally need attention sooner than the same product installed on a shaded, north-facing wall.
Homeowners looking for a window manufacturer in British Columbia or the Prairie provinces face similar conditions on sun-exposed elevations, where daytime-to-overnight temperature swings through the shoulder seasons put the same cyclic stress on exterior caulk joints as a typical Ontario winter.
Most replacement windows rely on a single perimeter seal between the glass unit and the frame, which means a caulk failure at the exterior trim is the last line of defence against moisture reaching the rough opening. Window Force builds its insulated glass units with a dual-seal, metal-free warm-edge spacer system that provides its own independent barrier at the glass-to-frame interface. That second line of protection does not eliminate the need for sound exterior caulking, but it does mean a hairline crack in an aging caulk bead is not the only thing standing between the building envelope and water intrusion.
What Maintenance Tips Help Window Caulking Last Longer?
A little routine attention extends the working life of a caulk joint well beyond its base rating. Clean caulked surfaces with mild soap and water rather than abrasive or solvent-based cleaners, which can strip flexibility from the sealant over time. Do a visual inspection at least once a year, checking specifically for cracking, chalking, or separation at the edges rather than waiting for a draft to become noticeable indoors. Manage indoor humidity, since excess moisture indoors accelerates condensation-related staining around window trim even when the caulk itself is intact.
Repainting interior caulked trim when the surrounding paint is refreshed keeps paintable caulk protected from UV and general wear, and small cracks caught early can often be addressed with a touch-up bead rather than a full removal and recoiling. Waiting until a crack has widened or the bead has pulled away entirely usually means starting over from the removal step rather than doing a quick patch.
What Should Homeowners Know Before Booking a Window Caulking Service?
Not every caulking quote reflects the same scope of work, and the differences matter more than they might seem on paper. Ask whether the quote includes proper joint preparation before new sealant is applied, as long-term performance depends heavily on the condition of the substrate. Confirm which sealant will be used and whether it is appropriate for the frame material, joint conditions, and expected weather exposure. Ask whether the surrounding trim and sill will be inspected for hidden moisture damage before caulking begins, since sealing over a compromised joint doesn't fix what's underneath it.
Questions to Ask Before Hiring
Confirm the contractor's licensing and insurance coverage, ask whether a workmanship warranty is included separately from any manufacturer product warranty, and request a written scope that specifies which joints will be addressed rather than a general description of "recaulking the windows." A quote that documents the products, the joints covered, and the warranty terms in writing is a reasonable baseline for comparing contractors.
What a Quote Should Include
A complete quote lists the caulk type and brand proposed for each application, the joints and locations covered, an estimated timeline, and the terms of any workmanship guarantee. Anything less specific makes it difficult to know what was actually agreed to if a problem shows up later.
For homes with newer windows still under a manufacturer's window warranty, confirm whether the caulking work affects the warranty terms before authorizing it; improper sealing of weep holes or drainage paths by a third-party contractor can void coverage on an otherwise protected unit.
What Are the Key Takeaways About Window Caulking for Long-Term Home Protection?
Caulking is a small, inexpensive job with outsized consequences when it's done poorly. Long-lasting results depend on selecting a sealant compatible with the frame material, preparing the joint properly, and allowing built-in drainage features to function as intended. Сareful surface preparation and correct product selection have a greater impact on long-term performance than the price of the sealant itself, and certain joints, particularly weep holes and the bottom of an exterior sill, need to stay open rather than sealed. When a window's frame, hardware, or rough-opening insulation has deteriorated alongside the caulk, no amount of resealing restores the performance a sound, well-built window delivers on its own; that's a signal to look at replacement windows rather than another round of sealant.
When a window's frame, hardware, or rough-opening insulation has deteriorated alongside the caulk, no amount of resealing restores the performance a sound, well-built window delivers on its own; that's a signal to look at replacement windows rather than another round of sealant. Window Force manufactures every unit to order, CSA certified and rated to meet ENERGY STAR requirements across all Canadian climate zones, with each window backed by a 25-year transferable warranty covering the frame, sealed glass unit, and hardware. That coverage draws a clear line between a maintenance item like caulk, which is the homeowner's responsibility to maintain, and the structural performance of the window itself, which the warranty protects.
Frequently Asked Questions
What is the best caulk for windows in Canada?
For exterior joints, 100% silicone is the standard choice on vinyl and metal frames because it stays flexible through Canadian winters and resists UV damage, while polyurethane performs better at bonding to wood, brick, or stucco. For interior trim, paintable acrylic latex or a siliconized hybrid is the right pick, since both take paint cleanly and don't need the specialized cleanup silicone requires.
Should I caulk the inside of a window?
Yes. Interior caulking blocks minor air leakage that bypasses the exterior seal and helps prevent condensation from settling where the frame meets the wall. Use a paintable product rather than exterior-grade silicone, which won't accept paint.
How do you caulk exterior windows correctly?
Remove all old caulk completely, clean and dry the joint, then apply silicone or polyurethane along the perimeter where the frame meets the siding or brick, being careful to leave the bottom of the exterior sill and any weep holes unsealed so water can continue to drain outward.
Can I caulk over old caulk?
No. New caulk does not bond reliably to cured caulk underneath it, and the new bead will typically lift or crack within a few months. Full removal with a razor blade or scraper, using a remover gel on stubborn residue if needed, is a required step, not an optional one.
What size gap can be filled with caulk alone?
Caulk is designed for gaps up to approximately 6 mm. Anything wider needs a foam backer rod first so the sealant has something to press against; gaps beyond about 12 mm usually point to an installation or frame issue that caulking won't resolve on its own.
How long does window caulking actually last?
Quality exterior silicone or polyurethane typically holds for 5 to 10 years depending on sun exposure and product grade, while interior acrylic latex or hybrid caulk, shielded from UV and weather, tends to last 10 to 15 years or more before it needs attention.
People Also Ask