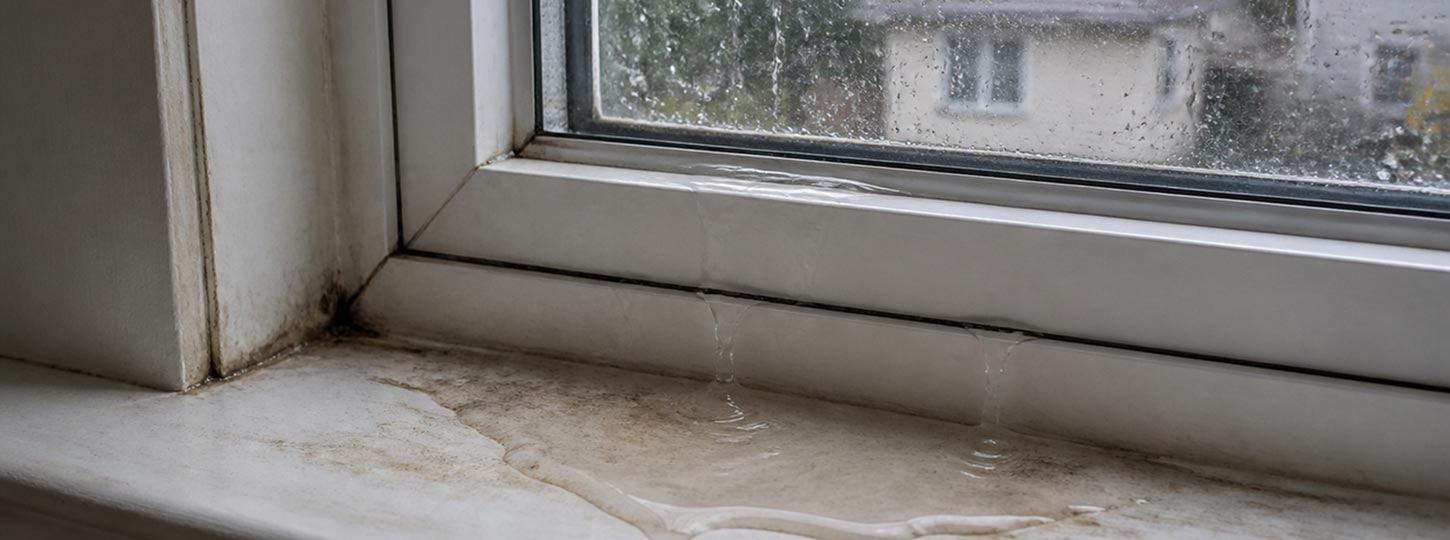


A window that leaks during rain almost never leaks where the water appears, and treating the visible drip point is the most common reason a repair fails within a season. This guide explains how to trace a leak to its actual source, contain the damage safely while you investigate, and match each cause to the repair that resolves it rather than hides it.
The diagnostic sequence below reflects what a manufacturer sees when leak complaints come back through the dealer network. Window Force has produced custom units at its 80,000-square-foot facility in Concord, Ontario since 2007, and because our team works with both the fabrication side and the installers who set the units, the failure patterns described here are drawn from actual service calls rather than generic troubleshooting.
Key Takeaways
- The point where water becomes visible is rarely the point of entry; water travels along framing, sheathing, and sills before it drips, so the drip location is a symptom, not a diagnosis.
- Leaks that appear only in heavy or angled rain usually point to wind-driven rain overwhelming seals, flashing, or drainage rather than to a defective window on a calm day.
- Sealant and caulk resolve a narrow set of leaks; applied over the wrong defect, they trap water inside the wall and accelerate hidden damage.
- Intentional drainage openings, such as weep holes, must remain clear and unsealed because they are how a correctly built window is designed to shed water.
- Water reaching the wall or floor below the window signals a rough-opening waterproofing failure that sealant cannot reach, and that requires removing the unit to correct.
- Replacement becomes the rational choice only after the window and the surrounding wall are assessed together, not on the basis of the leak alone. Homeowners assessing whether repair or replacement makes more financial sense can use the Toronto window replacement cost guide as a pricing reference, and qualifying replacements may be eligible for energy efficiency rebates covered in the Canada window and door rebates guide.
What Should You Do First When a Window Is Leaking?
The first priority during an active leak is to limit damage to interior finishes and document what is happening, not to attempt a repair. Water that reaches drywall, casing, and flooring can cause staining, swelling, and mould growth within days, so the first minutes matter more than the eventual fix.
Work through a short, ordered response before anything dries out or gets cleaned up:
- Move furniture, electronics, and textiles away from the wall beneath and beside the window.
- Place towels or a shallow container to collect water, and blot rather than smear standing moisture on the sill and floor.
- Photograph where water first appears, how fast it accumulates, and the wind and rain conditions at that moment.
- Dry wet surfaces once you have documented them, and run a fan or dehumidifier to slow moisture migration into the wall.
Resist the urge to apply caulk or sealant during the storm. A cosmetic repair made before the source is known usually seals water inside the assembly and erases the evidence you need to diagnose it correctly.
Immediate Actions During Active Rainfall
While rain is still falling, note the exact pattern of entry. Water arriving at the top corners behaves differently from water pooling at the sill, and a leak that starts only when wind shifts to one wall tells you more than any inspection done afterward on a dry day. Repeated rain intrusion is worth addressing promptly rather than seasonally, because moisture that cycles through interior finishes progressively degrades them and creates conditions for mould in the wall cavity.
Why Is Water Leaking From the Top of the Window Frame?
Water at the head of a window is one of the most misleading symptoms, because it very often originates above or beside the opening and simply becomes visible at the top of the frame. Failed head flashing, a gap where siding or cladding meets the wall, a cracked exterior seal, deteriorated masonry, or roof and gutter runoff can all deliver water to a path that ends at the window head.
As Sergey Essipov, a seasoned engineer with more than 20 years of experience in window manufacturing, explains:
The point where water becomes visible is rarely the point where it entered the building. Gravity carries water along framing, sheathing, and flashing until it reaches a place where it can escape, which is why repairing the visible drip instead of tracing the entry path almost always leads to the same leak returning.
The mechanism matters because it changes the repair. Head flashing is designed to direct water away from the window opening and protect the wall-window interface from moisture intrusion. If the flashing is missing, reversed, or improperly integrated with the surrounding water-management layers, water can bypass the drainage path and travel behind the frame instead of being directed safely to the exterior. Canadian installation guidance emphasizes that durable window performance depends on maintaining continuous water management and airtightness at the wall-window interface, with flashing integrated into the overall drainage system to prevent moisture from reaching the building envelope.
Why Do Windows Start Leaking During Heavy Rain?
A window that stays dry in ordinary rain but leaks in a downpour is usually not failing on its own; it is being overwhelmed by wind-driven rain. Ordinary rainfall falls nearly vertically and drains off the exterior, while wind-driven rain is pushed horizontally against the wall, forcing water into seams, seal gaps, and drainage paths that shed vertical water easily. This is why a leak can appear only when a storm strikes one particular wall at an angle and disappear when the wind turns.
The distinction between the two conditions explains most of the diagnostic confusion homeowners experience:
| Factor | Ordinary rainfall | Wind-driven rain |
| Direction of water | Largely vertical, drains off the face of the wall | Driven horizontally into seams and seals |
| Where weaknesses show | Rarely exposes minor seal or flashing gaps | Finds gaps in seals, flashing, and installation |
| Pressure on the assembly | Low; drainage keeps pace with water volume | Pressure difference pushes water past drainage |
| Typical symptom | Little or no intrusion | Leaks tied to wind from a specific direction |
Why Wind Direction Changes the Symptoms
Because wind-driven rain loads one elevation at a time, the same house can leak at a north window in one storm and a west window in another. A leak that tracks with wind direction is a strong signal that the problem lies in how the exterior manages pressure and drainage, not in a randomly defective seal. Wind-driven rain creates pressure differences across the building envelope that can force water through vulnerable joints and overwhelm the window's drainage system when flashing or sealing details are compromised.
The detail that determines whether a wall sheds that pressure or leaks beneath it lies at the sealed edge of the unit itself. Window Force builds every insulated glass unit on a dual-seal, metal-free warm-edge spacer, pairing a primary seal that blocks vapour with a structural secondary seal that carries load, so the perimeter bond maintains its integrity when a storm drives water against one elevation rather than relaxing under repeated pressure cycling. That edge margin is what lets the unit's own drainage do its job during precisely the wind-driven events that expose weaker assemblies.
How Can You Tell Whether Water Is Leaking From the Window, Wall, or Roof?
Locating a leak is a process of reading where water appears, in what pattern, and under what conditions. The head, jambs, and sill of the window each point toward different failures, and staining that spans more than one floor or appears well away from the window usually indicates a wall or roof problem rather than a window-unit problem.
Let the visible symptom direct where you inspect next rather than assuming the window is at fault. Water at the sill or inside the sash corners that tracks with rain points to the window unit or its seals, so the next place to check is the weatherstripping, sash seals, and glazing. Staining that appears beside or below the window, or on another floor entirely, points to the wall envelope, which means the cladding joints, flashing, and rough-opening seal deserve attention. Ceiling stains or water arriving from above the head suggest roof or gutter runoff, and overflowing gutters, downspouts, and the roof edge are the first suspects. Water on the interior glass in cold weather without rain is condensation rather than a leak, and the variables to examine are indoor humidity and the glass surface temperature.
The last row is worth isolating, because condensation is routinely mistaken for a leak. Interior moisture that forms on cold glass is a humidity issue rather than an intrusion, and warm-edge spacer technology with appropriate Low-E glazing raises interior glass temperatures enough to reduce it. If water appears only in cold weather with no rain, the wall is dry, and the fix lies in ventilation and humidity control.
Signs of a Window-Unit Leak Versus a Wall-Envelope Leak
A genuine window-unit leak tends to be localized, repeatable, and confined to the frame or sash, appearing during rain and drying between storms. A wall-envelope leak spreads: it stains beyond the casing, softens drywall below the sill, or shows up on the level beneath. When water reaches the wall or floor below the window, it usually indicates a waterproofing failure in the rough opening rather than a fault in the window itself.
Which Exterior Defects Cause Water to Leak Through the Window Frame?
Most frame leaks trace back to a small set of exterior failures that cluster into three categories: how the wall was designed to shed water, how the window was installed, and how well the exterior has been maintained since then. Recognizing which category you are looking at prevents the common mistake of sealing a maintenance problem that is actually an installation defect.
- Wall design defects, such as a missing overhang, an incorrect sill slope, or poor drainage detailing, mean water is being directed toward the opening by design.
- Installation defects, such as absent or reversed flashing, gaps between the window and wall, or a missing sill pan, mean the unit was set without a continuous drainage path.
- Maintenance defects, such as separated caulk joints, cracked cladding, or deteriorated mortar, mean the protection has degraded and needs renewal.
This three-part split reflects a principle established in Canadian building-science research: a wall does not keep water out with a single barrier but with layered lines of defence. National Research Council Canada describes the rainscreen approach as a first line that minimizes how much water reaches the wall and manages the forces driving it through the cladding, backed by a second line that intercepts and drains whatever gets past. A window frame sits at the junction of both lines, which is why a leak there can originate in wall design, installation, or maintenance rather than in the window itself, and why identifying the correct layer determines whether the fix belongs at the surface or inside the assembly.
The installation category is the one homeowners can least afford to misread. A manufacturer of vinyl windows builds a unit to a specified rough-opening size from lead-free uPVC with every corner fusion-welded into a continuous joint, but the flashing and sill-pan detailing that keep water out of the wall are executed on site, and a precisely built window set into an unflashed opening will still leak. That is why exterior inspection should look above and beside the frame, not only at the frame itself.
Can Blocked Weep Holes or Drainage Paths Create a Leaking Window Frame?
Many window systems and wall assemblies contain intentional openings that let incidental water drain back to the exterior, and blocking them turns a working drainage feature into a reservoir. Weep holes at the base of a frame and drainage paths within the sill are designed to release the small amount of water that inevitably reaches the sill during a storm. When paint, debris, insect nests, or misapplied caulk close them, water that the window was built to shed collects instead and eventually finds its way inward.
The practical rule is to identify these openings and keep them clear without altering them:
- Look for small slots or holes along the bottom exterior edge of the frame; these are usually weep holes, not defects.
- Clear them gently with a soft tool or compressed air rather than sealing, widening, or drilling new ones.
- Never caulk a horizontal joint below the window or an opening that appears to drain outward, because that is the drainage path.
The distinction between a gap that should be sealed and an opening that must stay open is the single most consequential judgment in this entire topic. Sealing a drainage path is one of the few homeowner actions that reliably makes a minor leak worse.
How Should You Inspect a Window Leaking From the Top of the Frame?
A reliable inspection follows a sequence that isolates one variable at a time, because spraying an entire wall at once only tells you it leaks, not where. The goal is to reproduce the leak under controlled conditions and record the first point where water appears.
Work from observation toward controlled testing, in this order:
- Observe during rain. Watch where water first enters and whether it correlates with wind from one direction.
- Inspect indoors after the storm. Check the head, jambs, sill, and the drywall below for staining and soft spots once the rain stops.
- Examine exterior joints from ground level. Look at flashing, cladding transitions, and sealant above and beside the window without climbing.
- Test with controlled water. Wet one section at a time, starting low and moving up, so the source is unambiguous when water appears inside.
For installed units, BC Housing recommends on-site water penetration resistance testing that simulates a wind-driven rain event to confirm the assembly performs as expected, which is the professional version of the controlled test above and the appropriate step when ground-level inspection is inconclusive. Anything requiring a ladder, roof access, or work at height is best left to a professional rather than a homeowner.
What Temporary Steps Can Limit Damage From a Leaking Window?
Temporary measures buy time to diagnose and schedule a proper repair, and their entire purpose is damage control rather than solving the leak. The line between the two must stay clear, because temporary protection that blocks drainage or hides the source creates a larger problem than the leak it addresses.
Reasonable interim steps include collecting and blotting water indoors, running a dehumidifier to limit moisture migration, protecting finishes with removable coverings, and applying temporary exterior protection that sheds water without sealing drainage openings. None of these should involve permanent caulk or anything that prevents the assembly from draining.
Certain conditions call for prompt professional assessment rather than continued do-it-yourself containment. Treat the following as signals to stop and call a specialist:
- Wet electrical outlets, switches, or fixtures anywhere near the leak.
- Extensive drywall saturation, sagging, or crumbling below the window.
- Recurring mould, a musty odour, or staining that returns after cleaning.
- Soft, spongy framing or trim, which indicates that water has been present long enough to degrade structure.
When Can Exterior Caulking Stop Water Leaking Through the Window Frame?
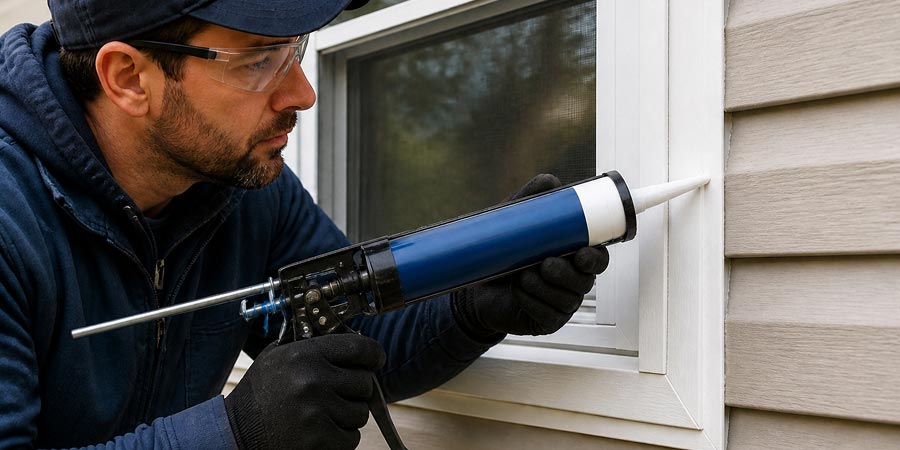
Exterior sealant has a legitimate but narrow role: it renews a perimeter joint whose original bead has visibly failed, and it is effective only when the failed joint is genuinely the water's entry point. Caulk cannot substitute for flashing, cannot bridge a concealed wall defect, and cannot dry a rough opening that was never waterproofed. Applied to the wrong location, it postpones the visible symptom while the underlying damage continues.
As Sergey Essipov, a seasoned engineer with more than 20 years of experience in window manufacturing, explains:
Applying new sealant over old, cracked caulk rarely creates a lasting repair because the new bead bonds to the failed material instead of the underlying substrate. As the original sealant continues to separate, the new layer lifts with it, often trapping moisture behind the joint and leaving the assembly in worse condition than before the repair.
The distinction between the joints that caulk can help and the ones it cannot is straightforward. A perimeter joint with a failed bead is the one case where sealant belongs, applied only after the old material is fully removed, because it renews a genuine seal at a real entry point. A flashing gap or missing flashing should never be caulked, since flashing, rather than sealant, is what manages water. Weep holes and drainage slots must stay open because they are drainage paths, and a concealed wall or rough-opening defect is beyond caulk's reach because the source sits inside the wall.
Which Repairs Address Flashing, Seal, Frame, and Installation Failures?
Once the cause is identified, each failure maps to a specific repair, and the appropriate fix ranges from a minor sealing task to the removal of the unit entirely. Matching the diagnosis to the repair, rather than defaulting to the easiest action, is what determines whether the leak stays fixed.
- Failed perimeter sealant: remove the old bead, clean the substrate, and reseal, working on the exterior surface only.
- Worn weatherstripping: replace the weatherstripping on the sash, a minor interior task.
- Discontinuous or missing flashing: restore flashing continuity and correct the laps, which requires removing exterior finishes.
- Improperly installed unit: reset the window with correct flashing and a sill pan, which means full removal of the unit.
- Rough-opening or wall-envelope failure: repair the waterproofing and affected wall components, removing finishes around the opening.
The access each repair demands carries the real message. Minor sealing and weatherstripping stay on the surface, but flashing and installation corrections require removing exterior finishes to reach the drainage layer, and that is precisely the work that cannot be faked with a bead of caulk. When the diagnosis points to the rough opening, the window comes out, the waterproofing is rebuilt, and the unit is reset correctly.
When Should a Leaking Window Be Repaired or Replaced?
Replacement is justified when the window itself has reached the end of its service life or when reaching the leak requires removing the unit anyway, not simply because it leaked once. Age, frame condition, whether leaks recur, whether the unit has warped out of square, and whether the insulated glass has failed all weigh into the decision alongside the cost of accessing concealed damage.
The comparison below frames the choice:
| Condition | Points toward repair | Points toward replacement |
| Frame | Sound, square, no rot | Warped, out of square, or rotted |
| Leak history | First occurrence, single identifiable source | Recurring or systemic across the unit |
| Insulated glass | Intact seal, no fogging | Failed seal, persistent fogging between panes |
| Access to the fault | Fault reachable from the surface | Fault requires removing the unit regardless |
When replacement is the right call, custom-built units matter because they are made to the measured dimensions of the existing opening rather than being trimmed to fit on-site. Window Force manufactures vinyl windows to order at its Ontario facility, which keeps the new unit true to the rough opening and preserves the drainage geometry the wall depends on. This is where the difference between a reseller and a company that fabricates its own units becomes visible, because the window and the opening are matched rather than adapted.
Questions to Ask Before Authorizing Replacement
Before approving a replacement, confirm that the leak was traced to the window rather than the surrounding wall, ask whether the rough opening will be rewaterproofed as part of the work, and clarify what the window warranty covers once the new unit is installed. A replacement that reuses a compromised opening simply relocates the problem, so the condition of the wall is as important as the window specification.
Where a reseller hands a leak complaint back and forth between the supplier who built the unit and the crew who set it, Window Force keeps both under one accountable line: units are manufactured to the confirmed rough-opening dimensions and installed through an authorized dealer network trained on the same specification, so a post-repair claim traces to a single origin rather than a chain of subcontractors. Every unit is CSA-certified and meets or exceeds ENERGY STAR® requirements across Canadian climate zones, and the 25-year transferable warranty transfers to the next owner, which matters most when a home changes hands after a leak has been diagnosed and corrected.
How Can Homeowners Prevent Future Window Leaks?
Prevention rests on two pillars that are easy to state and often neglected: keep the exterior in good repair, and keep drainage paths clear. Product quality and installation quality both contribute, and neither compensates for the other; a well-built window in a poorly flashed opening leaks, and a perfectly flashed opening cannot save a failed unit.
A seasonal inspection routine catches most problems before they reach the interior:
- Inspect perimeter sealant each spring and fall for cracks, gaps, or separation.
- Confirm weep holes and drainage slots are open and clear of debris.
- Clear gutters and downspouts so roof runoff is directed away from window heads.
- Check cladding, mortar, and flashing transitions above and beside each window for staining or deterioration.
- Monitor interior humidity through winter to distinguish future condensation from genuine intrusion.
Climate shapes how often these checks matter and which failures dominate, which is why performance has to be judged against local exposure rather than a single provincial benchmark. Coastal walls face sustained wind-driven rain that places constant demands on flashing and drainage, whereas a vinyl windows manufacturer Saskatchewan homeowners rely on is typically focused on performance in deep cold and condensation conditions. A window supplier in Manitoba must account for both extremes across a sharply continental climate, and the same principle governs window installation in Ontario, where freeze-thaw cycling tests sealant and drainage details season after season.
Because installed performance depends on both the unit and the setting, Window Force builds every window to CSA and ENERGY STAR benchmarks and supplies dealers and contractors across the country, from Alberta through the Prairies and the coast.
The Key to Fixing a Leaking Window Is Finding the Real Source
A leaking window is a tracing problem before it is a repair problem. Water reveals itself at the drip point but enters elsewhere, so the durable fix always begins by finding the true source, preserving the drainage the window was built to use, and addressing wet materials before they cause structural damage.
Treat sealant as a precise tool for a failed joint rather than a universal remedy, keep weep holes open, and reserve replacement for windows or openings that genuinely require it. Accurate diagnosis once is far cheaper than repeated repairs, and it is the difference between a leak that ends and one that returns with the next storm from the wrong direction.
Frequently Asked Questions
Is water on the inside of my window always a sign of a leak?
No. Water that forms on the interior glass in cold weather with no rain is condensation, a humidity issue rather than an intrusion. A true leak correlates with rain, appears at the frame or sill, and often tracks with wind from one direction. If moisture appears only when it is cold and dry outside, focus on indoor humidity and ventilation rather than sealing the window.
Can I just caulk around the window to stop the leak?
Only if a visibly failed perimeter bead is the actual entry point and only after completely removing the old sealant. Caulk applied over cracked sealant, over a flashing gap, or over a drainage opening usually traps water and makes the problem worse. If the source is inside the wall or at the flashing, caulk cannot reach it.
Why does my window leak only in heavy or wind-driven rain?
Wind-driven rain is pushed horizontally against the wall, creating a pressure difference that forces water past seals and drainage paths that handle vertical rain without issue. A leak that appears only during storms from one direction is a signal that the flashing, drainage, or installation is overwhelmed, not that the window is randomly defective.
Should I repair or replace a window that keeps leaking?
Repair when the frame is sound, the glass seal is intact, and the leak has a single reachable source. Lean toward replacement when leaks recur, the frame has warped or rotted, the insulated glass has failed, or the fault can only be reached by removing the unit. In that last case, replacement and repair require the same removal work, so replacement is often the better value.
Are weep holes supposed to let water in?
Weep holes let water out. They release the small amount of water that reaches the sill during a storm so it drains back to the exterior. They should be kept clear and never sealed. Blocking them, whether with debris or with caulk, causes water the window was designed to shed to accumulate and eventually move inward.
Who should I call when a window leak reaches the wall or floor below?
Water reaching the level below the window indicates a rough-opening waterproofing failure rather than a surface issue, and it generally requires removing the unit to correct. This is work for a qualified installer or building-envelope professional. A manufacturer or dealer can advise on whether a replacement unit is warranted once the source has been confirmed.
People Also Ask