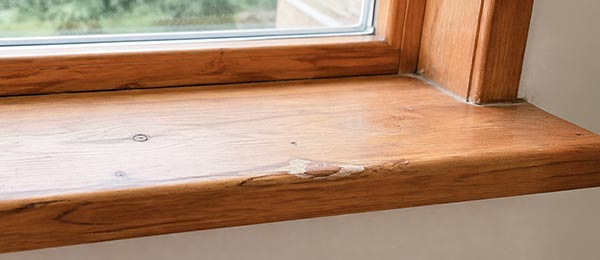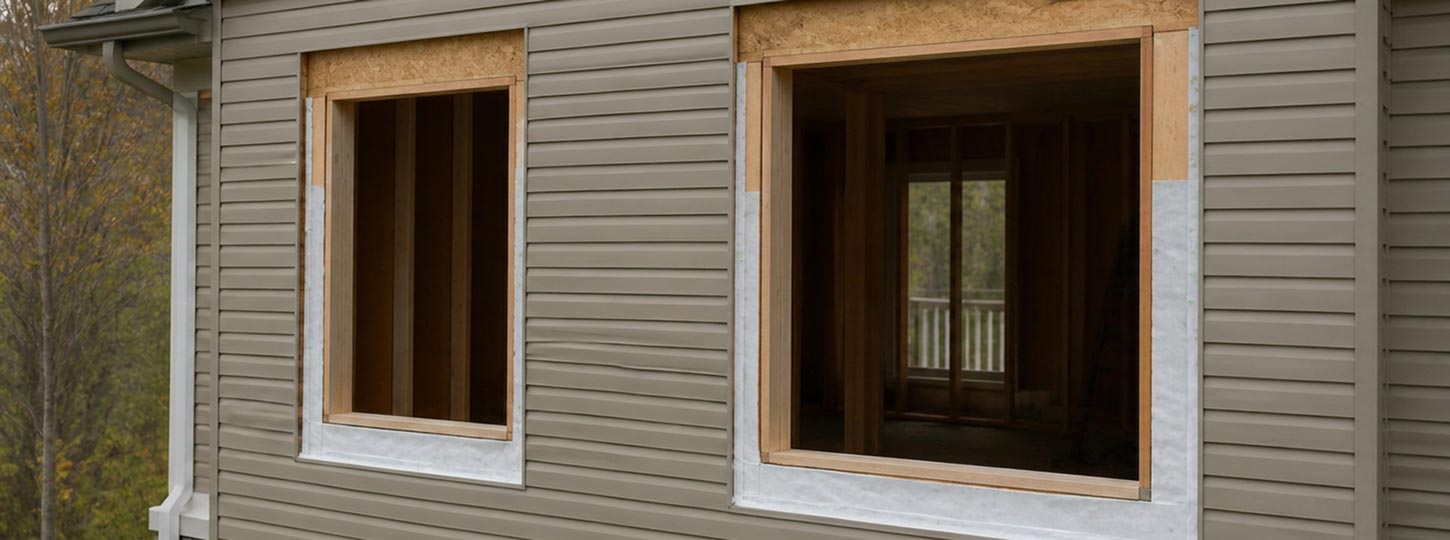


A window rough opening is the framed structural opening in a wall that receives the window unit, bounded by the header above, the rough sill below, and the jack studs on either side. It is built deliberately larger than the window frame so the unit can be positioned, shimmed square, insulated and sealed rather than wedged into place. The correct window size and installation clearance depend on the rough opening being accurately measured and prepared.
Window Force has verified rough opening dimensions and required clearances for custom orders since 2007, working from an 80,000 sq ft Ontario production facility, at a point when a measurement error is still cheap to fix. Units are built to order and installed through an authorized dealer network working on open framing and full-frame replacements across Canadian markets, so the same opening problems reach us from framing crews, retrofit installers and homeowners measuring their own walls. What follows reflects that verification work rather than a general framing overview.
Key Takeaways
- A rough opening is the framed structural opening in the wall, not the window frame and not the visible glass area.
- Nominal size, actual frame size, rough opening size, and daylight opening are four distinct numbers and are not interchangeable.
- A common planning allowance is about 1/2 to 3/4 inch of total additional width and height, but the manufacturer's specification always takes priority.
- That clearance exists for a reason: shimming, levelling, insulation and continuous air and water control all require space around the frame.
- Existing openings are rarely perfectly square, so width, height and both diagonals should be checked at several points and the smallest dimension recorded.
- An opening that is too small distorts the frame and binds the sash; an opening that is too large complicates fastening, sealing and finishing.
What Is a Window Rough Opening in Plain Language?
The rough opening is the framed opening in the wall prepared to receive the window unit. It is created during framing, before insulation, cladding and interior finishes are applied, and its dimensions are set by the structural members that surround it. Understanding what belongs to the opening and what belongs to the window is the first step in ordering the correct unit.
What Is Included in the Rough Opening?
The rough opening consists of the header at the top, the rough sill at the bottom, and the vertical framing on each side. It is measured from framing face to framing face, which means the number describes structural lumber rather than any finished surface. Exterior casing, brickmould, interior trim and drywall returns are all outside the opening and are never part of the measurement.
The opening also has to accommodate more than the window itself. Space is needed for shims, fasteners, insulation, sill protection and the sealing materials that connect the window to the wall assembly. When those allowances are not planned for, the installer is forced to compromise one of them on site.
Why Isn't the Window Installed Tight Against the Framing?
A window fitted tightly against framing has no capacity for adjustment. Framing can move with changes in moisture content and settlement, while existing openings are rarely perfectly uniform. Providing the specified installation clearance gives the installer room to adjust the unit without forcing the frame against the surrounding structure. The result can be a distorted frame, a binding sash, uneven weatherstripping, compression, and difficulty operating or locking the unit.
The perimeter gap also provides the space needed to maintain the building envelope around the window. Insulation, the air barrier and the water management layer all have to be continuous across the frame-to-framing joint, and that work requires physical access to the gap.
Windows Near Me
How Are Window Sizes and Rough Openings Different?
A common source of ordering errors is the assumption that a window has only one relevant size. In practice, a unit is described by several dimensions that serve different purposes, and confusing them produces either a window that does not fit or an opening with the wrong allowance. The distinction matters equally for new-construction windows and retrofit work.
Nominal Size
Nominal size is the rounded catalogue designation used for ordering, pricing and quick reference. It may be written in feet and inches or as a numeric code, and it is almost never the true measured dimension of the finished frame. Nominal size is a label, not a measurement.
Actual Frame Size
Actual frame size is the true outside dimension of the assembled frame, measured across the outer faces of the head, sill and jambs. This is the frame dimension used to compare with the rough opening to determine the required installation clearance. A deeper profile does not change frame width and height, but it does change how the unit sits within the wall thickness, which is why window jamb sizes are specified separately from face dimensions.
Frame depth also affects how the window sits within the wall assembly. The position of the frame and the quality of the perimeter insulation can influence thermal performance and the risk of condensation. Hotbox testing at the National Research Council of Canada showed that the further those two planes are displaced from one another, the lower the interior surface temperatures at the frame and the higher the risk of condensation, because the cavity between the frame and the rough opening provides less thermal resistance than the surrounding wall. Properly insulating the perimeter cavity can help reduce heat loss and the risk of condensation, but the available space is limited by the required installation clearance.
Rough Opening Size
Rough opening size is the framed dimension of the wall opening. For a typical installation, it is larger than the manufacturer's specified frame size by the installation clearance. On a well-prepared order, these three numbers appear together and are never left for the installer to infer.
| Dimension | What it describes | Where it is used |
| Nominal size | Rounded catalogue designation or product code | Quotes, price lists, initial specification |
| Actual frame size | True outside dimension of the assembled frame | Verifying fit and calculating clearance |
| Rough opening size | Framed wall opening, stud to stud and header to rough sill | Framing, site preparation, ordering |
| Visible glass area | Unobstructed glazing seen inside the sash | Daylight, egress calculations, appearance |
What Parts of the Wall Make Up a Window Rough Opening?
Three main framing elements define the rough opening: the header, the rough sill, and the king and jack studs. A homeowner does not need to frame a wall to benefit from recognizing them, but does need to know which member is being measured. What those members look like in practice varies from one market to the next. A window supplier in Oshawa measures a high share of openings framed between the 1950s and the 1970s, in which headers have deflected and sill plates have settled. In Saskatoon, prairie clay soils and deep frost movement leave their own signature at the sill. In Halifax, moisture at the rough sill is a recurring finding, and in Calgary, it is the framing movement that accompanies a wide annual temperature swing. Every market has its own version of the same three members, which is why the measurement is taken at the wall rather than assumed from the drawing.
Header
The header spans the top of the opening and carries the loads that would otherwise travel down through the removed studs, including roof, floor and wall loads from above. Its size is determined by the span and structural loads it must carry, not simply by the window dimensions. A header that has deflected over time will lower the effective opening height and reduce clearance at the window head.
Rough Sill
The rough sill forms the bottom of the opening and provides the structural base for supporting the window through the installation system and shims. It is the member most exposed to any water that gets past the exterior finish, which makes its condition an important part of the inspection during a full-frame replacement. Rot or crushing at the sill is common in older openings and must be corrected before a new unit is set.
King and Jack Studs
King studs run full height on each side of the opening and remain continuous from plate to plate. Jack studs, also called trimmer studs, are fastened to the king studs and support the ends of the header. The inside faces of the jack studs establish the rough opening width, so any bowing or twisting in these members directly affects the dimension available to the window.
How Much Larger Should a Rough Opening Be Than the Window?
There is no single universal allowance, and treating one as universal is a reliable way to create a fitting problem. A common planning allowance is about 1/2 to 3/4 inch of total additional width and height, although the exact requirement varies by product and installation method. The controlling number is always the one published for the specific product being installed.
Typical Installation Clearances
The table below shows how allowances commonly differ by installation scenario. These are reference figures for planning, not substitutes for a product specification.
| Installation scenario | Typical total added width | Typical total added height | Practical note |
| Flanged unit in new wood framing | 1/2 to 3/4 in. | 1/2 to 3/4 in. | Fin must lie flat on the sheathing |
| Full-frame replacement, wood framing | 1/2 to 3/4 in. | 1/2 to 3/4 in. | Confirm after old unit is removed |
| Masonry or brick-veneer opening | Product- and installation-specific | Confirm before ordering | Opening cannot be trimmed on site |
| Insert or retrofit into existing frame | Measured to the existing frame, not the framing | Measured to the existing frame, not the framing | Deduction is taken from frame interior |
Why Manufacturer Specifications Take Priority
Fastening method, flange geometry, sill design, and shim locations differ between product lines, and each of these variables affects the space the installer actually needs. A unit designed for direct attachment through the jambs does not need the same allowance as one with a nailing fin that must bear on the sheathing. When a published specification and a general rule of thumb disagree, the specification wins, and any warranty consideration assumes the specified installation was followed.
Why Does a Window Need Clearance Around the Frame?
The perimeter gap is working space, and each of its functions fails independently if that space is missing. Installation practice in Canada is set out in CSA A440.4, Window, door, and skylight installation, a National Standard of Canada that covers both new and replacement installations of factory-assembled units. That standard states plainly that improper installation can reduce a product's effectiveness and lead to excessive condensation, unacceptable levels of air, water and sound leakage, and deterioration of the wall systems into which the products are installed.
Shimming and Levelling
Shims are what convert an imperfect opening into a plane the window can sit in. They are placed at load-bearing points along the sill and at the jambs near hinges or balance hardware, and they allow the installer to bring the frame to level, plumb and square independently of the framing behind it. Without a gap, shims cannot be inserted, and the frame simply inherits every defect in the wall.
Insulation
The gap between frame and framing is a direct thermal bridge when left empty, and it cannot be insulated effectively if it is too narrow to accommodate insulation. The gap must be large enough to install the specified insulation or sealing material correctly without overfilling or distorting the frame. Oversized gaps create the opposite problem, since large voids are harder to fill uniformly and more likely to leave unfilled pockets behind the trim.
An under-insulated perimeter gap does not only cost energy. It lowers the surface temperature at the edge of the glass, where condensation first appears in a cold climate. Window Force extrudes its frames from lead-free uPVC with UV stabilizers compounded through the full profile wall. Our insulated glass units use a metal-free warm-edge spacer with a dual seal, so the edge zone is not bridged by a conductive metal profile that draws heat out of the unit. Combined with a correctly filled installation gap, that keeps the coldest part of the glass warmer and pushes the condensation threshold further down the temperature scale.
Air and Water Sealing
Air sealing and water management both happen in this perimeter zone. The interior side needs a continuous air seal to the frame, and the exterior side needs flashing and a drainage path to carry water over the cladding. Both layers require sufficient space to be installed and integrated correctly, which is why the manufacturer's specified clearance is an installation requirement rather than an arbitrary gap.
How Do You Measure the Width and Height of a Window Rough Opening?
Measuring a rough opening is a sequence, not a single reading. The goal is to establish the smallest usable dimension of the opening rather than the most convenient one, because the window has to pass through the tightest point.
Measure the Width
Identify the actual framing faces on both sides of the opening, removing or looking past interior and exterior trim as required. Measure the width at the top, at mid-height and near the sill, recording each reading separately. If the three numbers differ, the smallest one is the working width.
Measure the Height
Measure from the top of the rough sill to the underside of the header at the left side, the centre and the right side. Headers can deflect, and sills can settle, so the three readings frequently differ by an eighth of an inch or more in older homes. Again, the smallest reading governs.
Use Multiple Measurement Points
Single-point measurement is the most common field error and the least visible, because the number appears correct until the unit arrives. Take all three readings before calculating the allowable window size. Use the smallest measurement rather than an average.
Engineer Sergey Essipov, with 20 years of experience in window manufacturing, explains:
On production drawings we see the consequences of a single measurement more often than any other error. An opening that measures 36 inches at the head and 35 and five-eighths at the sill will still be ordered as 36 inches, and the installer then has to fight the sill to close the last three-eighths of an inch. Recording the smallest width and the smallest height costs nothing at the measuring stage and removes the problem before the unit is cut.
How Can You Check Whether a Rough Opening Is Square, Level, and Plumb?
Three geometric conditions determine whether a window can be installed without distortion. Level describes a true horizontal, plumb describes a true vertical, and square describes corners at ninety degrees. An opening can satisfy two of the three and still be unusable without correction.
Check the Sill for Level
Place a level on the rough sill and check across its full length rather than only at the centre. A sill that slopes into the building will direct any incidental water inward and complicates setting the unit at a consistent height. Minor deviation is corrected with shims; a sill that is visibly out of level over a short span usually indicates settlement or deterioration that should be addressed structurally.
Check the Sides for Plumb
Check each jack stud for plumb in both directions, since a stud can be vertical in one plane and leaning in the other. Twisted studs are particularly problematic because they present a non-planar surface to a rigid frame. Framing that cannot be brought into tolerance with normal shimming should be corrected before the window is ordered, not after it arrives.
Compare the Diagonals
Measuring both diagonals is the fastest reliable test for square. Equal diagonals are a practical indication that a rectangular opening is square, while a significant difference between the diagonals indicates that the opening is out of square. Natural Resources Canada lists windows and doors that no longer operate properly as one of the visible warning signs of structural or moisture problems in a wall, which is worth remembering when an existing opening measures poorly.
How Do You Read a Window Size Chart and Rough-Opening Measurement?
A manufacturer's size chart compresses several distinct pieces of information into one row, and reading it correctly removes most ordering ambiguity. Typical fields include the product code, nominal dimensions, actual frame dimensions, the required rough opening, frame depth, configuration and performance ratings. Across the full range of window types, the field structure remains consistent, even though the allowances themselves vary by product.
Example Window Size and Rough-Opening Chart
The following row set is illustrative and is shown to demonstrate the relationship between the fields, not to specify any particular product.
| Field | Example unit A | Example unit B |
| Product code | CL.SNGLSLIDER | US.CASEMENT |
| Nominal size | 36 in. x 48 in. | 24 in. x 48 in. |
| Actual frame size | 35 1/2 in. x 47 1/2 in. | 23 1/2 in. x 47 1/2 in. |
| Required rough opening | 36 in. x 48 in. | 24 in. x 48 in. |
| Frame depth | 3 1/4 in. | 4 9/16 in. |
| Configuration | Fixed left, operating right | Right-hand hinge, crank-operated |
Two points follow from the example. The rough opening exceeds the actual frame size by half an inch in each direction, and the nominal size matches the rough opening in this case, but it would not necessarily do so for another product. Single slider windows and casement units of the same nominal designation can carry different frame dimensions, so the actual frame column is the one to verify.
Because every unit is cut to the dimensions on the order rather than pulled from pre-built stock, the actual frame size on a Window Force chart is generated from the customer-submitted opening, not selected from a fixed inventory list. For new-construction projects where a slim sightline is the priority, the Ultraslim Series (4-9/16 inch frame depth) provides a different rough opening requirement than the Classic Series (3-1/4 inch frame depth) used in retrofit work, which is why series and configuration are confirmed on the order before any opening is measured to a published allowance. That removes the step where a homeowner has to find the nearest standard size and absorb the difference in shim space. It also means the clearance figure attached to an order belongs to that specific series and configuration.
Is the Rough Opening the Same for New Construction and Replacement Windows?
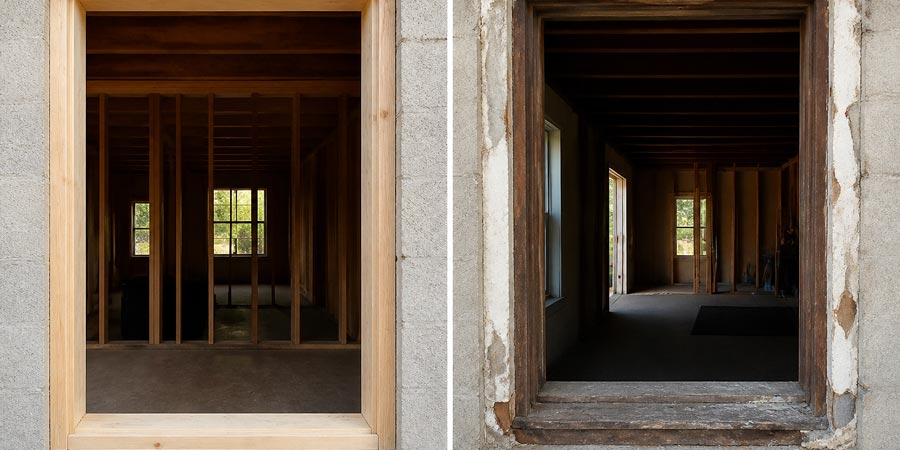
The rough opening exists in every installation, but it is not always visible or relevant to the order. What changes between methods is which surface the installer measures to and how much of the wall assembly is disturbed. For homeowners planning a full-frame replacement rather than new construction, the replacement windows guide covers the product considerations that follow after the rough opening is confirmed. Which method dominates depends on what is standing in a given market. A window manufacturer in Victoria quotes insert and full-frame retrofit far more often than new construction, because much of the housing there predates the current framing standards. In Edmonton, a large stock of 1970s and 1980s builds keeps full-frame replacement in steady demand. In Mississauga, active subdivision development generates a much higher share of flanged units set into open framing, and in Winnipeg both streams run in parallel across the same season. The method follows the building, not the map, so the ordering reference dimension is confirmed per project rather than assumed from the region.
| Factor | New construction | Full-frame replacement | Insert or retrofit |
| Structural opening exposed | Yes, framing is open | Yes, after the old unit is removed | No, existing frame stays |
| Ordering reference dimension | Rough opening or manufacturer's specified opening | Confirmed structural opening after removal | Existing frame dimensions |
| Attachment method | Nailing fin to sheathing or studs | Through jambs, or fin if cladding is opened | Fasteners into existing frame |
| Framing inspection possible | Full | Full | Limited |
| Finishes affected | None yet installed | Interior and exterior trim disturbed | Trim largely preserved |
| Resulting glass area | Maximum available | Maximum available | Slightly reduced |
New Construction
In new construction, the framing is open, the rough opening is measured directly, and the unit is attached before cladding is applied. This sequence gives the best access for flashing and air sealing because every layer can be installed in the correct order.
Full-Frame Replacement
Full-frame replacement removes the entire existing unit down to the structural opening. It provides the most direct access to the sill, header and surrounding framing for inspection and repair and it restores the full opening dimension rather than building inward. It also demands the most careful measurement, since the final rough opening is confirmed only after demolition.
Insert or Retrofit Replacement
An insert installation leaves the existing frame in place and fits the new unit inside it. Replacement windows installed this way preserve interior and exterior finishes and shorten the job, at the cost of a modest reduction in glass area and no opportunity to inspect the framing behind. It is the correct choice when the existing frame is sound, square and dry, and the wrong choice when it is not.
What Happens if a Window Rough Opening Is Too Small or Too Large?
Both errors are correctable, but they fail in opposite directions and carry different costs. The consequences are also progressive: an installation that is merely difficult on day one often becomes an air-leakage or operational complaint several seasons later.
Opening Too Small
A tight opening prevents the unit from being positioned and squared. Typical outcomes include:
- The frame is forced into place and bows, which throws the sash out of alignment
- Shims cannot be inserted where the hardware needs support
- Locking points and weatherstripping no longer compress evenly, producing drafts at specific corners
- Insulation and sealant cannot be applied to the required depth
- Sashes bind or fail to latch, often only in cold weather when materials contract
Opening Too Large
An oversized opening creates a different set of problems. Fasteners have to reach further to find sound framing, shim stacks become tall and unstable, and the insulation gap becomes difficult to fill uniformly. Exterior trim and interior returns may no longer cover the gap, requiring additional finishing material. Where the excess is significant, the correct remedy is to reframe the opening rather than compensate with fasteners and foam, because a window that is not properly bearing on the framing will not stay square under wind load.
Why Do Flashing and Insulation Matter Around the Rough Opening?
The rough opening is where the window stops being a product and starts being part of the wall. Three separate control layers meet at this joint, and each has to be continuous for the assembly to perform as designed. Exposure determines which part of the detail carries the load: a window company in Halifax prepares sill pans to resist wind-driven rain arriving horizontally, while the drier prairie exposure around Red Deer shifts the emphasis to freeze-thaw movement at the perimeter seal.
Sill Flashing
The sill is where water collects if anything upstream fails, so it is prepared before the unit is set. A sloped, sealed sill pan with upturned back and ends directs incidental water outward rather than into the framing. This detail is invisible after installation, which is precisely why it is skipped on poor installations.
Full-scale spray testing at the National Research Council of Canada compared window installations with and without a drainage route out of the rough opening. The best-performing details combined three features: a sill pan with watertight corners and a back dam, a drainage path behind the bottom flange, and a continuous interior air barrier. Together, these features improved drainage and limited water entry during severe wind-driven rain testing. The detail with no drainage path admitted water into the sill area even at modest driving pressures and, above roughly 300 Pa, could no longer drain it, causing it to accumulate on the rough sill.
Sill flashing handles water that gets behind the cladding, but water also has to leave the window itself. Common practice stops at drilling weep openings through the face of the sill; on our profiles, the drainage route is built into the multi-chamber extrusion, so collected water is carried through the frame and released outward above the sill pan instead of standing in a chamber. When the pan and frame drainage are coordinated during installation, the sill no longer becomes the component where deterioration starts.
Low-Expansion Insulation
The frame-to-framing gap is insulated with a product formulated for windows and doors. Natural Resources Canada, in the wall insulation section of its Keeping the Heat In guide, instructs renovators to seal cracks around window and door frames with a non-expanding polyurethane foam sealant, or alternatively to fill the gap with insulation or with backer rod and caulking. High-expansion products are unsuitable because their expansion pressure can bow a vinyl jamb inward and take the sash out of adjustment.
Continuous Air and Moisture Control
The interior air and vapour control layer must be carried across the opening and sealed to the window frame, and the exterior water-resistive barrier must be lapped so that water always drains outward and downward. Insulation alone does not stop air movement, and a gap that is filled with foam but not sealed on its interior face will still allow moisture-laden air to reach cold surfaces inside the assembly.
What Rough-Opening Measurement Mistakes Should Homeowners Avoid?
Most rough-opening problems trace back to a small number of repeated errors, all of which occur before any product is manufactured. Reviewing them takes minutes and prevents the kind of fitting issue that cannot be resolved on installation day.
Rough-Opening Measurement Checklist
- Measuring exterior casing, brickmould or interior trim instead of the structural opening
- Taking a single reading for width or height rather than three
- Assuming the opening is square without checking both diagonals
- Treating nominal size as if it were the actual frame size
- Ordering a unit equal to the rough opening, leaving no installation clearance
- Failing to confirm the manufacturer's required tolerance for the specific product and series
- Ignoring frame depth and wall thickness, which determine whether a jamb extension is required
A clean set of measurements also matters after the job is finished, because a window warranty is written on the assumption that the unit was installed within the published tolerances and was never forced into an undersized opening.
The practical answer to tolerance risk is documentation at both ends of the job. Window Force manufactures the unit and publishes the rough opening it requires, and installation is carried out by authorized dealers working to that same figure, which keeps the opening and the product inside one traceable chain rather than split between parties who never spoke. Units are CSA-certified and meet ENERGY STAR® requirements across Canadian climate zones, and coverage comes with a 25-year transferable warranty that stays with the house if it changes hands. A fitting question raised years later can therefore be checked against a specification recorded before the window was built.
Engineer Sergey Essipov, with 20 years of experience in window manufacturing, notes:
A frame is only as square as the opening lets it be, and the corners are where that stress concentrates. At our facility, corners are fusion-welded so the head, sill, and jambs bond into one continuous mass rather than relying on mechanical fasteners at the mitre. It matters most when a unit is ordered to the exact rough-opening dimensions and there is nowhere to put a shim: the frame gets fastened against framing that is not plumb, and a mechanically joined corner opens up long before a welded one does. Leave the specified clearance and let the shims carry the correction, not the corner.
Conclusion: What Should You Remember About Window Rough Openings Before Ordering?
Before ordering a window, confirm the rough opening dimensions, the actual frame size, and the manufacturer-required installation clearance. Measure the opening at multiple points and check both diagonals to identify any variations that could affect the installation.
If the opening does not meet the manufacturer's requirements, correct the framing before the window goes into production. Accurate measurements and the correct installation clearance give the installer the space needed to position, level, square, insulate and seal the window properly.
Frequently Asked Questions
Is the rough opening the same as the window size?
No. The rough opening is the framed wall opening, while the window's actual frame size refers to the unit's outside dimensions. The rough opening is always larger than the actual frame size by the specified installation clearance.
How much larger should the rough opening be than the window?
A common range is roughly 1/2 to 3/4 inch of total added width and height, with many residential wood-framed installations using about 1/2 inch. The figure varies by product line, attachment method and wall type, so the manufacturer's published requirement is the number to follow.
Can I measure a rough opening without removing the trim?
Not reliably. Interior and exterior trim conceal the framing faces that define the opening, and measuring to the trim produces a dimension that is smaller or larger than the real one. In an existing wall, the opening is accurately confirmed only after the old unit and trim are removed.
What should I do if the opening is out of square?
Minor deviation is normally corrected with shims during installation. If the diagonals differ enough that shimming cannot bring the frame into square without leaving unsupported gaps, the framing itself should be corrected before the window is ordered, since the finished dimensions may change.
Does a larger rough opening make installation easier?
Only up to a point. Excess clearance makes fastening less secure, produces shim stacks that are difficult to keep stable, complicates uniform insulation and may leave gaps that the trim cannot cover. Correct clearance is a specified range, not a minimum.
Who is responsible for the rough opening, the manufacturer or the installer?
The manufacturer publishes the required rough opening for each product, and the party preparing the wall is responsible for delivering an opening that matches it within tolerance and is square, level and plumb. For replacement projects, that measurement should be confirmed on-site before the order is released to production.
People Also Ask