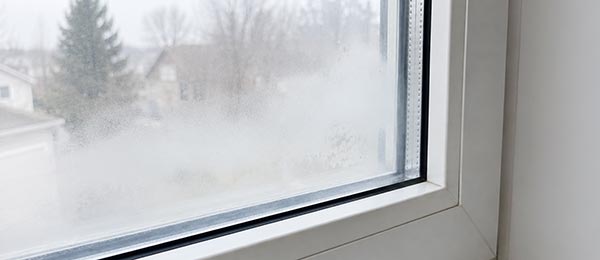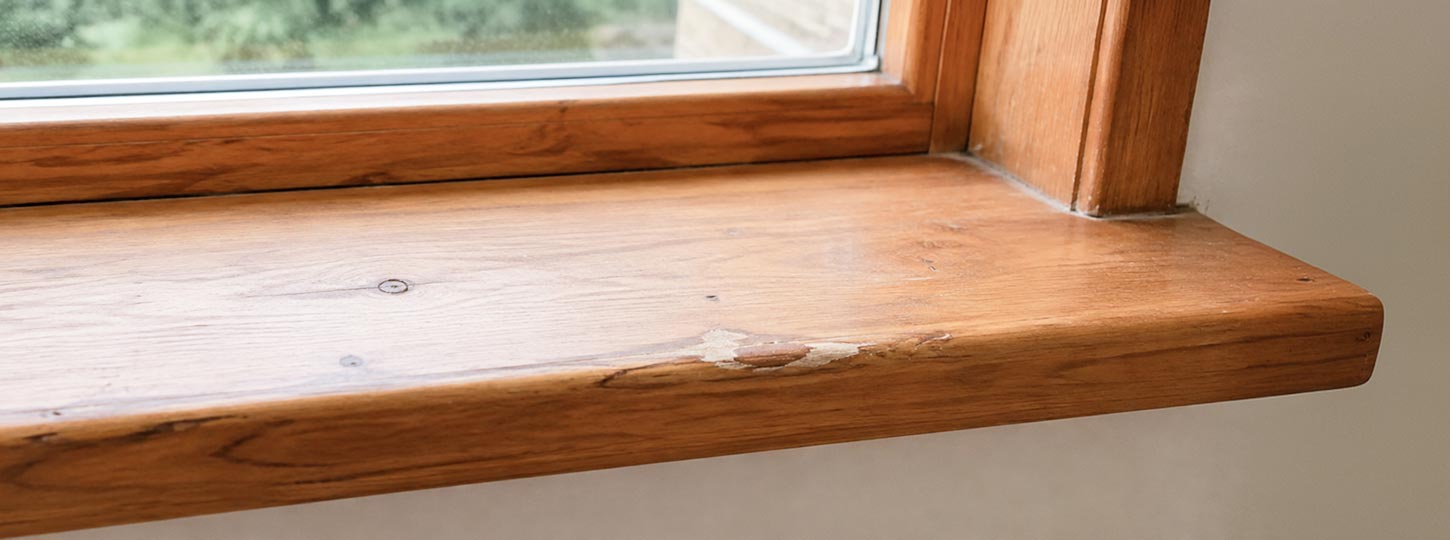


A soft corner at the bottom of a wood window rarely means the whole window has failed, but it always means water has been sitting where it should have drained away. Whether you can consolidate and paint the sill, splice in new wood, or cut it out entirely depends on how deep the decay runs and whether you've stopped the leak behind it. This guide explains how to tell the difference before you spend money on the wrong repair.
Every custom window Window Force builds starts with a measured opening, and that measurement often reveals a soft sill or a wet, rough sill. Through our authorized dealer network, we see firsthand how the condition of the wood below the window determines whether an order proceeds as a straightforward retrofit, waits for a carpenter to rebuild the sill, or becomes a full-frame replacement. Building windows since 2007 at our 80,000 sq ft Ontario plant has made one pattern clear: a window is only as durable as the opening it is set into, which is why this guide follows the same sequence our dealers use on site, diagnosing the sill, fixing the water and only then choosing between repair and replacement.
Key Takeaways
- Window sill repair restores the horizontal board at the bottom of the window when the jambs and the sash are still sound; it does not fix the sash, the glass or a rotten rough opening.
- A screwdriver or awl test at the corners, along the nosing and through intact paint separates a local soft spot from decay that has moved into the jambs or the framing.
- Filler and epoxy work only on small, dry, shallow damage, while wood that crumbles under the tool needs a splice or a new board.
- The repair bill depends on how much wood is gone, how much trim has to come off, access, the replacement material, and whether the rough sill and flashing are wet.
- Sill rot is a water problem first, so no patch lasts on a sill that still holds water, has lost its slope or has a blocked drip edge.
- Once decay reaches the jamb ends or the rough opening, the work becomes a sill replacement or a new window, not a repair.
What Does Window Sill Repair Actually Fix?
Window sill repair rebuilds or consolidates the horizontal board at the bottom of a window, used when the jambs on either side and the sash above are still sound. It restores the part of the frame that carries water away from the wall, and in most cases the work is local: decayed fibres are removed or hardened, the original profile is rebuilt, and the surface is sealed again with primer and paint.
Two different pieces share the name "sill", and confusing them leads to the wrong repair. The exterior sill is the sloped board on the outside of the window that carries rain past the wall below, usually with a projecting nosing and a drip groove cut into its underside. The interior piece, correctly called the stool, is the flat shelf inside the room, with the apron trim fixed beneath it. Below both sits the rough sill, the horizontal framing member of the wall opening, which is part of the house structure rather than the window. The exterior sill does the weather work and takes most of the decay, while the stool usually shows the consequences as staining or swelling.
The scope of the work matters as much as its location. Sill repair does not replace a sash that no longer closes, restore a fogged or cracked insulated glass unit, or correct a rough opening where the framing lumber has started to rot. If any of those conditions is present, a sill repair may still form part of the job, but it will not be the whole job. The practical first step is therefore to identify which piece is damaged and where the decay began, because that answer determines whether the work is done from a ladder outside or from inside the room.
Windows Near Me
When Is the Sill the Only Part That Has Failed?
The sill alone has failed when the softness is confined to the board itself, the jambs are firm, and the sash still closes and locks without force. Paint hides decay well, so assess it by probing rather than looking. A flat screwdriver or an awl pressed in with firm hand pressure barely marks sound wood, whereas decayed wood lets the tip sink in easily and comes away in short, fibrous pieces instead of a clean splinter when you lever the tool out.
The test belongs at the points where water collects, not only where the paint looks worst:
- Both corners, where the sill meets the jambs and end grain absorbs water fastest
- The nosing and the underside of its projecting edge, around the drip groove
- The middle of the board, through paint that still looks intact
- The bottom of each jamb, a few centimetres above the sill
- The interior stool, at the corners nearest the glass
A small soft area at one corner or along the nosing, firm jambs and a sash that seats square in the frame make the case for saving the board. Swollen interior casing, a sash that binds or will not sit square, or softness that continues past the sill into the jamb or the framing below it indicates a different repair scope, because the question is no longer how to fill the sill but how long the window and the wall around it have been taking on water. A homeowner comparing assessments from carpenters and window replacement companies should ask each of them to show exactly where the probe went in and what it found, since that evidence, not the appearance of the paint, is what separates a repair from a replacement.
What Do You Gain and Give Up by Filling a Sill Instead of Cutting In a New Board?
The three repair levels differ in how much original material they keep and how much of the surrounding assembly they expose. None work on wet wood, and none correct a missing flashing on their own.
| Repair option | What stays in place | What must still be dry and flashed | When it fails |
| Filler or epoxy patch | The whole sill board, its profile, the jambs and all trim | The wood around the patch must be dry, and the existing flashing and drainage must already work | Decay deeper than the patch, wood that crumbles under the tool, a nosing that carries load |
| Wood splice or new nosing | The main body of the sill, the jambs and most trim; only the damaged section is cut out | The cut-back wood and the glue line must be dry, and the joint must be angled so water runs off it | Decay through the full thickness of the board or into the jamb ends |
| Full sill board | The jambs, sash and glass; trim and sometimes cladding are removed and refitted | The rough sill and the flashing beneath it must be dry and sound before the new board goes in | A soft rough opening or decayed framing below the sill |
The patch keeps the most original material and disturbs nothing around the window, but it relies entirely on the remaining wood. Filler on wood that crumbles under a screwdriver will not reliably carry the nosing, because the bond is only as strong as the fibres it grips, and seasonal movement can cause the repair to crack or break away. A splice costs more labour but places new, solid wood at the weakest point, which is why it is the usual answer when only the nosing or one end of the sill is gone. A full board is the only option of the three that lets you inspect and correct the rough sill and its flashing, so it remains when the rot is deep.
A splice, often called a Dutchman, lasts longest when its joints are cut at an angle that sheds water outward and away from the window instead of holding it in the seam, and when you glue it with a waterproof exterior adhesive such as epoxy. Use a decay-resistant species, such as western red cedar or white oak, or match the original sill species, and prime every face, including the hidden ones, before installation.
Follow the probe test rather than visible damage. When the tool sinks in across a large part of the board instead of one corner, the patch is already off the table, and the realistic comparison is between a splice and a new board.
What Drives Window Sill Repair Cost?
Window sill repair cost depends less on materials than on how much of the surrounding assembly you have to disturb to reach sound wood. Two sills with identical surface damage can lead to very different bills once the trim comes off and the condition underneath is known. The main factors are the following:
- How much wood is gone: A shallow soft spot needs consolidation and filling, a lost nosing needs a splice, and decay through the thickness needs a new board.
- Whether the casing has to come off: Removing and refitting the interior stool and apron, the exterior brickmould, or a strip of cladding adds labour that the visible damage does not reveal.
- Interior access versus an exterior ladder: A ground-floor sill reachable from inside costs less to work on than a second-storey sill that needs a ladder or scaffold and suitable weather.
- Wood versus a rot-proof board: A matched wood species must be primed on all faces and painted, while a cellular PVC or composite board costs more as material but eliminates future repainting during maintenance.
- Whether the rough sill or the flashing is wet: This factor changes the scope most, because a wet rough opening adds drying time, framing repair and a new flashing membrane before any visible work begins.
Because sill work is mostly labour, its price follows the wider renovation market rather than material costs. Statistics Canada reports that prices for homeowners' maintenance and repairs rose 19.2% between September 2018 and September 2024, while the composite of its Residential Renovation Price Index for contractor work increased by 55.4% between the second quarters of 2018 and 2024. The same analysis, drawing on the 2022 Canadian Housing Survey, found that 7.3% of households lived in housing in need of major repairs and 24.0% needed minor repairs, underscoring how much deferred repair work Canadian housing already carries. Labour rates also differ by region, so a homeowner comparing a carpenter's estimate with a quote from a window supplier in Ontario or any other province should compare the scope line by line, not the totals.
How Does Rotted Window Sill Repair Proceed Once the Wood Is Dry?
Rotted window sill repair generally follows the same sequence, because each step depends on the one before it: stop the water, let the wood dry, cut or scrape back to solid wood, treat or consolidate what remains, fill or splice, then prime and paint. Two limits apply throughout. Never fill wood that is still wet, and never leave a patch standing proud of the drip edge, where it would hold water against the joint it was meant to protect.
Drying and Cutting Back to Solid Wood
Correct the water source before touching any wood, whether it is a failed caulk joint, a blocked drip groove, or missing flashing, because otherwise the drying stage never finishes. Then remove loose and blistered paint so the exposed wood can release moisture, and protect the opening from rain while it dries. Drying time depends heavily on climate and exposure: in the dry continental summers that a window manufacturer in Alberta designs for, an exposed sill dries far faster than a shaded north-facing sill in a humid coastal autumn. A pin-type moisture meter can help confirm that the repaired area has dried to a moisture level comparable with sound wood elsewhere on the same window.
Older sills need one precaution before any scraping or sanding. Health Canada advises that a home built before 1960 probably contains lead-based paint, and that exterior paint on homes built between 1960 and 1990 may contain it as well. On those windows, do not remove the paint with a power sander, heat gun, or blowlamp, because they create toxic dust and fumes. A brush-on chemical stripper, plastic sheeting under the work area, goggles, gloves and a good-quality mask, and a thorough clean-up at the end of each day are the safer approach, and children and pregnant women should stay away from the work. Wet, decayed wood can also carry mould, so the same protection makes sense when you open up an old sill.
Cutting back means removing decayed wood with a chisel, scraper or oscillating tool until every surface of the cavity is firm, with clean, sound edges that a filler or a splice can bond to.
Engineer Sergey Essipov, with 20 years of experience in window manufacturing, explains:
The most common failure in a patched sill is not the filler; it is what was left under it. Digging should stop exactly where the tool hits firm wood, and not a moment before. If the remaining wood is still damp and punky, so soft that it cannot hold a screw or carry a paint film, no filler skimmed over it will stay bonded through a Canadian winter. It simply seals the moisture in, and the decay carries on underneath the new surface.
Filling, Priming, and Painting
Once the cavity is dry and sound, the work rebuilds the profile and restores the protective finish in a set sequence:
When Is Window Sill Replacement the Better Job?
Window sill replacement becomes the better job when the board can no longer support a durable repair. The clearest signs are rot that runs through the full thickness of the sill, a nosing that has broken or fallen away, jamb ends that are soft where the sill is notched into them, and a board carrying several earlier patches with fresh decay between them. In each case, filling or splicing would leave too little original wood to hold the repair.
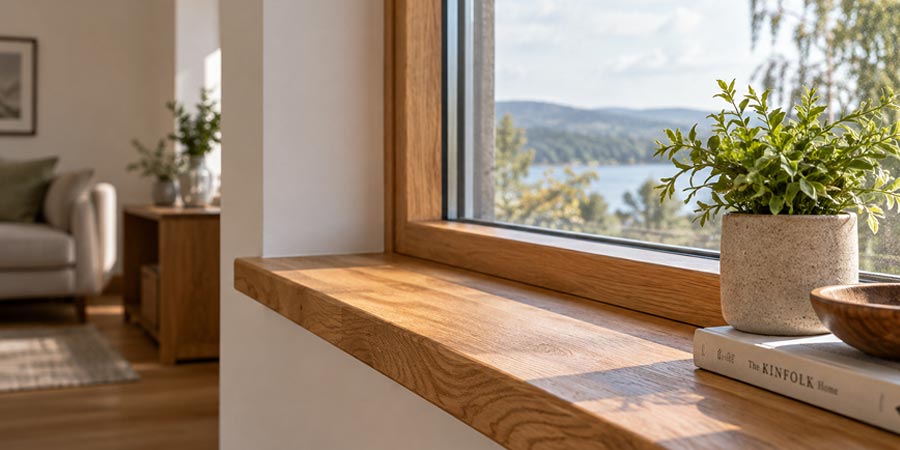
A new sill board is not the same job as a new window. The sash, glass, and jambs stay where they are; only the bottom frame member is cut out and rebuilt, keeping the original window in service and leaving the interior finishes largely undisturbed.
How to Replace a Window Sill When the Window Stays
The sequence for how to replace a window sill in a window that will remain in service is short, although each step needs care to avoid damaging the jambs:
When the Sash and the Rough Opening Have to Come Out
When decay has reached the jambs and the framing, or the sash no longer fits the frame, a new sill treats only one member of a failed assembly. A replacement window, with its own factory-made sill, is the better job in that situation, because the opening is fully exposed, the rough framing can be inspected and repaired, and new flashing is installed before the unit is set. The approach is covered in more detail in the Window Force guide to replacing a window.
Engineer Sergey Essipov, with 20 years of experience in window manufacturing, notes:
When we measure an opening for a replacement, the rough sill gets looked at before the old window does. A frame built to the measured opening drains wherever the sill underneath sends the water, whatever the frame is made of, so a soft or out-of-slope rough sill has to be corrected first. Our dealers probe the sill and the bottom of each jamb when they measure, and what they find decides the scope. A dry, sloped and flashed opening lets a vinyl frame do its job; a wet one means the carpenter comes before the window does.
At this point, window replacement cost depends on the size of the unit, the frame material and the installation method rather than on the condition of a single board. Vinyl windows, including casement, awning, sliding and double-hung units, use vinyl frame components that are not susceptible to wood rot, although the opening beneath the window still needs correct flashing and drainage. Window Force builds custom vinyl windows to the measured opening from lead-free uPVC with UV stabilizers in multi-chamber profiles, with a dual-seal, metal-free warm-edge spacer in every sealed glass unit. They are CSA certified, and Window Force is an ENERGY STAR Partner whose windows are engineered to meet ENERGY STAR requirements. They are backed by a 25-year transferable warranty.
What Does Window Sill Rot Reveal About Trapped Water?
Window sill rot is the visible end of a moisture problem, not a wood defect. The most frequent causes are a failed caulk joint at the sill ends, a sill that has lost its slope or was installed level, missing flashing under the sill, and cladding or trim that holds water against end grain instead of letting it drain.
The Canadian Wood Council explains that wood-rotting fungi need wood as food, a fairly constant temperature, oxygen, and water, and that water is normally the only factor a building owner can easily control. The same source notes that once decay starts, the fungi produce water as part of the process, so a rotting sill tends to keep itself wet. This is why drying and correcting the leak always come before any repair, and why decay that seems to have appeared suddenly has usually been developing for several seasons.
Opening the wood shows how long water has been present. Typical findings include dark end grain at the corners where the sill meets the jambs, a soft corner beneath paint that still looks sound, and staining on the interior stool, usually at the corner nearest the leak. Climate changes how quickly this develops: on the coast, where a window supplier in British Columbia works with long periods of wind-driven rain, a sill with poor slope may never dry between storms, while in colder inland regions the same trapped water freezes and opens the joints further each winter.
Treating the visible rot without tracing the water path can leave the underlying problem unresolved. The inspection should therefore follow the water path upward, from the sill ends to the jamb caulking and the head flashing above the window.
How Does Exterior Window Sill Repair Differ From Work on the Inside?
Exterior window sill repair deals with the board that sheds rain, so its purpose is to restore the geometry that moves water away from the wall. The interior stool rarely sees rain; it mostly shows damage, so inside work is as much about diagnosis as repair.
| Feature | Exterior sill | Interior stool |
| Main function | Sheds rain and snowmelt past the wall below | Finishes the opening and forms a shelf inside the room |
| Typical damage | Decay at the corners and nosing, failed paint, cracks | Staining, swelling, lifted finish, loose apron |
| What the repair must restore | Slope, drip groove, flashing and a continuous paint film | A sound surface and finish, after the moisture source is confirmed |
| Usual access | Outside, often from a ladder | Inside the room |
What the Outside Board Has to Shed
An exterior sill only lasts when every element of its water-shedding detail works together. The board needs a clear slope away from the window, a nosing that projects beyond the wall surface, and a drip groove under that nosing so water falls clear instead of running back along the underside. Beneath it, a flashing membrane over the rough sill catches any water that passes the sill joints and directs it outside. The final layer is paint that covers every face, including the end grain at the jambs, which absorbs water far faster than the board face. Where the sill meets exterior casings or cladding, the joint must allow drainage rather than trap water at the corners.
A conventional wood window joins its sill to the jambs with a notch, placing exposed end grain exactly where water collects. Window Force fusion-welds each frame corner, melting the sill and jamb profiles into one continuous piece, so the lowest corners form a continuous welded joint rather than a mechanically joined seam. The welded joint also holds the frame square while the installer shims and fastens it, which keeps the sash pressing evenly on its weatherstripping along the full length of the sill.
What Changes With Interior Window Sill Repair
Interior window sill repair usually concerns the stool and the apron below it. Damage here comes from three sources: condensation running down the glass in cold weather, water from plants or cleaning, and a leak that started outside and travelled through the frame. The stain's location and timing identify the source. Darkening along the back edge or at the corners that grows after rain points to an exterior leak, whereas a uniform band along the glass that appears on cold mornings points to condensation. When the cause is outside, repair the exterior first, then sand, fill, or replace the stool; a swollen MDF stool can't be sanded back and must be replaced.
What Will a Window Sill Repair Kit Not Fix?
A typical window sill repair kit combines a penetrating consolidant and a two-part filler, and it is designed for one situation: a small, dry, non-structural soft spot that can be hardened and rebuilt in place. Used within that scope, it is an effective repair that preserves the original board.
A kit cannot replace what is missing from the assembly. It does not supply:
- A new sill profile or nosing where the original has broken away
- Flashing under the sill, or a sill pan where none was installed
- A dry rough opening when the framing below is wet or decayed
- A sound jamb end where the sill is notched into soft wood
Product choice matters as well. A polyester body filler made for car bodywork is sometimes used on wood, but it cures rigid and does not move with the board as moisture and temperature change, so on an exterior sill it can crack along the bond line and trap moisture behind a hard shell. Epoxy systems and exterior wood fillers are the safer choice. Application temperatures, cure times and primer compatibility also differ between products, which is why the instructions for the specific kit in hand take priority over steps published for any other brand.

What About Concrete, Stone and Vinyl Window Sills?
Not every sill is wood. Many brick houses in Ontario and across Canada have a concrete, cast stone or natural stone sill below the window, set into the masonry rather than forming part of the window frame. These sills do not rot, but they crack, spall when water freezes in their pores, and lose their slope as the surrounding masonry settles. Hairline cracks can be cleaned and sealed, and small spalls patched with a repair mortar suited to the material, while a sill that is broken through, has lost its slope or lets water into the wall below usually has to be replaced by a mason. The joint between the window frame and the masonry sill is closed with exterior sealant, and that joint, rather than the stone itself, is where many leaks start.
Vinyl and aluminum windows have their own sill, formed as part of the frame. They can't rot, but they can still fail to drain. Water that enters the sill track is meant to leave through weep holes in the exterior face of the frame, and when dirt, insects or paint block them, water backs up and can spill over the interior edge of the sill. Clearing the weep holes is routine maintenance. A cracked frame corner, a sill that slopes toward the room, or water appearing on the wall below the window after rain points to an installation or flashing problem, which calls for the installer or the manufacturer rather than a filler.
Which Mistakes Make the Same Sill Rot Again?
A sill that rots again within a few seasons usually points to a moisture-management problem that the first repair didn't correct. The National Park Service recommends identifying and eliminating sources of moisture penetration before repairing deteriorated wood, and notes that repaired sill surfaces should be sloped to carry water away rather than allow it to puddle. For suitable areas of deteriorated wood, the guidance also describes consolidation with semi-rigid epoxy followed by an epoxy patching compound. Each of the following mistakes undermines one of those conditions:
- Painting wet wood: The paint film traps moisture inside the board, and the finish blisters and peels while decay continues beneath it.
- Bridging the drip with caulk: A bead of sealant run across the drip groove lets water travel back under the nosing and into the wall.
- Skipping the flashing: Without a membrane over the rough sill, any water that passes the sill joints reaches the framing directly.
- Filling past the point where a screw would hold: Filler placed over wood too soft to grip a fastener has nothing to bond to and lets go with the first seasonal movement.
- Cladding over soft wood: Aluminum capping or vinyl wrap installed over a decayed sill hides the problem and holds water against the wood.
These mistakes leave the underlying moisture problem unresolved and can lead to renewed decay.
Who Should Hire a Carpenter, and Who Can Stop at a Patch?
A small, dry soft spot can be consolidated, filled and painted by a careful homeowner, provided the water path has been fixed first. A sill that is rotten through its thickness, soft at the jamb ends or sitting on a soft rough opening needs a carpenter for a new sill board, or a new window when the frame and framing have also failed.
Before hiring, weigh three things: how the sill is reached, how much casing and trim must come off, and whether the leak has already been found and solved. A contractor who probes the sill, checks the jambs and traces the water path before quoting will recommend the repair the opening actually needs, whether that is a patch, a new board or a new window.
Conclusion: When to Repair the Sill, Replace It or Replace the Window
A rotted window sill does not automatically mean the window needs to be replaced. The decision depends on whether the damage remains limited to the sill or has spread into the surrounding assembly.
The most important step is to find and stop the water before repairing the wood. Once you've checked the sill, jambs, and rough opening, the right solution becomes much clearer: patch what is still sound, replace what is beyond repair, and replace the window only when the damage extends beyond the sill.
Frequently Asked Questions
Can you paint over a soft window sill?
No. Paint applied over decayed or damp wood seals moisture inside the board, so the decay continues, and the finish fails early. Remove or consolidate the soft wood, correct the water source, and dry the wood before priming and painting.
How long does a window sill repair last?
Service life depends more on moisture control and the condition of the remaining wood than on the filler itself. A properly repaired and maintained sill can remain durable, while unresolved water intrusion can cause the repair to fail within a few seasons.
Can a rotted sill be repaired in winter?
Exterior repairs are best done in dry weather above the minimum application temperature listed on the epoxy or filler product. In winter, you can temporarily protect the opening and schedule the permanent repair once the wood has dried and temperatures allow the materials to cure.
Is a PVC or composite sill board better than wood?
A cellular PVC or composite board doesn't rot and needs no repainting, making it a practical choice for exposed sills. It still requires the correct slope, a drip edge, and flashing beneath it, and PVC in particular moves more with temperature than wood, so long sills need room to expand.
Does a rotten sill mean I need new windows?
Not necessarily. When the jambs are firm, the sash closes properly, and the rough opening is sound, you can repair or replace the sill on its own. A new window becomes the better option when decay has spread into the jambs, the sash or the framing around the opening.
Can I replace only the interior stool?
Yes, if the exterior sill and the frame are sound and the damage on the stool came from condensation or interior water. If the staining came from an exterior leak, you must repair the outside first, or the new stool will stain and swell in the same place.
People Also Ask