


Common causes of window drafts include failed seals, sash misalignment, and air leaks between the frame and the wall. Some can be corrected without removing the window, but the appropriate repair depends on where the air is entering. Each leakage path requires a different repair, so identifying the source comes first.
Window Force has built every unit to order since 2007 at our 80,000 sq ft Ontario production facility, rather than pulling from pre-built stock, so the sealing system, hardware, and frame geometry for each window are specified for one opening in one house. Across those orders, and through an authorized dealer network that handles installation from British Columbia to Nova Scotia, we see which part of a window actually starts leaking first, and how often a reported draft turns out not to involve the window at all. The diagnostic sequence in this guide follows that pattern: it separates seal failure, hardware drift, and rough opening leakage because those are the three things that come back on service reports.
Key Takeaways
- Weatherstripping seals moving joints between sash and frame, while caulking seals fixed joints such as trim to wall and frame to wall. Using one where the other belongs is the most common failed repair.
- A draft felt at the edge of an operable sash points to the seal, the hardware, or the closing pressure. A draft felt at the trim or the outer frame points to the rough opening.
- Air leakage in a dwelling tends to increase gradually as the building ages, which is why a window sealed well for fifteen years can begin to leak without any visible damage.
- Cold glass can feel like a draft even when the window is airtight.
- Condensation or fogging does not by itself indicate an air leak.
- Sealing a window that serves as an emergency escape route is never an acceptable draft fix.
Why Do Windows Become Drafty in the First Place?
A window is an assembly of moving parts, elastomeric seals, and sealed joints, and each element ages on its own schedule. Drafts appear when one of them stops performing, not when the window as a whole fails. Separating the failure modes matters because each one responds to a different repair.
Worn Seals
Every operable window relies on weatherstripping to close the gap between the sash and the frame. Compression gaskets made from thermoplastic elastomer or EPDM lose their recovery over time, a behaviour known as compression set, where the material stays flattened instead of springing back after the sash is opened. Pile seals in sliding and hung units mat down, lose their fin, and allow air to track along the channel. Neither failure is dramatic, and both are often mistaken for a frame problem.
Installation Gaps
The space between the window frame and the rough opening is a separate air barrier from the window itself. If that cavity was filled with loose fibreglass and no sealant, or if the interior air seal was never completed behind the casing, outdoor air can move through the wall cavity and emerge at the trim. The window can be in perfect condition, and the room will still feel cold at the perimeter.
Frame and Hardware Problems
Hinges, operators, rollers, and locks all determine how firmly the sash is pulled against its seal. When a friction stay wears, or a multi-point lock falls out of adjustment, the sash sits a few millimetres off its intended position, and the gasket never reaches full compression. Frames can also distort, particularly older units in openings that have moved with the structure, and a bowed jamb will leave a gap that no amount of new weatherstripping will close.
Windows Near Me
How Can You Find the Exact Source of a Window Draft?
Choosing repair materials before locating the leak can turn a simple one-hour repair into a recurring problem. The sequence below isolates the leakage path first, then identifies the right remedy. Work on a cold or windy day, when pressure differences across the envelope are largest, and leaks are easiest to detect.
Check the Sash
Slide a strip of paper into the closed joint and pull it out. Similar resistance around the perimeter suggests that the sash is making reasonably consistent contact with the seal. If the paper slides out freely at one corner and grips at the opposite one, the sash is closing on an angle, and the problem is geometric rather than material.
Inspect the Frame Perimeter
Run the smoke source slowly along the inside edge of the casing. Movement here suggests the leak is behind the trim, in the rough opening, and not at the window. Note the exact location before opening anything up, since the leak is often concentrated at the head or at one jamb rather than distributed evenly.
Look for Alignment Problems
Measure the reveal, meaning the visible gap between the sash edge and the frame, at the top and at the bottom of the unit. A noticeable difference between the top and bottom reveals can indicate sash sag, worn hinges, or hardware that has drifted out of adjustment.
How Do You Fix Drafty Windows With Worn Weatherstripping?
Weatherstripping is the only seal designed to work at a joint that opens and closes, and replacing it is one of the most effective repairs when a worn or compressed seal causes the draft. The federal retrofit guidance describes weatherstripping in flat strip, tube, and V profiles, working either under compression or by sliding along the joint, which helps you match a replacement to the window in front of you.
Compression Weatherstripping
Casement, awning, and tilt-and-turn units, among the full range of window types available, close against a continuous gasket that is compressed when the lock draws the sash inward. Remove a short section of the old material and take it to the supplier rather than guessing dimensions, because the backing width, bulb height, and kerf thickness all have to match. Pull the old gasket out of its groove, clean the channel of dirt and old adhesive, and press the new material in without stretching it. A stretched gasket retracts within weeks and leaves a gap at the corners.
Pile or Brush Seals
Sliding and hung windows use a polypropylene pile, often with a centre fin, running in the track and along the meeting rail. Match both the pile height and the backing width, since a seal that is too tall binds the sash and one that is too short never touches it. Cut the ends square and fit the corners tightly. Where the pile sits in a slot, the replacement should slide in under light tension rather than being forced.
Engineer Sergey Essipov, with 20 years of experience in window manufacturing, explains:
On failed units we inspect, the gasket is almost never worn through. It has taken a permanent set from being held compressed for years, so it measures the right size but has lost two or three millimetres of recovery. That is enough to open a continuous leak path along an entire sash edge, and it is why a visual check alone is unreliable. Compress a short section with a fingertip and watch whether it comes back.
How to Check the New Seal
Close and lock the window, then repeat the paper test at several points along each edge. Resistance should be consistent; uneven results indicate the hardware or sash alignment may need attention.
When Should You Use Caulk to Stop a Window Draft?
Caulk belongs at joints that are not supposed to move, such as the junction between trim and wall or between frame and cladding. Applying it to a sash joint that has to open is the most damaging mistake in this category of repair. Use sealant only where the joint is intended to remain fixed.
Interior Caulking
Inside, target the joint between the casing and the wall finish, and the joint between the casing and the window frame. A flexible, paintable acrylic latex with silicone works well here. Cut the nozzle square, hold the gun close to perpendicular to the line of travel, and force the material into the crack rather than laying it on the surface. Where the gap exceeds roughly 6 mm, insert a foam backer rod first so the sealant bonds to two faces and can move. Our full window caulking guide covers joint preparation and product selection in more detail.
Exterior Perimeter Sealing
Outside, the bead between the frame or the brickmould and the cladding is exposed to ultraviolet radiation, thermal cycling, and driven rain, and it has a shorter service life than interior sealant. Remove the failed material completely instead of laying a new bead over it, since fresh sealant will not bond to a cured, dirty surface and will separate within a season. Silicone and polyurethane-based products are appropriate for this joint.
Where Caulk Should Not Go
Three places must stay open. Weep holes at the exterior sill drain water out of the glazing pocket and frame, and blocking them traps water inside the assembly. The drainage path along a slider sill serves the same function. Finally, keep the sash joint free of sealant on any window that has to open. You can sometimes seal a permanently closed window that isn't required for ventilation or emergency escape with a removable sealant, as long as the installation doesn't require the opening to remain operable.
Before applying exterior sealant, locate the drainage openings and keep them clear. Blocking the sill drainage path can trap water inside the frame and damage the assembly.
How Can You Tell Whether the Draft Is Coming From the Sash or Around the Window Frame?
These two pathways can feel similar at the ankles but require different fixes. The test that separates them is what happens at the moving-part boundary. Air that appears only along the edge of the operating window sash is a sealing or hardware issue, while air that appears at the casing or the wall joint is an installation issue.
| Indicator | Sash leakage | Perimeter leakage |
| Where air is detected | Along the edge of the moving sash, at the lock, or at the meeting rail | At the casing, at the wall joint, or from behind the trim |
| Effect of locking the window | Draft weakens or stops when locked firmly | No change, since the leak is outside the window unit |
| Common cause | Compression set, matted pile, worn hinge or roller, loose keeper | Unsealed rough opening, missing interior air seal, cracked exterior bead |
| Correct repair | Replace weatherstripping, adjust or replace hardware | Seal behind the trim, insulate the perimeter gap, restore the exterior bead |
| Typical materials | Gasket, pile seal, hinge or operator parts | Backer rod, low expansion foam, interior and exterior sealant |
When both conditions are present, correct the perimeter first because a larger rough-opening leak can mask the result of a weatherstripping repair.
Can Adjusting Window Locks and Hardware Fix Drafty Windows?
Hardware sets the seal's compression, so a seal in good condition can still leak if the mechanism holding it has drifted. This is one of the few draft repairs that costs nothing but time. Always try it before writing off a window as beyond repair.
Check Locking Pressure
On a casement or awning, the locking points draw the sash tight against the gasket. Many multi-point systems use adjustable keepers or cams that you can shift a millimetre or two toward the frame to increase compression. Adjust in small increments and test the paper resistance after each change, because excess pressure stiffens the handle and accelerates gasket wear.
Inspect Hinges and Rollers
A worn casement hinge lets the sash drop at the outer corner, which is why the leak often appears at the top of the lock side. Sliders depend on rollers running true in the track, and a seized roller both drags the sash and lifts it away from the pile seal. Clean the track, clear any debris from the drainage channel, and lubricate moving parts with a product suited to the material. Avoid oil on pile seals, since it collects grit.
When Hardware Needs Replacement
Replace a hinge with visible play, an operator gear that slips under load, or a lock that won't hold the sash closed without force. Hardware replacement is often less disruptive and less costly than full window replacement, particularly when compatible parts are still available.
How Do You Fix Air Leaks Between the Window Frame and the Wall?
When smoke movement points behind the casing, the leak is in the rough opening, and no work on the window will resolve it. This repair is more invasive than replacing a gasket, but it addresses a much larger leakage area. It is also the repair most often skipped during a rushed installation, which is why it shows up so frequently in homes where the windows themselves are relatively new.
Remove the Interior Trim
Score the paint line with a utility knife, then ease the casing away with a thin pry bar and a wide scrap of wood to protect the wall finish. Work slowly at the mitres. Federal air-sealing guidance recommends carefully removing trim and sealing behind it as a more effective alternative to surface caulking, and what is exposed is usually either an empty cavity or a loosely stuffed batt that never functioned as an air barrier.
Insulate the Perimeter Gap
Fill wider cavities with a foam backer rod, or use a low-expansion polyurethane foam formulated for windows and doors. The distinction matters: standard high-expansion foam generates enough pressure to bow a jamb inward, after which the sash no longer closes evenly against its seal and a draft problem becomes an operating problem. Apply foam in a single, moderate pass and let it cure before trimming flush.
Restore the Air Seal
Insulation alone does not stop air. Finish with a continuous bead of flexible sealant at the interior face, connecting the window frame to the wall air barrier, then reinstall the casing. Persistent moisture at this junction points to water entry rather than air movement, and our guidance on window leaks covers that diagnosis separately.
Which Temporary Fixes Can Stop Drafty Windows During Winter?
Seasonal measures have a legitimate place, particularly in rented homes or when a cold snap arrives before a repair can be scheduled. They all manage the symptom rather than restoring the seal. None of them repairs failed weatherstripping, a distorted frame, or an unsealed rough opening.
| Temporary measure | How it works | Best suited to | Main limitation |
| Removable rope caulk | Pressed by hand into the sash joint to block the leakage path | Windows that will not be opened until spring | Must be removed before operating the window, leaves residue on some finishes |
| Shrink applied insulation film | Creates a sealed still air layer on the room side of the glass | Older single glazed or early double glazed units | Blocks the window for the season, modest thermal gain |
| Thermal curtains or cellular blinds | Slow the convective current falling off cold glass | Rooms where the discomfort is felt as cold air at floor level | No effect on actual air leakage, can raise condensation risk on the glass |
| Draft stoppers at the sill | Intercept cold air spilling from the window onto the floor | Immediate comfort relief in occupied rooms | Purely a comfort measure, no reduction in heat loss |
Regional context shapes which of these is worth using. In a mild coastal market, where a window supplier in Victoria deals more with driven rain than deep cold, a film installed over an operable window can restrict its use and may affect moisture behaviour at the glass, so use it according to the product instructions and not on required escape windows. In a continental climate with long stretches below freezing, this film is one of the most effective seasonal options available.
Can a Window Feel Drafty Even When Outside Air Is Not Leaking In?
Yes, and this accounts for a significant share of complaints about drafty windows in homes where the sash and frame are airtight. The glass itself creates the sensation, not infiltration. Understanding the mechanism prevents unnecessary sealing work.
Cold Glass and Radiant Discomfort
A body near a cold surface loses heat to it by radiation. Sitting beside a window whose interior surface is near the freezing point feels cold even when the room air is at 21 degrees Celsius, because the exchange is with the glass rather than with the air. No air has to move for the effect to be noticeable.
This effect has a defined threshold in thermal comfort engineering: ASHRAE Standard 55 sets limits for radiant temperature asymmetry to control discomfort caused by uneven radiant conditions around occupants. A cold window surface can therefore create discomfort even when the indoor air temperature is otherwise comfortable. Above that gap, occupants near the glass report discomfort even when the air temperature and the seal itself are entirely normal, which is why some "draft" complaints resolve with better glazing rather than any sealing work.
Convection Near the Window
Indoor air that touches cold glass cools, becomes denser, and falls. That descending current spreads across the floor and is felt at the ankles, which is precisely how homeowners describe a draft. The tell is that the movement is downward along the glass rather than inward at the joint, and that it persists no matter how firmly the sash is locked.
IGU Seal Failure vs Air Leakage
A failed insulated glass unit loses its intended seal, allowing moisture to enter the cavity and reducing the effectiveness of the insulating gas fill. That lowers the interior glass temperature and can make the window feel colder. It does not create an open airflow path into the room, and it is not repaired with weatherstripping or caulk.
Independent measurement studies of aging IGUs show why this matters over time: as edge seals degrade, argon fill concentration has been measured dropping from roughly 93% to 46% in aged units, corresponding to a measurable rise in the unit's U-value and a real loss of insulating performance, even though the cavity stays fully sealed against outside air the whole time.
Engineer Sergey Essipov, with 20 years of experience in window manufacturing, notes:
An inexpensive infrared thermometer settles this argument in about a minute. Read the centre of the glass, then read the sash joint and the casing. If the low readings track the glass surface, the complaint is radiant and convective. If the cold spot follows the joint line or runs along the trim, there is a real leakage path, and the repair changes accordingly.
Does Condensation Mean You Have a Window Draft?
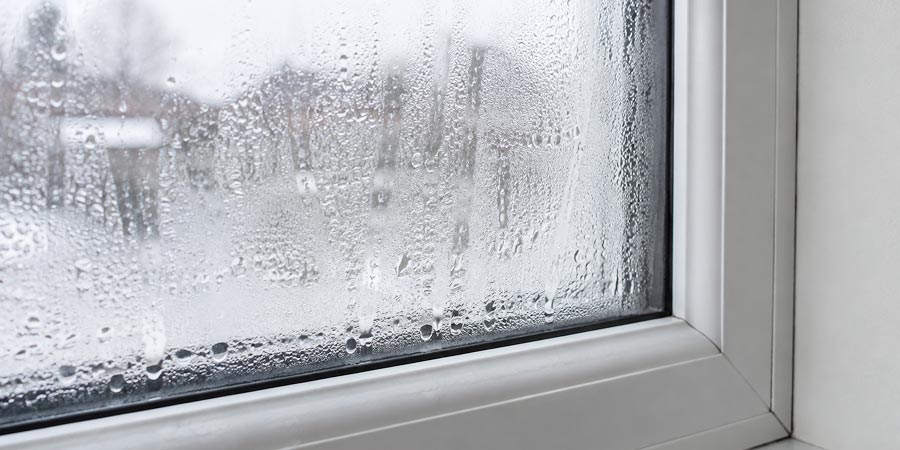
No. Condensation is primarily caused by indoor humidity meeting a surface that is cold enough for moisture to condense. It does not by itself prove that a window is leaking air. Applying sealant in response to condensation treats a problem that is not there.
Health Canada's indoor air quality guidance sets the target range for occupied buildings at 30 — 50% relative humidity, noting that the appropriate setpoint within that range depends on how much condensation the specific building envelope can tolerate, a useful benchmark when deciding how far to push humidity back up after an air-sealing project.
| Observation | Interior surface condensation | Fogging between the panes | Actual air leakage |
| Where it appears | Room side of the glass, usually at the lower edge | Sealed inside the glass unit | No moisture required; air movement is the symptom |
| Can it be wiped away | Yes | No | Not applicable |
| Underlying cause | Indoor humidity meeting a cold surface | Failed edge seal in the glass unit | Failed gasket, hardware, or perimeter seal |
| Correct response | Lower indoor humidity, improve air circulation across the glass | Replace the sealed unit; check warranty coverage first | Locate the path, then seal or adjust |
One practical caution applies after any successful air sealing project. Tightening the envelope raises indoor humidity because less moisture escapes through uncontrolled leakage, and condensation can appear on windows that were previously dry. That is a ventilation adjustment, not a sign that the repair failed.
Which Draft-Fixing Mistakes Can Make the Problem Worse?
Several common responses to a draft either fail outright or create a new defect. Most come from applying the right technique in the wrong place. The list below reflects the failures seen most often during service inspections.
- Caulking a moving sash joint, which either bonds the window shut or tears free within a season.
- Fitting a weatherstripping profile that does not match the channel, which prevents the sash from closing evenly and can push it out of square.
- Sealing weep holes or sill drainage, which traps water in the frame and glazing pocket and shortens the assembly's life.
- Applying new sealant over deteriorated, dirty material, since the bond fails at the old surface rather than at the substrate.
- Using high-expansion foam around a frame, which bows the jamb and converts a sealing problem into an operating problem.
- Over-tightening lock keepers to compensate for a worn gasket, which accelerates wear and strains the hardware.
- Sealing shut a bedroom window required as an emergency escape route. Federal retrofit guidance restricts caulking a window closed to units that need neither ventilation nor an escape route, and provincial building codes treat egress openings as a life-safety requirement.
How Much Can Sealing Drafty Windows Improve Home Comfort and Energy Efficiency?
Air leakage control is the retrofit measure with the best effort-to-result ratio, but the size of the result varies enormously between houses. Comfort improves first and most noticeably. Energy savings follow, and they are difficult to predict for an individual home.
Comfort Benefits
Eliminating an uncontrolled leakage path removes the cold spot, stabilizes the temperature near the window, and allows the room to hold an even temperature without raising the thermostat. In rooms with seating or a desk near the window, this is usually the first change occupants report.
Energy Benefits
Air leakage is a major contributor to heating load in older housing stock. A study of 73,450 Canadian dwellings conducted by researchers at the University of Alberta, published in Indoor and Built Environment, notes that air leakage can raise a home's heating and cooling costs by 30 percent or more, and found that airtightness degrades progressively with building age, at roughly 0.3 percent per year once a house has passed its initial settling period.
Why Savings Vary by House
The recoverable loss depends on how many leakage paths exist, how large the pressure differences across the envelope are, and how severe the climate is. A home served by a window manufacturer in Winnipeg faces far larger stack pressures on a January night than a comparable home on the South Coast, so identical sealing work yields different results. Treat any promise of a fixed percentage reduction on a specific bill with skepticism.
When Are Drafty Windows No Longer Worth Repairing?
Many drafty windows can be returned to service with seal replacement, hardware adjustment, or perimeter sealing when the frame and sash remain structurally sound. The threshold is crossed when the failures are structural, simultaneous, or recurring. A single failed bead of caulk or one worn gasket never justifies replacing a window.
When Repair Makes Sense
Repair holds up when the underlying structure is sound, and the problem is isolated. That's typically the case when:
- The frame and sash are square, sound, and free of distortion.
- The leak has been traced to a specific, single path.
- Hardware is available, and the mechanism is otherwise intact.
- The glass unit is clear, with no fogging or moisture between the panes.
- The window meets current needs for daylight, operation, and escape.
When Replacement Becomes the Better Option
Replacement becomes the more economical path once the problems compound or repeat. Watch for these signs:
- Drafts return after you correctly install weatherstripping and seal the perimeter.
- The frame is visibly warped, rotted, or separated at the corners.
- Hardware fails repeatedly or is no longer manufactured for the unit.
- Several failures coincide, such as a fogged glass unit alongside a sagging sash.
- Thermal performance is poor enough that the glass itself drives the discomfort.
At that point, the decision shifts from routine maintenance to the cost and scope of replacement. Well-built vinyl replacement windows address the seal, frame, and glass as one system, which repeated repairs on an aged unit cannot do. Window Force manufactures custom vinyl windows built to the exact dimensions of the opening they replace.
Regional exposure should also inform the specification. A window company in Moncton will weigh wind-driven rain and perimeter water management more heavily than a supplier writing a package for a dry continental interior, where the deciding factor is usually the sealed unit's U factor.
What Should You Remember About Stopping Window Drafts Without Replacement?
Work from cause to cure. Locate the leakage path with a smoke source on a cold day, then apply the matched remedy: weatherstripping at moving sash joints, sealant at fixed joints, adjustment or replacement of hardware where compression has been lost, and proper insulation plus an interior air seal at the rough opening. Reserve film and rope caulk for seasonal relief in rooms that need immediate comfort, and keep drainage openings and escape windows clear at all times.
Choose materials only after you've identified the leakage path. Matching the repair to the actual failure avoids unnecessary work and prevents a new seal from masking a larger installation problem. When drafts persist after the correct repairs have been carried out properly, the window is telling you something about its frame rather than its seals, and that is the point at which an assessment is worth arranging.
Have you reached the point where the repairs stop holding? Send the details through the request form on our website, and an authorized dealer will assess whether the frames can still be serviced or whether the leakage is structural, measure the openings, and confirm a configuration and glazing package suited to your climate zone, along with current production lead times. Window Force units are extruded from lead-free uPVC with UV stabilizers, fusion-welded at every corner, and built on a dual-seal, metal-free warm-edge spacer. Each unit is CSA certified and carries a 25-year transferable warranty, which matters most on the component that caused the problem in the first place: the seal.
Frequently Asked Questions
How do I know whether my draft needs weatherstripping or caulk?
Determine whether the joint moves. If air enters where the sash meets the frame, the joint opens and closes, and it needs weatherstripping. If air enters at the casing, the wall junction, or the exterior perimeter, the joint is fixed and needs sealant. Caulk applied to a moving joint will tear or bond the window shut.
Can I stop a draft without opening up the wall or removing the trim?
Often yes. Weatherstripping, hardware adjustments, and exterior perimeter sealing address most drafts without disturbing the interior finish. Trim removal becomes necessary only when smoke testing shows air arriving from behind the casing, which indicates the rough opening was never air sealed.
Is window insulation film worth using?
It provides a modest but real benefit on older glazing by creating a still air layer and interrupting the convective current off the glass. It is a seasonal comfort measure rather than a repair; it seals the window shut for the winter, and it should not be applied to a window required for emergency escape.
Why does my window feel cold even though I cannot find a leak?
The glass surface is likely the cause. A cold pane draws heat from occupants by radiation and chills the air beside it, which then falls to floor level. The sensation is indistinguishable from a draft. An infrared thermometer comparing the glass centre with the joint line will confirm which is happening.
Does fogging between the panes cause drafts?
No. Fogging means the edge seal of the insulated glass unit has failed and moisture has entered the cavity. Thermal performance drops and the glass runs colder, but no airflow path into the room is created. The remedy is replacing the sealed unit, and it is worth checking warranty coverage before authorizing any work.
How often should weatherstripping be replaced?
There is no fixed interval, since service life depends on the material, the exposure, and how often the window is operated. A practical approach is an annual check each autumn: inspect the gasket for recovery, check the corners for consistent contact, and verify that the lock draws the sash tight without excessive force.
Will sealing my windows cause humidity problems?
It can. If condensation appears after air sealing, manage indoor humidity through appropriate ventilation rather than reopening the leaks.
People Also Ask