


Polyurethane and silicone are the two sealants most often used around windows, and they are not interchangeable. Polyurethane bonds to most building materials, can be painted, and is meant for exterior joints. Silicone shrugs off sun and water, bonds best to glass, metal and other non-porous surfaces, and in most formulations will not take paint. The right choice depends on four questions: what the bead has to stick to, whether it will be painted, how much the joint moves, and whether the surface will be dry on the day you seal it.
The perimeter joint around a window is decided earlier than most homeowners think. When Window Force takes an order for custom vinyl windows, the frame depth, exterior colour, and trim detail are fixed before the unit is built, and those choices set the gap width and the materials on each side. We have specified windows that way since 2007 at our 80,000 sq ft Ontario plant, and our authorized dealers then seal the joint those choices create, so we see both the specification and the bead that has to live with it. This guide explains how to match the sealant to that joint.
Key Takeaways
- Polyurethane is the paintable exterior sealant for most building materials, including wood, brick, concrete and stucco. It cures slowly and needs a dry surface.
- Silicone is the better sealant for glass, metal and other non-porous surfaces that will stay unpainted. Most types cannot be painted, and paintable versions are less durable.
- Both can handle a joint up to 25 mm (1 in.) wide when a backer rod is installed. Joints of 6 mm (1/4 in.) and wider need a backer rod first.
- Typical full cure is about a week for polyurethane and up to two weeks for some professional silicones; "dry to the touch" is not the same as cured.
- Between a vinyl window frame and porous masonry or stucco, use polyurethane or a neutral-cure silicone that is specifically listed for masonry.
- New silicone will not bond to old silicone, and polyurethane will not bond to it either. Remove the old silicone down to a clean surface.
- Caulk seals fixed joints only. Keep the line where a sash opens, the weep holes, and the glass edge free of sealant.
What Is the Difference Between Polyurethane Caulk and Silicone?
Silicone sealants are built on a silicon-oxygen backbone, the same basic chemistry as glass and quartz. That is why cured silicone is so stable in ultraviolet light and weather, and also why paint has very little to grip on its surface. Polyurethane sealants are organic polymers that cure by reacting with moisture in the air. They bond aggressively to porous materials, resist abrasion and tearing better than silicone, and accept paint once cured, but they are more sensitive to water during application.
Natural Resources Canada summarizes both sealants in its guide to caulking and weatherstripping materials. The figures below come from that table. NRCan also warns that products of the same type vary widely between brands and recommends choosing the premium product when long-term durability matters.
| Property | Polyurethane caulk | Silicone sealant |
| Bonds to | Most surfaces; the type preferred by window and door installers | Non-porous surfaces such as glass, ceramic tile and some plastics |
| Surface limits | Exterior use only | Primer may be needed on wood, steel or anodized aluminum; avoid bare concrete, masonry and steel |
| Joint movement | Up to 50% | 12 to 50% |
| Maximum joint width | 25 mm (1 in.) with a backer rod | 25 mm (1 in.) with a backer rod |
| Paintable | Yes; limited colours | Most types are not paintable; paintable types are less durable |
| Durability | 25+ years | 20+ years |
| Application | Long cure; can be hard to smooth; ventilation while curing | Interior and exterior grades; ventilation during application |
| Over an old bead | Can be reapplied over itself | Cannot be used over existing silicone |
The table already answers the most common question. If the joint has to be painted, or one side is wood, brick, or concrete, polyurethane is the default. If the joint is glass or metal and will stay the colour of the bead, silicone is the default.
Windows Near Me
Which Window Joints Should Be Caulked at All?
A sealant closes a joint that is meant to stay still: frame to cladding on the outside, or interior casing to drywall on the inside. It does not replace flashing; it does not hold the glass in the sash, and it should never cross a moving joint.
On a casement window, the sash closes by pressing onto a compression gasket. That gasket seals the opening part of the window. Caulk run across it either glues the sash shut or tears the first time the handle is turned. The same rule applies to sliders, door sills and sweeps. If air is coming in where the sash meets the frame, the fix is weatherstripping or adjustment, not sealant. Our guide on how to stop window drafts covers how to tell the two apart.
For the fixed joints, our full window caulking guide walks through signs of failure, inspection intervals and when to call a professional. This article focuses on one decision inside that job: which chemistry goes into the joint.
Before you buy a cartridge, look at how the old bead failed. If it peeled cleanly off one side while staying in one piece, the bond to that surface failed, usually because of dust, moisture or the wrong sealant for the material. If it split down the middle with sealant still stuck to both sides, the sealant failed, usually because the joint moved more than the bead could stretch or the bead was too thin. A new cartridge has to fix that specific failure, not just cover it.
Many homeowners also run a bead into the corners of the frame, worried that the mitres will leak. On a vinyl frame, those corners are rarely the weak point. Window Force fusion-welds every frame and sash corner, melting the profile ends into a single joint at the plant, so there is no seam for sealant to close. Caulk smeared over a welded corner only collects dirt; the bead belongs where the frame meets the wall, which is the joint that actually moves.
When Should You Use Polyurethane Caulk?
Use polyurethane when the joint is outside, one or both sides are common building materials such as wood, brick, concrete, or stucco, and the bead will be painted or must stand up to wear. It is also the sealant NRCan notes as the one window and door installers prefer for exterior work.
On Exterior Trim That Will Be Painted
Painted wood trim is the clearest case for polyurethane. The bead must accept the same paint as the trim, and polyurethane does once it has fully cured. A manufacturer such as Sika, for example, recommends waiting 7 days under standard conditions before painting its polyurethane construction sealant. Painting earlier traps solvent and can crack the paint film.
Standard silicone sheds paint. Paintable silicones exist, but NRCan lists them as less durable than standard types, so a painted exterior joint still points back to polyurethane.
Interior trim is a different case. NRCan marks polyurethane as exterior use only and warns that exterior products may contain volatiles that are unsafe in a closed room. For interior casing that will be painted, acrylic latex caulk is the usual choice: it cleans up with water and handles the small movement of an indoor joint, about 7 to 10 percent.
Polyurethane Caulk for Concrete, Brick and Stone
Masonry is where polyurethane earns its place. NRCan's table tells you to avoid general-purpose silicone on bare concrete, masonry and steel, while polyurethane is listed for most surfaces. Its strong bond to porous materials and resistance to abrasion make it the safer default for a window frame in a brick or stone opening.
Heritage stone walls are a good example. Homeowners working with a window supplier in Quebec City often have vinyl frames going into stone openings that are far from square, in a climate with heavy snow and wide temperature swings. The joint moves, the stone is porous, and the old mortar sheds dust. Polyurethane on a clean, dry, primed-where-required surface, with a backer rod behind it, is the combination that holds there.
Polyurethane has two weaknesses on masonry. The first is water during application: one-component urethanes must go onto a dry substrate, since moisture that reaches the bead before it cures can cause bubbles. The second is dust: concrete and mortar dust act as a release layer, so the bead peels off cleanly. Brush the joint, let it dry fully, and seal on a dry day.
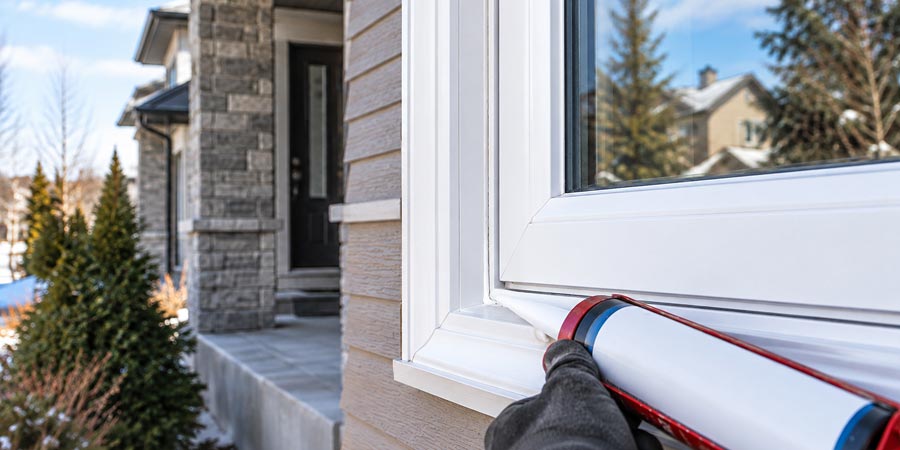
Brick openings are rarely uniform, which makes joint width a hidden risk. A gap that is 10 mm at the head can be 30 mm at the sill, beyond the 25 mm both sealants are rated for, even with a backer rod. Because Window Force builds every frame to the measured opening rather than pulling a stock size, the unit is sized so the perimeter gap stays within the range a sealant can actually bridge. The dealer can then seal a consistent joint instead of packing an oversized gap with caulk that will split in its first winter.
Engineer Sergey Essipov, with 20 years of experience in window manufacturing, explains:
Sealant failures that get blamed on the cartridge are very often gap problems. NRCan rates both polyurethane and silicone for a joint up to 25 mm with a backer rod, and an opening that measures 10 mm at the head and 30 mm at the sill is outside that range at one end whichever product you buy. At our facility, we build the frame to the confirmed opening and leave a defined installation clearance, so the gap the dealer seals is a number the installer can plan around. If you measure more than 25 mm anywhere along the joint, deal with the opening first and the caulk second.
When Is Silicone the Better Sealant?
Silicone is the better choice for non-porous surfaces that will stay unpainted and for joints that sit in hard sun or stay wet. NRCan lists interior and exterior grades, notes good durability of 20+ years, and points to fungicide versions for wet locations.
On Glass, Metal and Unpainted Vinyl
Glass, aluminum and other metals are the surfaces silicone is designed to grip. NRCan notes that steel or anodized aluminum may need a primer, so check the label before sealing metal flashing or drip edges. Our window caulking guide notes that 100% silicone also bonds reliably to vinyl, making it a common choice where a vinyl frame meets metal flashing or another non-porous surface and nobody will paint the joint.
Keep silicone away from the glazing itself. The glass in a modern window is sealed inside the unit, not by the perimeter bead.
Fog between the panes is the problem most often blamed on caulk, and caulk cannot fix it. That moisture got past the seal at the glass edge, inside the sealed unit, which no perimeter bead can reach. Window Force builds its glass units around a dual-seal, metal-free warm-edge spacer, with one seal that keeps moisture out of the cavity and a second that holds the unit together. If a unit does fog, it is a glass-unit issue with its own fix, covered in our guide on how to fix a foggy window; scraping and resealing the perimeter will not clear it.
In Sun and Large Temperature Swings
Silicone's chemistry makes it extremely stable in ultraviolet light, so an unpainted silicone bead on a south or west wall will usually stay flexible longer than an unpainted polyurethane bead. Good polyurethanes also weather well, and painting them protects the surface, but if a joint will be left bare in full sun, silicone is the more forgiving option. NRCan's general rule still applies: if the bead will be exposed to sunlight, choose a product the label approves for that.
Temperature swings turn into joint movement. Cladding and frame expand and contract at different rates, and the bead has to stretch with that difference every season. Regina sees winter lows below −30°C and long, sunny summers, so anyone choosing a window manufacturer in Regina should assume the perimeter joint will cycle through one of the widest temperature ranges in the country. For that kind of exposure, the minimum is a sealant rated for high movement (25% or more), with a backer rod and a two-sided bond.
Neutral-Cure Silicone on Masonry
NRCan's advice to avoid silicone on bare concrete and masonry reflects the chemistry of common household silicones. Many use an acetoxy cure that releases acetic acid, which can react with the calcium in concrete and weaken the bond, and they smell of vinegar while curing.
Neutral-cure silicones release alcohol or similar compounds instead, and professional weatherproofing grades are formulated for masonry. DOWSIL 791, for example, is listed for masonry and other porous and non-porous substrates with ±50% movement capability. The practical rule: use silicone on brick, stone or concrete only if the cartridge explicitly says neutral cure and lists masonry. A vinegar-smelling bathroom silicone does not belong there.
Which Sealant Works Between a Vinyl Window Frame and Brick, Siding or Stucco?
For most Canadian homes, the joint that matters is the one between a vinyl window frame and the exterior cladding. Vinyl itself bonds well to both silicone and polyurethane. The material on the other side of the joint, and whether you plan to paint the bead determine the cartridge.
| Joint | First choice | Also suitable | Avoid |
| Vinyl frame to brick, stone or concrete | Polyurethane | Neutral-cure silicone listed for masonry | Acetoxy (vinegar-smell) silicone |
| Vinyl frame to stucco | Polyurethane | Neutral-cure silicone listed for masonry | Acrylic latex on an exterior joint |
| Vinyl frame to painted wood trim | Polyurethane | Paintable hybrid sealant | Standard silicone |
| Vinyl frame to metal flashing or aluminum cladding | Silicone, with primer if the label requires it | Polyurethane | Sealant over the weep openings |
| Vinyl frame to vinyl siding J-channel | Silicone where a seal is needed | Polyurethane | Caulking the siding panels into the channel |
Vinyl siding needs its own note. Siding panels are designed to slide in their J-channels as they expand and contract, and siding manufacturers generally advise against caulking the panels in place. Seal the frame where the installation details call for it, and leave the siding free to move.
Coastal homes add moisture and salt to the list. For homeowners ordering replacement windows in Halifax, salt air, persistent humidity and freeze-thaw cycles mean the perimeter bead is often sealed on surfaces that are rarely fully dry. That makes surface preparation and a dry application window more important than the brand on the cartridge, and it favours silicone on metal and non-porous faces and polyurethane on masonry only after a proper dry spell.
Hybrid sealants, often labelled SMP or MS polymer, are a third option that sits between the two. Many are paintable, resist UV well and bond to a wide range of materials without isocyanates. They are not part of the NRCan table, so judge each one by its label: movement rating, listed substrates, cure time and whether it can be painted.
Engineer Sergey Essipov, with 20 years of experience in window manufacturing, explains:
A sealant only bonds to the outer surface of whatever it touches, so on an older vinyl frame the bead is often gripping a layer of chalked powder rather than the vinyl itself, and it peels within a season. At our facility, we compound our lead-free uPVC with UV stabilizers, so the frame face resists that surface breakdown and stays sound enough for a sealant to bond to years after installation. Before you reseal any older frame, wipe it with a clean cloth. If white powder comes off, clean down to firm vinyl first, whichever chemistry you choose.
Can Silicone Caulk Be Painted?
Standard silicone cannot be painted reliably. Paint does not bond to its low-energy surface, so it beads up, peels or cracks within months. Professional data sheets say this plainly: Dow notes that its 791 weatherproofing sealant is not intended to be painted because paints typically don't adhere to most silicone sealants.
Paintable silicone products do exist and are labelled as such, but NRCan lists them as less durable than standard silicone. If the joint has to match painted trim, choose polyurethane or a paintable hybrid sealant instead, and paint only after the full cure time on the label.
Colour is the usual reason this question comes up. Vinyl frames are finished at the factory and aren't meant to be painted along the perimeter, so a silicone bead in a colour that matches the frame is often simpler than trying to paint over a joint.
How Long Does Silicone Caulk Take to Dry Compared With Polyurethane?
Every sealant has two clocks. Tack-free time is when the surface skins over and stops being sticky. Full cure is when the bead has set all the way through and reached its rated strength and movement. A bead that feels dry can still be soft underneath, which is why tooling, painting or exposing it to water too early causes problems.
Professional data sheets give a sense of the difference. Dow's 791 silicone weatherproofing sealant lists a tack-free time of 40 minutes and a full cure of 7 to 14 days at 25°C and 50% relative humidity. Sika's polyurethane construction sealant lists a tack-free time of 3 to 6 hours, a cure rate of up to 1/8 in. (about 3 mm) per 24 hours, and a final cure of 4 to 7 days at 23°C and 50% relative humidity.
| Sealant | Tack-free time | Full cure | Paint after |
| Silicone (Dow 791, 25°C / 50% RH) | About 40 minutes | 7 to 14 days | Not paintable |
| Polyurethane (Sikaflex Construction, 23°C / 50% RH) | 3 to 6 hours | 4 to 7 days | 7 days |
| Interior sealants in general (NRCan) | Varies | Typically 2 to 3 days | Per label |
Both chemistries cure by reacting with moisture in the air, so cold, dry air slows them down, and deep beads take longer than shallow ones. A thick polyurethane bead curing at roughly 3 mm a day can take well over a week in cool autumn weather. Sika's product is applied between 4°C and 38°C; other products have their own range. Read the cartridge for the product in your hand, and do not apply any sealant to a frosty or wet surface.
Humidity and rain are different things. Moisture in the air helps the cure, but liquid water on a fresh bead washes out the surface and, for polyurethane, can cause bubbles. Plan exterior sealing for a dry stretch of at least a day, and keep sprinklers and hoses away from new joints.
Ventilation matters too. NRCan notes that all sealants need extra ventilation while they cure, and that products labelled for exterior use only may release volatiles that are unsafe in a closed room. Air out the house after interior caulking, and never use an exterior-only polyurethane on interior trim.
How to Apply Silicone or Polyurethane Caulk Around a Window
The trigger is the easy part. Most failed joints come down to preparation. Work in this order:
The backer rod is the step most often skipped. A bead that fills the whole joint bonds on three sides: the frame, the cladding, and the back of the gap. When the wall moves, a three-sided bead cannot stretch, so it tears. A two-sided bead, shaped like an hourglass over the rod, is the shape the movement ratings assume.
Foam is a different product. Low-expansion polyurethane foam fills the cavity between the frame and the rough opening; high-expansion foam can bow a vinyl frame. Foam cures hard, cannot be removed once cured, and must be protected from sunlight, so it should never be the visible exterior bead. Trim it flush, then seal the visible joint with caulk over a backer rod.
The bottom of the frame needs one more check before you seal it. A common resealing habit is to run one unbroken bead all the way around the window, including the sill. That closes the path the frame uses to shed water. Window Force designs its multi-chamber frames with weep openings at the sill so water that gets past the outer face can drain back outside; a bead across those openings traps water inside the frame, where it shows up later as a wet sill or ice in the track. Stop the bead short of the weeps, and clear any old sealant that has already closed them.
Can You Put Polyurethane Caulk Over Old Silicone?
No. NRCan notes that silicone cannot be applied over existing silicone, and polyurethane does not bond reliably to cured silicone either. Cured silicone leaves a slick, low-energy surface that almost nothing sticks to. A new bead laid over it looks fine for a few weeks, then peels away in a clean strip.
NRCan says you can apply polyurethane over sound, clean polyurethane, but you should still cut out a cracked or dusty bead rather than bury it. If you are switching chemistry in either direction, removal is the whole job.
To remove old silicone, cut out the bulk with a utility knife, then use a plastic scraper on the frame so you don't gouge the vinyl. Some cured sealants need a solvent or a commercial remover; follow the product directions and ventilate. Stop when the surface is dull and clean rather than shiny. A shiny film is the old silicone, and it is enough to spoil the new joint.
Which Sealant Should You Choose for Your Window?
Choose before you cut the nozzle, in this order:
- Will the joint be painted? If yes, use polyurethane or a paintable hybrid outside, and acrylic latex inside.
- What is on the other side of the frame? Glass and metal point to silicone. Brick, stone, concrete, stucco and wood point to polyurethane or a neutral-cure silicone listed for masonry.
- How wide is the joint? If it's over 6 mm, add a backer rod. Over 25 mm, the joint needs more than caulk.
- Will the surface be dry and within the temperature range on the label? If not, wait.
- Is every trace of the old sealant gone? If not, keep scraping.
The perimeter bead is part of the installation, and responsibility follows that line. Window Force manufactures each window and places it through an authorized dealer network, and the dealer who installs the unit selects and applies the perimeter sealant for the cladding on your wall. The 25-year transferable warranty covers manufacturing and material defects on the window itself and passes to the next owner if you sell, while installation labour, including the bead, stays with the installing dealer. Our windows are CSA certified. Window Force is also an ENERGY STAR Partner, and its windows are engineered to meet ENERGY STAR® requirements. A continuous, correctly chosen perimeter seal prevents that rated performance from leaking away around the frame. For a homeowner, that split means one party answers for the unit and one for the joint, and you know which to call.
Seeing peeling caulk, drafts or water at the sill around older windows? Send us a request through our website, and an authorized Window Force dealer will check whether the frame needs only a new perimeter seal or a replacement unit, measure the opening if replacement windows make sense, and give you a production timeline for windows built to that size.
Frequently Asked Questions
Does polyurethane caulk dry hard?
No. NRCan describes polyurethane caulk as flexible once cured, which is what lets it move with the joint. The product that cures hard is polyurethane foam, which fills the cavity around the frame, not the visible bead. If a polyurethane bead feels firm on the surface but soft underneath, it has not finished curing.
Is polyurethane caulk waterproof?
Cured polyurethane forms a flexible, watertight exterior seal. During application, though, it is sensitive to moisture: one-component urethanes need a dry surface, and water before cure can cause bubbles in the bead. Seal on a dry day and keep water off the joint until it has cured.
How long does silicone caulk last?
NRCan gives silicone sealant a durability of 20+ years and polyurethane 25+ years, with a warning that products of the same type vary widely by brand. Sun exposure, a joint without a backer rod, and a poorly prepared surface will shorten that life. Paintable silicones are listed as less durable than standard types.
When should you use latex caulk vs silicone?
Use acrylic latex for interior joints that will be painted and move very little, such as trim to drywall. NRCan rates it for about 7 to 10 percent movement and joints up to 10 mm. Use silicone for non-porous surfaces, wet areas and joints that will stay unpainted. For exterior window perimeters, silicone and polyurethane are the better choices.
What removes silicone caulk before resealing?
Cut out the bulk with a utility knife, then scrape the surface with a plastic scraper until it is dull rather than shiny. A commercial silicone remover can help remove the thin film that remains. New sealant will not bond to any silicone residue, so the surface must be completely clean before you apply the next bead.
What are the downsides of polyurethane sealant?
It is for exterior use only; it needs ventilation while curing; it takes several days to cure fully, and it can be harder to smooth than silicone. It needs a dry surface during application and comes in a limited range of colours. Its main advantages are that it bonds to most building materials and can be painted.
People Also Ask