

Installing a double hung window follows the same sequence as any other window: prepare the opening, set the unit, fasten it, then insulate and seal the perimeter. The difference is that both sashes slide in channels built into the side jambs, so a frame pushed a few millimetres out of straight shows up as a sash that drags, will not lock or refuses to tilt. This guide covers the two jobs homeowners and contractors actually face, retrofit into an existing frame and full-frame or new construction with a nailing fin, and explains how to check sash operation before the last screw goes in.
Since 2007, Window Force has manufactured custom vinyl windows for Canadian homes at its 80,000 sq ft Ontario plant. Through our authorized dealer network, we regularly hear about installation issues involving binding sashes and misaligned locks. These problems often trace back to incorrect shimming, overdriven fasteners or excessive foam pressure rather than a defect in the window itself.
Key Takeaways
- Decide first whether the job is a retrofit into a sound existing frame or a full-frame or new construction installation, because measuring, flashing and fastening differ between the two.
- Straight side jambs are essential for maintaining smooth sash movement and proper lock alignment.
- Accurate shimming and controlled fastening are essential to keeping the frame square and both sashes operating smoothly.
- Test both sashes for full travel and lock engagement after shimming and before final fastening. On models with tilt-in sashes, also check the tilt latches and confirm that both sashes return securely to their channels. Repeat the checks after the foam has cured.
- Use low-expansion window and door foam or backer rod with sealant, keep the sill drainage path open and connect the interior air seal to the wall's air barrier.
- In Canada, CSA A440.4 sets out installation requirements for windows, doors and skylights. Its application is established through the applicable building codes, including provincial and territorial requirements.
Before You Start: Measure, Check the Rough Opening and Confirm the Method
The first decision in any double hung window installation is what stays in the wall. A retrofit, or insert, installation keeps the existing frame and trim and sets the new unit inside it. A full-frame installation removes everything down to the rough opening, and in new construction the window goes into a framed opening wrapped in sheathing membrane. The trade-offs between the two approaches are covered in our comparison of brick-to-brick vs retrofit window installation, and the general sequence for any window style is in our guide on how to replace a window. For a double hung unit, the deciding question is simple: the new frame will copy any twist in the surface it is fastened to, so a retrofit only makes sense when the existing frame is sound, dry and close to square.
Measuring for a Double Hung Unit
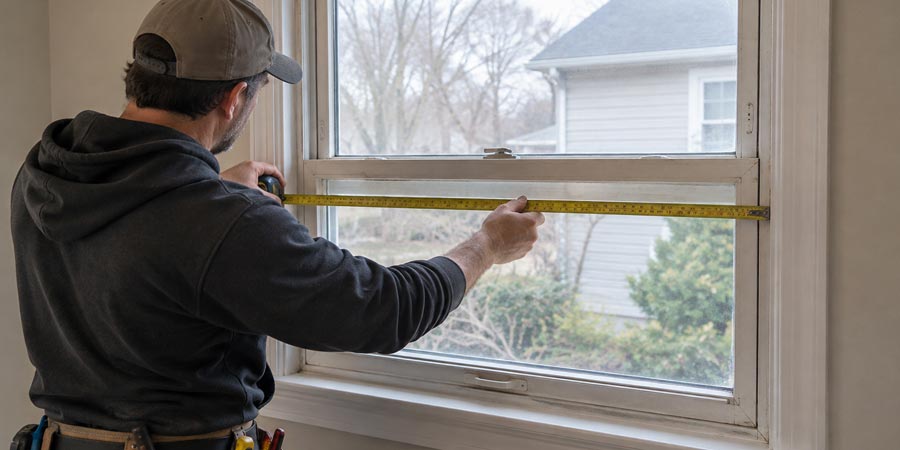
For a retrofit, measure the width between the existing jambs at the top, middle and bottom, and the height from head to sill at the left, centre and right. The smallest reading in each direction controls the order size, since the new frame has to clear the tightest point in the opening. Measure both diagonals as well. Many manufacturers' instructions ask for diagonals within about 3 mm (1/8 in.) of each other; a larger difference means the opening is racked, and the installer will either correct it or move to a full-frame installation. Housing stock changes what you find in the opening: a window company in St. Catharines may meet original wood double hung frames with steeply sloped sills and openings that have settled out of square, while houses in the newer subdivisions of Innisfil may more often have framed openings built to standard sizes. Where the sill slopes, record the angle and whether the new unit needs a sill angle adapter or extension.
For full-frame and new construction work, measurements come from the framing itself. Our article on the window rough opening explains how openings are sized and how much clearance the frame needs for shims and insulation. Because custom vinyl windows are built to order, the figures used for the order become the production dimensions, which is why a professional site measure is the cheapest insurance on the whole project.
Inspecting the Opening
A quick inspection before ordering tells you whether the planned method will hold up. The points worth checking are:
- Sill and lower jamb corners: soft wood, dark staining or peeling paint suggest past water entry
- Plumb, level and square: check jambs and sill with a 1.2 m (4 ft) level and measure the diagonals
- Interior finishes below the window: water stains or swollen trim point to a leak path the new window will not fix on its own
- Header or lintel: cracked masonry or a sagging head will load the top of the new frame
- Air barrier: in full-frame work, note whether there is a polyethylene or membrane air barrier you can seal to
If the sill is soft or the opening is badly racked, a full-frame installation is the safer choice even if the trim looks fine.
Windows Near Me
Tools and Materials
Most of the kit is standard carpentry equipment, but a few items are chosen specifically because a double hung frame is sensitive to how it is supported and sealed.
| Item | Purpose | Double hung note |
| 1.2 m (4 ft) level and long straightedge | Checking plumb, level and jamb straightness | A straightedge laid along each jamb shows bow that a short level misses |
| Tape measure and framing square | Opening size and diagonals | Record three widths, three heights and both diagonals |
| Composite or tapered wood shims | Supporting the frame at fastening points | Composite shims do not compress or rot over time |
| Corrosion-resistant screws, roofing nails for fins | Anchoring the frame | Length and spacing as specified in the installation instructions |
| Self-adhered flashing membrane or preformed sill pan | Water management at the sill | End dams should run up the jambs |
| Low-expansion window and door foam | Insulating and air sealing the gap | Choose a low-pressure, window-and-door foam product that complies with the applicable CAN/ULC-S710.1 requirements. |
| Closed-cell backer rod and exterior sealant | Controlled sealant joints | Rod slightly larger than the gap so it stays put |
| Drill or driver with an adjustable clutch | Fastening | A low clutch setting prevents screws from pulling vinyl jambs out of line |
| Pry bar, utility knife, oscillating tool | Removing stops, sashes and old frames | Work carefully if interior stops will be reused |
The installation instructions supplied with the window take priority over any general guide, including this one, because they reflect how that specific frame was designed and tested.
Retrofit Double Hung Installation, Step by Step
Retrofit installation is generally faster than full-frame replacement because the existing interior finishes and exterior cladding remain in place. The steps below assume the existing frame has passed the inspection described above.
Custom-built windows can reduce the amount of adjustment needed during installation because their dimensions are based on the measured opening. Window Force manufactures double hung units to order with fusion-welded corners, helping installers maintain a more consistent perimeter gap and provide proper support at each fastening point.
Engineer Sergey Essipov, with 20 years of experience in window manufacturing, notes:
Most double hung service calls we trace back start at the jamb, not in the product. At our facility, every frame and sash corner is fusion-welded, so the unit leaves the line square, with matching diagonals. What changes that on site is a shim pushed in until it feels tight or a jamb screw driven until the head disappears. On a double hung, the sash rides in that channel, so it starts dragging at exactly the height of that shim.
New Construction Double Hung Installation With a Nailing Fin, Step by Step
In new houses, additions and full-frame replacements involving wood-frame walls, windows with an integral nailing fin are attached through the fin to the wall framing or sheathing, following the manufacturer's instructions. The surrounding flashing is then integrated with the sheathing membrane to direct water away from the opening. The share of fin-mounted work varies by market: a window manufacturer in Edmonton may see more nailing-fin units going into new subdivisions, while projects in Halifax may lean more toward full-frame replacement in older wood-frame houses, where the flashing has to be rebuilt around an existing opening. In both cases, the order of the layers matters more than any single product, because each layer has to shed water over the one below it.
Squaring, Shimming and the Jamb-Bowing Mistake
Double hung windows depend on consistent jamb geometry because both sashes move within channels that house their balance systems. If the frame becomes distorted during installation, the channels can narrow or widen, affecting sash movement, weatherstripping contact and lock alignment.
When a jamb bows inward, the channel narrows at that height and the sash drags or sticks there. When it bows outward, the sash develops side play, the weatherstripping loses contact, and the tilt latches may not hold the sash securely in the channel. A frame that is level but racked causes a different problem: the meeting rails no longer line up, so the sash lock needs force to engage.
How to Check Sash Operation Before Final Fastening
The check takes a few minutes and should be done after shimming and partial fastening, before the remaining screws, foam and trim go in:
- Measure the frame width at the top, middle and bottom; the readings should match, and any difference marks the height where a sash will pinch or gap.
- Measure both diagonals again.
- Raise and lower each sash through its full travel. Movement should be smooth and consistent, without sticking, unusual resistance or sudden changes in speed.
- Close and lock the window; the meeting rails should line up and the lock should engage without lifting or pushing either sash.
- On models with tilt-in sashes, tilt each sash inward and return it to its operating position. Confirm that both tilt latches engage securely.
- Look at the reveal between sash and frame along both jambs; it should be even.
Engineer Sergey Essipov, with 20 years of experience in window manufacturing, explains:
A vinyl jamb can deform between fastening points if a screw is tightened across an unsupported gap. This is why proper support behind every fastener matters. Even a small distortion can affect how the balance channels operate and cause resistance during sash movement. Correct any alignment issues before applying foam or installing the remaining fasteners.
Repeat the same test once the foam has cured and before the interior trim covers the gap, since expanding foam is the last thing that can move the jamb.
| Symptom after installation | Likely cause | Correction |
| Sash drags or sticks at one height | Jamb bowed inward by a tight shim, overdriven screw or foam pressure | Back off the screw, thin the shim, or cut out the foam and refill with a low-expansion product |
| Sash will not stay open or drifts down | Jamb bowed outward, or balance shoe not seated | Re-shim to straighten the jamb and reseat the balance |
| Lock is hard to engage | Frame racked or sill not level, so meeting rails do not align | Re-level the sill shims and correct the diagonals |
| Sash will not tilt in, or a latch does not catch | Channel width changed at latch height | Straighten the jamb at the top of the sash travel |
| Draft along the side or at the meeting rail | Uneven weatherstrip compression from a racked frame | Re-square the frame and check the reveal |
| Upper sash binds at the head | Shims or fasteners loading the head from the header | Remove head shims and leave the deflection space open |
A homeowner judges a new double hung window in its first winter by two things: whether the sashes move freely and whether the glass stays clear at the edges. The second depends partly on what happens to the sealed glass unit while the frame is being adjusted, since a racked sash puts uneven stress on the glass edge. Window Force builds its glass units with a dual-seal, metal-free warm-edge spacer: an inner seal holds the gas fill and keeps moisture out, while an outer structural seal carries the mechanical load, so handling and on-site adjustment do not fall on a single bead. The metal-free spacer also keeps the bottom edge of the glass warmer than an aluminum spacer would, which is where condensation shows first on a cold morning.
Insulating and Sealing for Canadian Winters
The perimeter joint does two jobs: it stops air at the interior and manages water at the exterior. Canadian conditions test both. Cold prairie winters put a large temperature difference across the joint for months, coastal climates bring long periods of wind-driven rain, and much of central and eastern Canada sees repeated freeze-thaw cycles that work on every sealant joint. In Calgary, chinook winds can swing temperatures sharply within a day, which is one reason a window supplier in Alberta pays close attention to sealant movement capacity.
Low-Expansion Foam or Backer Rod and Sealant
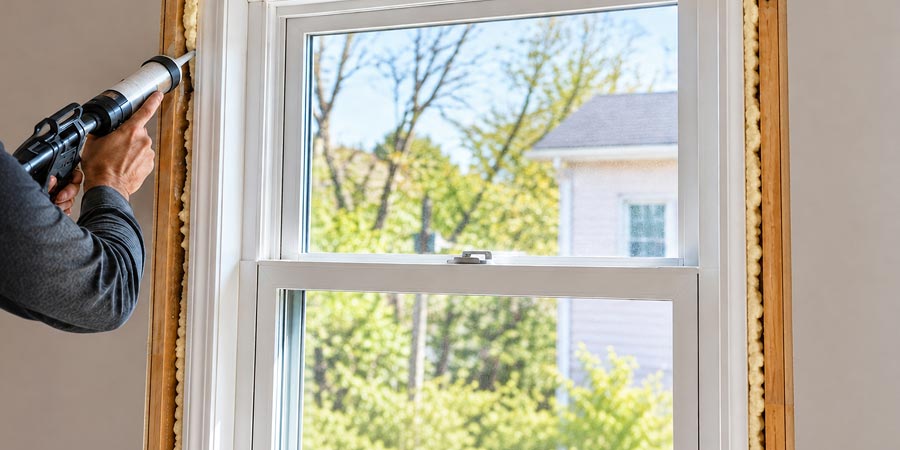
Use a one-component polyurethane foam labelled for windows and doors with a low pressure build; in Canada these foams are evaluated to CAN/ULC-S710.1. A general-purpose gap filler can develop enough pressure as it cures to push the jambs inward, recreating the bowing problem after the sashes have already been checked. Apply the foam in shallow passes, leave room for it to expand, and do not fill the sill drainage path. Where the gap is narrow, or where the window instructions call for it, closed-cell backer rod and sealant is the alternative. The rod sets the depth of the sealant joint so the bead bonds to the two sides only, which lets it stretch and compress with seasonal movement instead of tearing.
Where the Air Seal Belongs
Research from the National Research Council of Canada shows why the interior seal matters as much as the exterior one. In Construction Technology Update No. 80, NRC researchers reported on watertightness tests of more than 25 wall-window assemblies under loads representing severe wind-driven rain events. Sealant behind the window flange kept water out of a new, defect-free installation, but once a defect was introduced, the combination of a sealed flange and a leaky interior air barrier increased water entry at the sill and reduced drainage from it. The recommended detail moves the plane of airtightness to the interior, using a backer rod with foam or sealant between the frame and the rough opening, and leaves a gap behind the bottom flange so the sill can drain. With a sloped sill, back dam, properly lapped sill membranes and insulation kept to the interior side of the drainage path, the authors concluded that these details can manage even the most significant rainfall events in North America.
In practice, the interior foam or sealant should connect to the wall's air and vapour barrier, and the drainage path at the sill should stay clear of foam.
Choosing the Exterior Sealant
The exterior bead is the first line against weather, not the only one, and the product needs to bond to vinyl, tolerate UV and move with the frame through the seasons. The differences between the two most common options are covered in our comparison of polyurethane caulk vs silicone. For late-season installations, check the minimum application temperature on the cartridge, since many sealants will not cure properly on a cold, damp frame.
Before applying exterior sealant, check that the vinyl surface is clean and free of chalking or other contaminants. A stable bonding surface is essential for a durable joint. Window Force frames are lead-free uPVC with UV stabilizers in multi-chamber profiles, which helps maintain the frame's exterior surface under prolonged sun exposure.
Codes and Standards Across Canada
Window installation in Canada is governed by a national model code, provincial adaptations of it and a dedicated installation standard. Knowing which document controls what makes it easier to judge a contractor's quote and to plan any permit.
| Document | What it covers | How it applies |
| CSA A440.4, Window, door and skylight installation | Rough opening preparation, flashing, shimming, fastening and sealing | Referenced by applicable building code provisions for residential window, door and skylight installation |
| National Building Code of Canada | Minimum requirements for houses, including bedroom egress and energy provisions | National model code published by the NRC and adopted or adapted by individual provinces and territories |
| Provincial codes, for example the Ontario Building Code 2024 and the Quebec construction code | Legally enforced requirements in each province | The version that applies where the house is located |
| NAFS with CSA A440S1 | Product ratings for air, water and structural performance | Shown on the product label |
| ENERGY STAR Canada | Thermal performance criteria, a single national standard since January 2020 | Guides product selection, not installation |
One code point is particularly important when installing double hung windows in bedrooms. Because only one sash can be opened at a time, the available clear opening is smaller than the overall frame dimensions. Its actual area depends on the sash configuration and opening dimensions. For example, the 2024 Ontario Building Code requires a bedroom egress window to provide an unobstructed opening of at least 0.35 m², with no dimension less than 380 mm. Other provinces and territories have their own requirements, so verify the applicable local code before ordering. Replacing a bedroom casement with a double hung unit of the same frame size may not provide sufficient clearance. Code adoption differs between provinces. Projects in Quebec must comply with the Quebec Construction Code, while those in Regina follow Saskatchewan's adopted building code. Local egress requirements and permit rules should be confirmed before work begins, particularly when an opening is enlarged or a structural header is modified.
DIY or Hire a Pro
A single ground-floor retrofit in a sound wood frame is within reach of a careful homeowner with the right tools and the patience to run the sash checks properly. The picture changes with second-storey openings, masonry walls, full-frame work that involves flashing integration, bedroom windows that need to meet egress dimensions, or a whole-house order where one mistake is repeated across every opening.
Labour is a substantial part of the total window replacement cost, and DIY removes it, but most manufacturer warranties exclude damage caused by installation errors. A water leak traced to a missing sill pan, or a sash that binds because of a bowed jamb, becomes the homeowner's expense rather than a warranty claim. Our guide on how to choose the best window installer covers the credentials and questions that separate a qualified crew from a general handyman.
The strongest argument for professional installation is a clear chain of accountability. Window Force manufactures each unit and supplies it through an authorized dealer network whose crews install to the instructions shipped with the order. Accountability is split by design: Window Force warrants the window, and the installing dealer is responsible for installation workmanship and labour, so ask for the dealer's labour warranty in writing. Window Force windows are CSA certified, and Window Force is an ENERGY STAR Partner whose windows are engineered to meet ENERGY STAR requirements. The ratings on the label reflect what a correctly installed window delivers. The 25-year transferable warranty on the frame, sash and hardware stays with the house if it is sold, and a separate 10-year non-prorated warranty covers sealed glass units, a practical advantage if you sell before the windows reach mid-life. Homeowners in the province can arrange supply and window installation in Ontario through Window Force and its dealers, while projects elsewhere in Canada are handled through the same dealer and contractor network.
Conclusion
Installing a double hung window well comes down to keeping the jambs straight. Choose the right method for the condition of the opening, flash and seal so water can drain and air stops at the interior, and use shims, screws and foam that support the frame without pushing it out of line.
Testing both sashes before final fastening and again after the foam cures helps catch alignment problems before the installation is complete. This simple check can prevent sticking, lock misalignment and air leakage.
Still deciding between window styles, or planning for what comes after the install? Our side-by-side comparison of single and double hung windows and our guide to the pros and cons of double hung windows cover the trade-offs, and our guide to repairing double hung windows explains what to do if a sash or balance misbehaves later.
Ready to replace your double hung windows? Request a site assessment through our quote form and a Window Force representative or authorized dealer will measure each opening, confirm whether retrofit or full-frame installation suits its condition, recommend the glass and configuration for your climate and bedroom egress needs, and give you the production lead time before you commit.
Frequently Asked Questions
Can I install a double hung window myself?
Yes, if it is a retrofit into a sound, square frame on the ground floor and you follow the manufacturer's instructions closely. Full-frame work, upper-storey openings, masonry walls and bedroom windows that must meet egress requirements are better left to a qualified installer, partly because installation errors are typically excluded from manufacturer warranties.
Should I use spray foam around a double hung window?
Use only low-expansion foam made for windows and doors, with a low pressure build, and apply it in shallow passes. High-expansion gap filler can push the side jambs inward as it cures and make the sashes drag. Keep foam out of the sill drainage path, and use a backer rod with sealant where the gap is narrow.
Why does my new double hung window stick after installation?
A distorted jamb is a common cause. Check the frame width and alignment at the point where the sash binds, then adjust the supporting shims or fasteners as needed. If foam has caused the distortion, remove the affected section and reseal it with a suitable low-expansion product.
Does a double hung window meet bedroom egress requirements?
It depends on the window's actual clear opening dimensions and the applicable provincial or territorial building code. For example, the 2024 Ontario Building Code requires an unobstructed opening of at least 0.35 m², with no dimension less than 380 mm. Because only one sash opens at a time, some double hung configurations may not provide enough clearance. Check the dimensions before ordering.
Which standard covers window installation in Canada?
CSA A440.4 sets out installation practice for windows, doors and skylights, and its application is established through the building codes adopted where the house is located. Provinces enforce their own codes based on the national model, such as the Ontario Building Code 2024, so the local version applies.
People Also Ask